DCHost service lists, domain tasks and new order screens
Use your project's service list to find an existing service and the order catalogue to buy a new one. Domain registrations also have their own Domains & DNS section. This guide shows the entry points and the fields to review before ordering.
Before you start: Sign in to the customer portal and check that you are using the correct account. Screenshot prices and options are from the capture date; use your current order summary and agreement for the applicable terms.
1. Find services in your project
On the dashboard, find the relevant project under Your Projects and select Manage Project. Choose the service category in the project menu:
| Service | Project category | List link |
|---|---|---|
| Hosting and websites | Websites | List Websites |
| VPS / virtual servers | VPS | The project's VPS view |
| LXC containers | Container | List Containers |
| Physical servers | Bare Metal | List Bare Metals |
The example shows the Container list in the Default project.
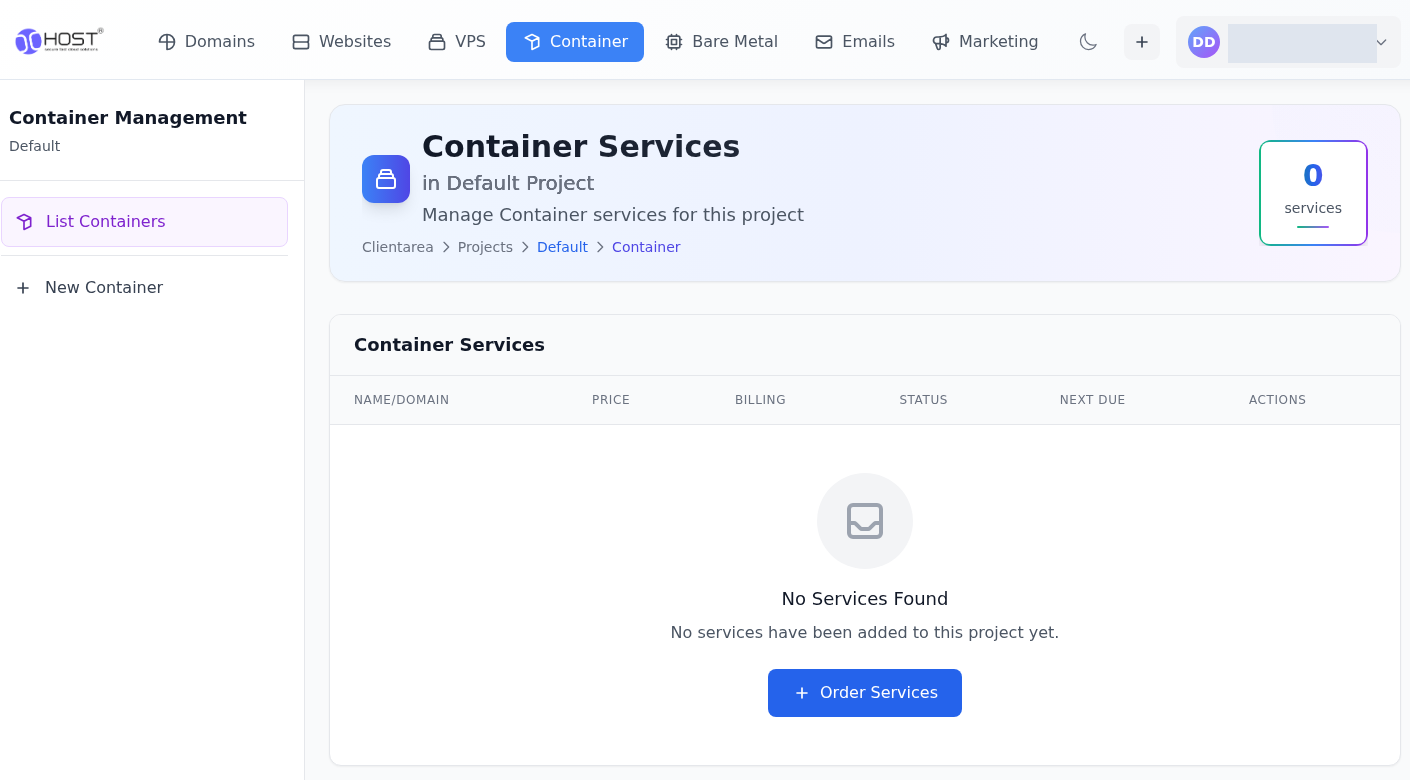
Step 1: Choose the service type
- Choose the service type
In the project menu, use Websites for hosting, Container for containers or Bare Metal for physical servers.
- Read the project and record count
Check the project name in the heading and the category service count on the right.
- Check the account and project if the list is empty
If you see No Services Found, check the account, project and category. If a paid order is missing, contact support before placing another order.
- Open the catalogue for a new purchase
For a new purchase, Order Services opens the catalogue. Check that the next screen names the service type you intend to buy.
This empty list applies only to the selected project and category. It does not mean the account has no services or orders anywhere.
The table includes Name/Domain, Price, Billing, Status, Next Due and Actions. Check the project name and service status first.
The demo project's Websites, Container and Bare Metal lists were inspected; all three showed 0 services / No Services Found. That result applies only to the selected project and category. An empty list does not mean every account order is missing or that payment failed. If you expect a record, check the other project, customer email and order status.
2. Open domains and registration
Choose Domains & DNS from the main portal menu. Use All, Active, Pending and Cancelled to filter domain status. Select All to include every status.
Quick Actions on Domains & DNS contains domain task entry points.
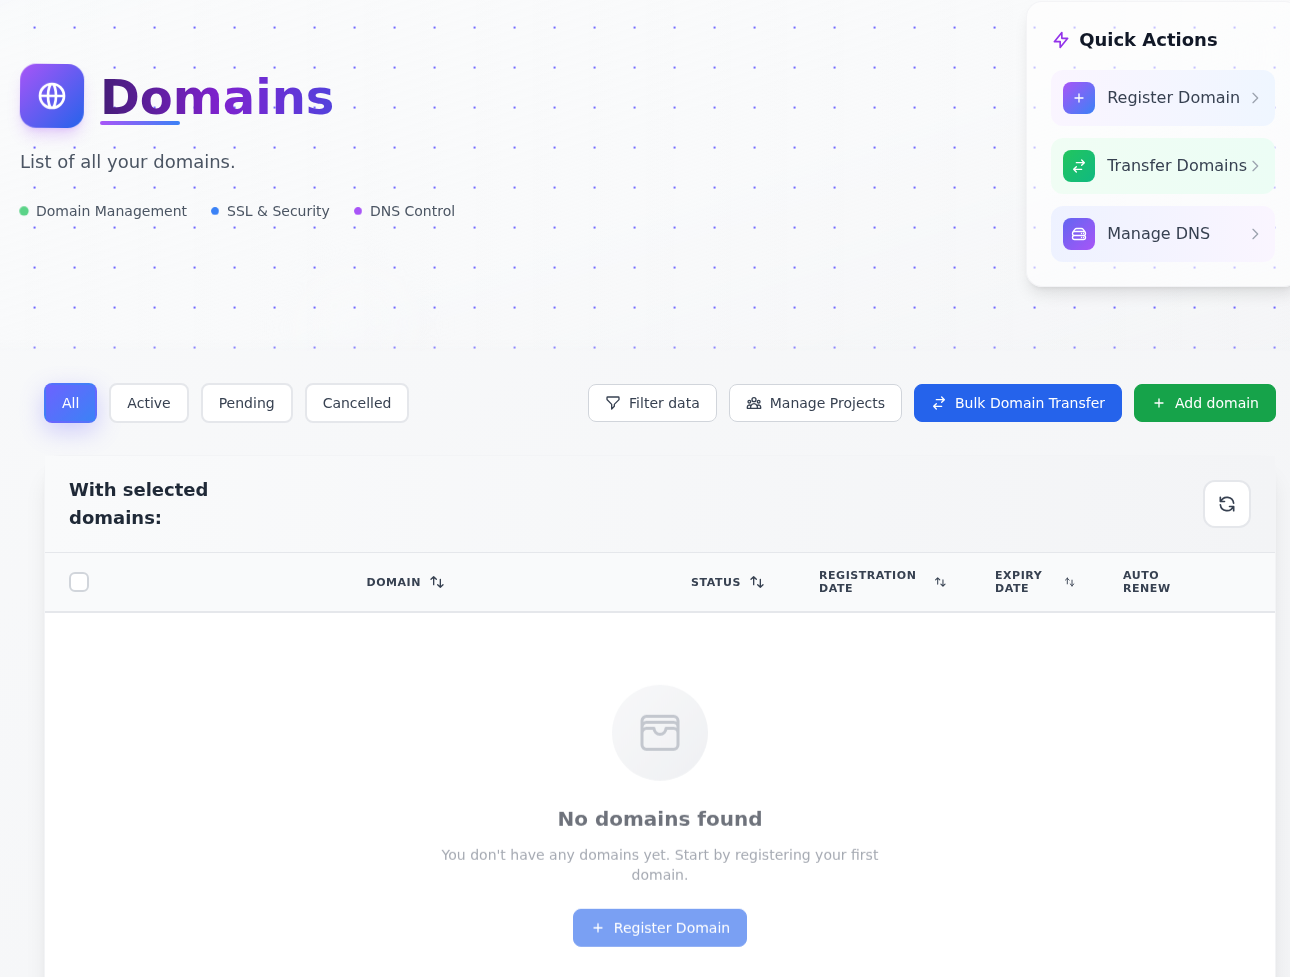
Step 1: Open Register Domain for a new domain
- Open Register Domain for a new domain
Register Domain in Quick Actions or Add domain above the list opens domain search.
- Start with All to include every status
Use All, Active, Pending and Cancelled. If an expected domain is missing, check All first.
- Read the list result
No domains found means this list has no domain records. If you have registered a domain, check that you are using the correct customer account.
The demo account has an empty domain list. Opening registration does not by itself purchase a domain.
The table includes Domain, Status, Registration Date, Expiry Date and Auto Renew. A column heading alone does not confirm that a domain was renewed or has automatic renewal enabled; check the actual record value.
For a new domain, select Register Domain or Add domain. The search page includes Search, bulk search and transfer options. Compare registration, transfer and renewal prices separately. Opening domain search does not by itself purchase a domain.
3. Prepare a domain transfer list
Quick Actions → Transfer Domains or Bulk Domain Transfer opens the transfer form. Read the domain transfer checklist first and obtain the transfer code from the current registrar.
Transfer Domains opens the Bulk Domain Transfer dialog.
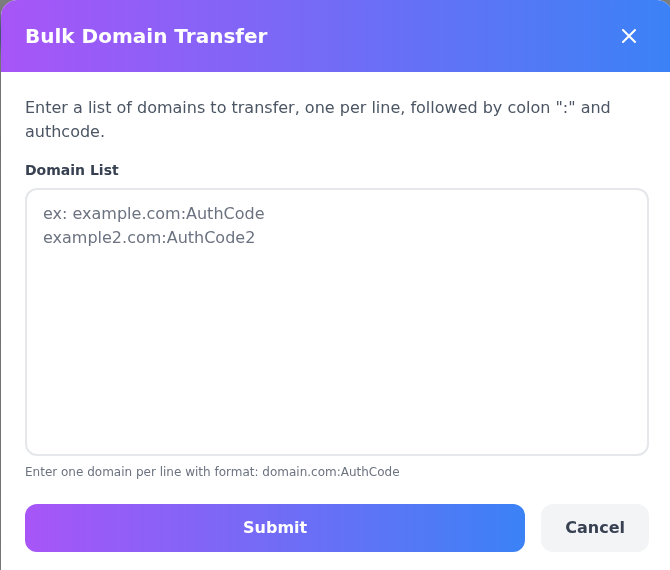
Step 1: Use one line per domain
- Use one line per domain
Use one domain.com:AuthCode entry per line in Domain List. After the colon, enter the transfer code from the current registrar.
- Use Submit when the transfer details are ready
Review the domain, transfer eligibility and code. Use Submit when ready for your actual transfer, then review the terms and amount on the next screen.
- Choose Cancel to leave without submitting
Use Cancel to close the dialog if you do not want to proceed.
AuthCode in the screenshot is an example format. No actual transfer code was entered and no transfer was submitted.
Enter one domain and code per line in Domain List, using domain.com:AuthCode. The value after the colon is your actual transfer code; do not copy the example AuthCode text. Use Submit when ready for a real transfer and read the conditions shown afterwards. Use Cancel to leave without submitting.
No transfer code was entered and no transfer was submitted for this capture. Keep transfer codes out of public screenshots.
If Manage DNS shows an error
In the demo account, Manage DNS displayed “The DNS service list could not be verified. Please open your services page.” This does not mean DNS records were opened or changed. Close it with OK, then check the DNS service in the correct account and project. Contact support with the message if it persists.
Use the DNS records guide for record types and the nameserver change guide when changing DNS providers.
4. Start a hosting order
In the project's Websites section, use New Website / Create a New Website, or open the hosting catalogue. The order menu labels it Create Websites.
Create Websites opens at Choose Plan.
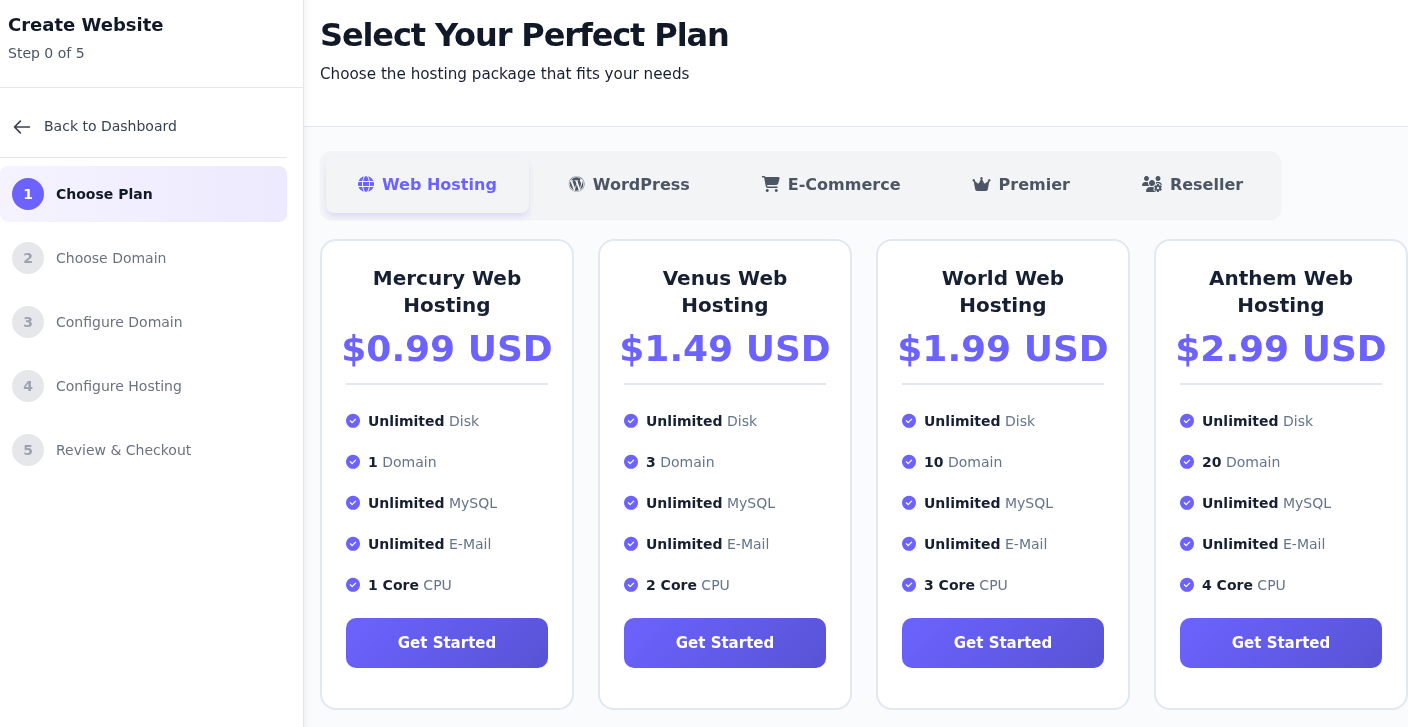
Step 1: Choose a hosting category first
- Choose a hosting category first
Open Web Hosting, WordPress, E-Commerce, Premier or Reseller and compare plans in the appropriate category.
- Compare resources and website count
Read Domain, CPU and other resource rows on the cards. Compare the number of sites you need as well as the price.
- Use Get Started on the selected plan
Continue with Get Started on the plan you want. The left-hand steps include domain choice, hosting configuration and final review.
Prices and plan details are from the capture date. Check the current amount, billing period and terms in the order summary; no plan was selected during this capture.
Choose Web Hosting, WordPress, E-Commerce, Premier or Reseller first. Compare site counts, CPU and other resources, then use Get Started on the plan you want.
The left-hand flow shows Choose Plan → Choose Domain → Configure Domain → Configure Hosting → Review & Checkout. Domain registration and hosting can be separate services; check whether you intend to use an existing domain or register a new one. For a ready hosting account, see control panel access and first steps.
5. Prepare an LXC container order
Open the container catalogue, labelled Create CT in the order menu. Under Choose Your Plan, compare CPU, RAM, storage, traffic, IP, location and billing period. A plan may already appear selected when the page opens; check that it suits your needs.
Template and Hostname follow the plan choices on Create CT.
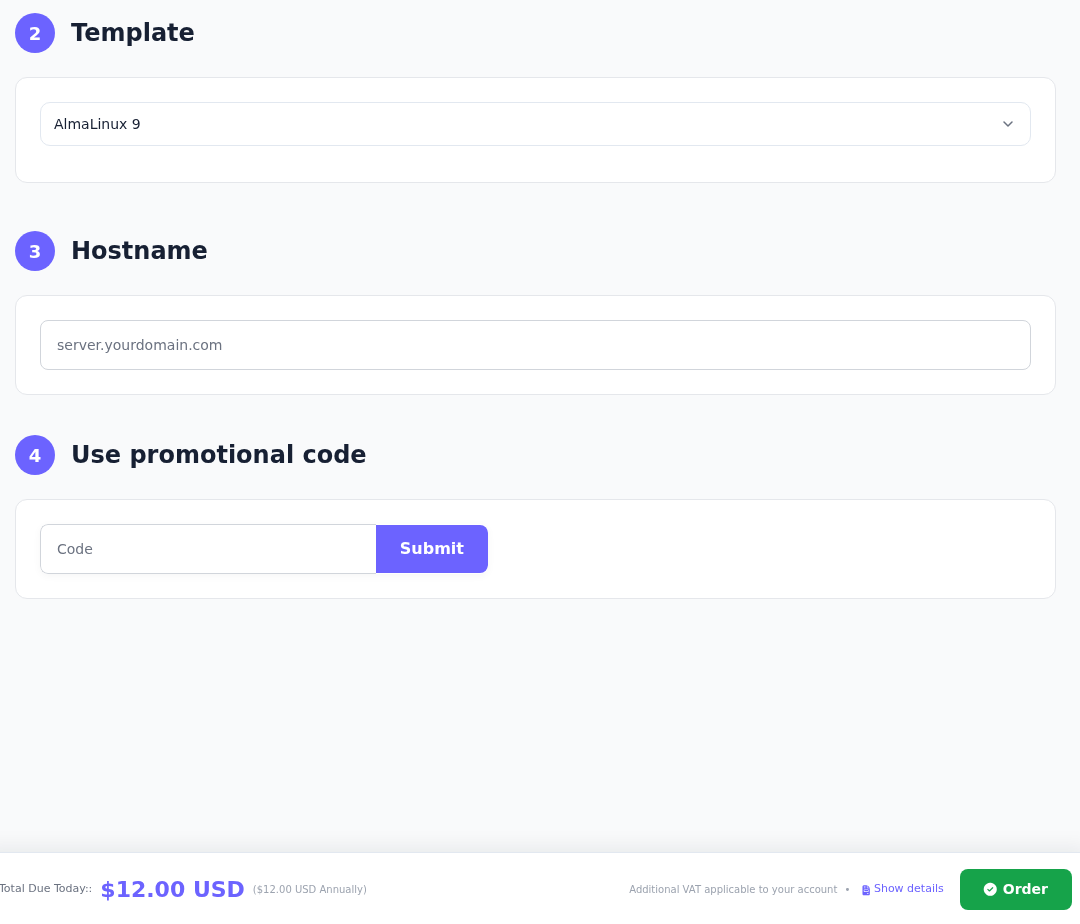
Step 1: Choose a suitable operating system template
- Choose a suitable operating system template
Choose a supported template suitable for your application in Template. The displayed default is not necessarily the right choice for every workload.
- Enter the container hostname
Enter the intended server name in Hostname. server.yourdomain.com is a grey placeholder; replace it with your own name.
- Apply a promotional code if you have one
Enter a valid code in Use promotional code and use the adjacent Submit button. This button belongs to the promotional code field.
- Review the amount before continuing with Order
Read Total Due Today, the billing period and applicable tax information. Use Order when ready to proceed with an actual order.
This is a new-container order form, not management of a running container. No hostname was entered and neither Order nor the promotional Submit was used.
- Template: Choose a supported operating system template suitable for your application.
- Hostname: Enter the container's server name. The grey
server.yourdomain.comtext is a placeholder. - Use promotional code: If you have a valid code, apply it using the adjacent Submit. This button belongs to the promotional code field.
- Total Due Today: Check the amount, billing period and tax information. Use Order when ready to proceed with an actual purchase.
This is a new order form. It does not show the console, restart controls or resource management of a running container. No container order was submitted for this guide.
6. Prepare a physical server order
Open the dedicated server catalogue, labelled Order Bare Metal. Review the plans and stock status near the top. Configuration fields appear below them.
System and disk options appear below the plans in Order Bare Metal.
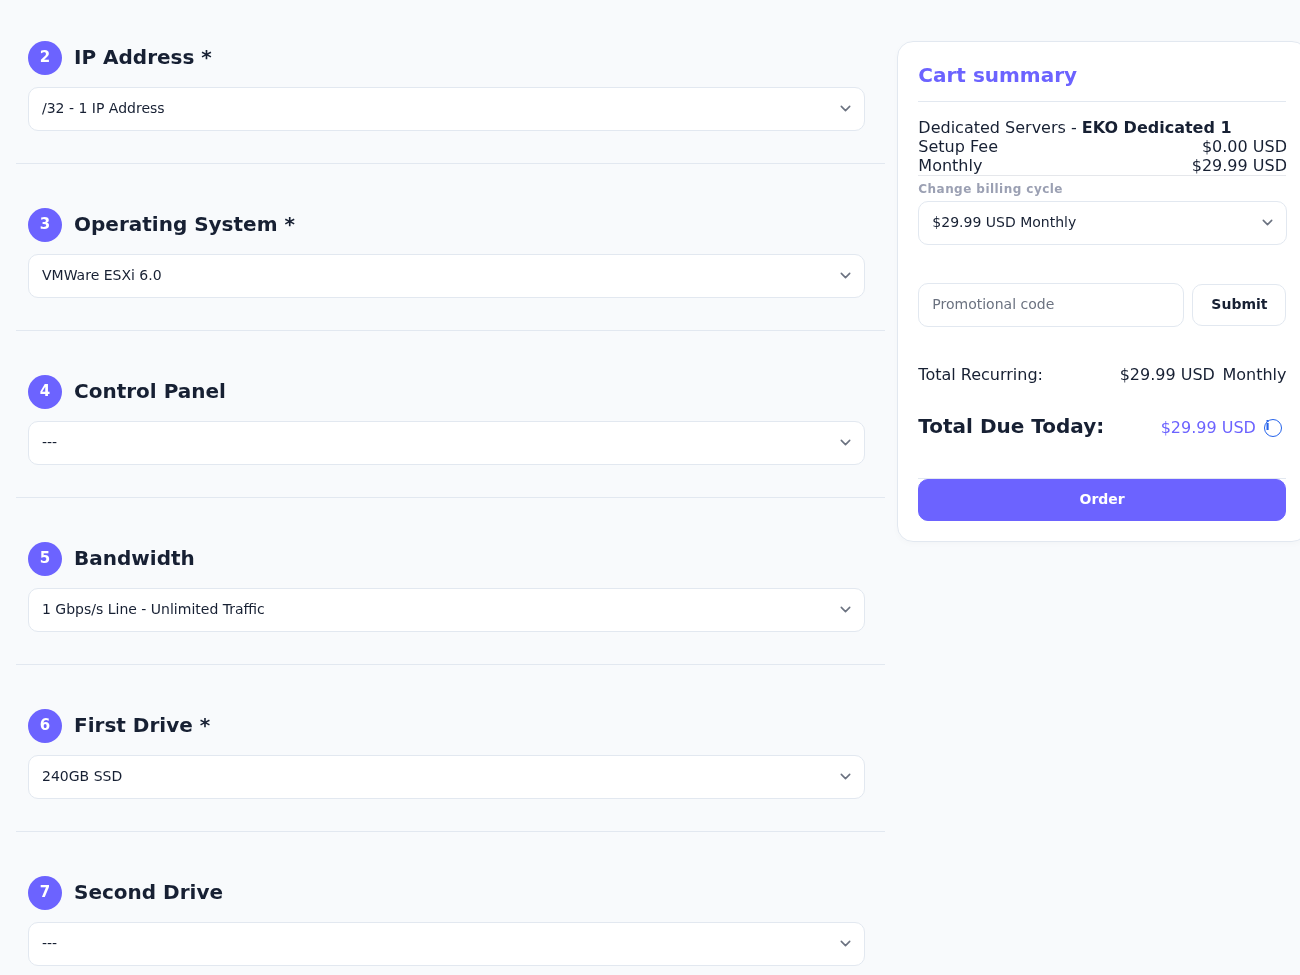
Step 1: Check the operating system choice
- Check the operating system choice
Review IP Address, Operating System and Control Panel for your requirements. Read licence and operating-system conditions on panel options.
- Check the First Drive capacity
First Drive is the primary disk and Second Drive is an additional disk. Check extra charges and read Bandwidth together with the plan and fair usage terms.
- Compare billing period and totals
Check Change billing cycle, Total Recurring and Total Due Today in Cart summary. Apply a promotional code with its own Submit button if applicable.
- Continue with Order when ready
Review the selected product, operating system, disks, licences and amount before selecting Order.
Do not treat the displayed operating-system default as a recommendation; choose a suitable supported release. Confirm current pricing, licences and traffic terms with the plan and agreement. No order was submitted.
| Field | What to check |
|---|---|
| IP Address | IP count and additional charges. |
| Operating System | A supported release appropriate for your use. Do not treat the first displayed value as a recommendation. |
| Control Panel | Panel choice, operating-system compatibility and licence terms. A trial licence is not a permanent licence. |
| Bandwidth | Port and traffic conditions, read together with the current plan and fair usage terms. |
| First Drive / Second Drive | Primary and additional disks, including extra charges. |
| Change billing cycle | Billing period. |
| Total Recurring / Total Due Today | Recurring cost versus the amount payable today. |
After checking the product, operating system, disks, licences and amount, use Order to continue. No physical server order was submitted for this guide. For a worked VPS order example, use the service order guide.
If a link returns you to the wrong screen
If a main-menu service link returns to the dashboard, open the relevant category through Your Projects → Manage Project. For a new purchase, check the product type displayed. If it is not what you intended, use the verified catalogue links above. Check existing orders before buying the same service again.
No active service management screens were available in these demo categories, so none are represented here. If access still fails, include the project name, service type and screen reached in a support request.