DCHost customer portal guide: accounts, billing and services
The DCHost customer portal is where you manage your account, purchased services, invoices and support requests. Choose your task below. Each guide uses numbered screenshots; select Enlarge or View step close up to read smaller details.
If you have not signed in yet, start with the account creation and sign-in guide. Menu and button names match the labels shown in the portal.
Choose your task
Account, sign-in and notifications
| What you want to do | Start here |
|---|---|
| Create a DCHost account and verify your email | Account creation and email verification |
| Sign in to an existing account | Customer portal sign-in |
| Update your name, phone, address or account email | Profile and contact details |
| Change the portal password or identify an access problem | Change your password |
| Choose a timezone, portal language or domain preferences | Account preferences |
| Select email categories or start Telegram setup | Notification preferences |
Security and team access
| What you want to do | Start here |
|---|---|
| Review two-factor authentication and IP access rules | Account security |
| Add a public SSH key for server orders | Manage SSH keys in the portal |
| Set access permissions for a contact, team or invitation | Account access and permissions |
| Find account activity, sent emails and portal notifications | Account history |
Invoices, payments and account credit
| What you want to do | Start here |
|---|---|
| Find an invoice, read its status and continue to payment | Review and pay an invoice |
| Add account credit or redeem a credit voucher | Add account credit |
| Check saved cards and automatic-charge status | Payment methods |
| Choose invoice grouping, delivery and automatic credit use | Billing and payment preferences |
| Search credit increases or deductions and export records | Credit activity and records |
| Check service renewal dates and continuity | Service renewals |
Start using your service
To locate your service or start a new domain, hosting or server task, open the service lists and order entry points guide. Once the service is ready, continue with the relevant guide below.
| Your service | Start here |
|---|---|
| Hosting | First checks and control panel access |
| VPS or VDS | First Linux server login and SSH key sign-in |
| Domain | DNS records, nameserver changes and domain transfers |
For a new virtual server, follow the VPS/VDS order guide. To organize server and project lists in the portal, use the project management guide.
Prepare a support request
Use the actual form in the support request guide to explain which step you reached, identify the service or invoice and describe the error. If you cannot access the portal, use the contact page.
Recognize the two interfaces: The customer portal manages your account and service tasks. Your hosting control panel manages website files, databases and mailboxes. The password for one interface may not work in the other.
Find the right service in the main menu
Dashboard is your account's home screen in the DCHost customer portal. The top menu provides separate links for services and account tasks:
| Menu | What to look for here |
|---|---|
| Domains & DNS | Domains in your account |
| Hosting | Hosting services |
| VPS | Virtual server services |
| Container | Container services |
| Bare Metal | Dedicated physical servers |
| Billing | Invoices and payment tasks |
| Support | Support area and requests |
| News | DCHost announcements |
| Settings | Account settings |
Some lists may be empty in a new account. Creating an account does not add all of these services. If you cannot find a service you purchased, check that you signed in to the account used for the order.
Open the profile menu
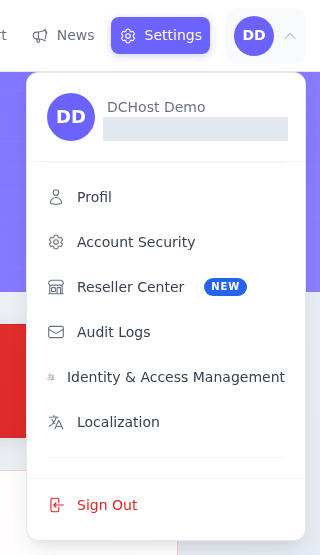
Select the account button showing your initials at the top right. The menu shows your account name and email address. Check that this is the correct account before continuing.
The account icon at the top right opens your profile and account tools.
Step 1: Select the account icon
- Select the account icon
Select the icon showing your initials or profile image. In this example, it displays DD.
- Select Profil
Select Profil in the menu to open your account details. The link is labelled Profil in the current interface.
The demo account email address is hidden. The menu is open in this screenshot; account details were not changed.
Profil opens the account details page. Account Security opens Account Settings, where you can continue to security options. Sign Out is in the same menu when you want to end your session.
The screenshot shows the example account's name; its email address is hidden. Your own name and email address should appear in your account.
Find the relevant account setting
The links at the top of Account Settings open different tasks: Edit Details for account information, Change Email for email changes, Change Password for password changes, and Security for security options.
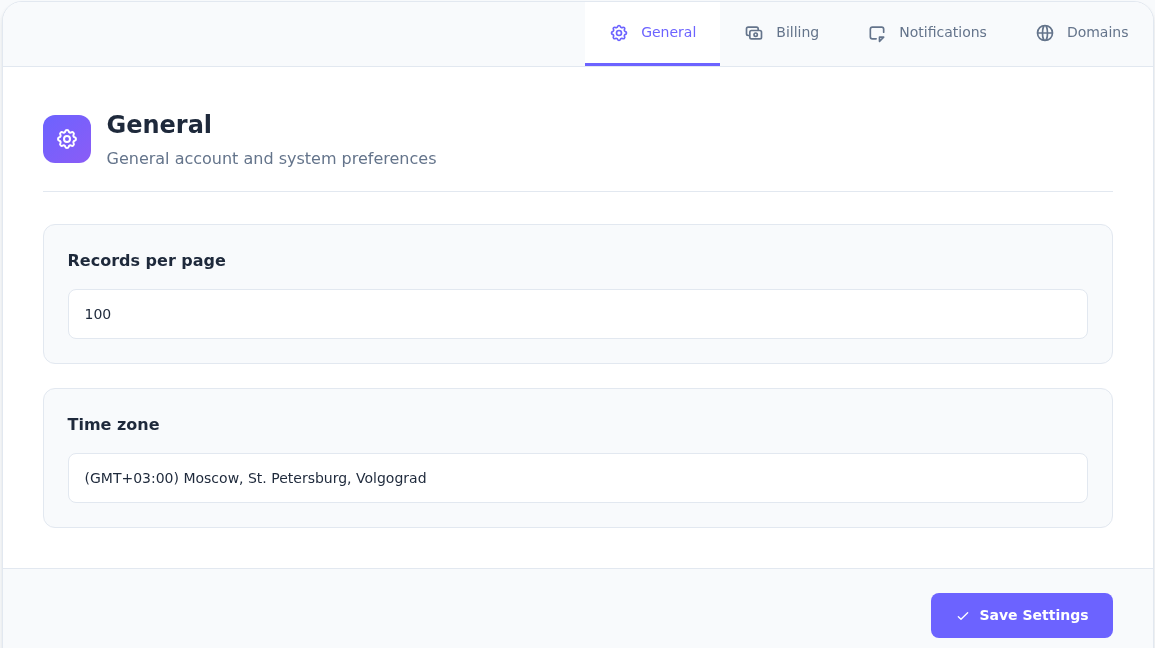
The General tab is open under Settings in Account Settings.
Step 1: Choose the number of records per page
- Choose the number of records per page
Records per page controls how many entries a list shows on one page. Choose a value that suits you.
- Check your time zone
Open Time zone and choose the zone for your location. You do not need to copy the example value shown in the screenshot.
- Save when you are ready
Review your choices before selecting Save Settings. Leave without saving if you do not want to make a change.
The displayed time zone is the demo account’s current value. For Türkiye, the list includes (GMT+03:00) Istanbul. No settings were saved for this guide.
The General tab under Settings contains two basic preferences:
- Records per page: The number of records shown on each page of a list.
- Time zone: Your account's timezone preference. Choose the timezone appropriate to you rather than copying the screenshot's selection.
If you want to change a preference, update the field and use Save Settings. Changing the account's timezone preference does not mean you changed the operating system timezone on your server.
For timezone, list length, language and domain settings, follow the relevant step in the account preferences guide. Personal details and email changes are covered separately in the profile guide.
Find two-factor authentication options
Two-factor authentication adds another verification step to password-based sign-in. It is separate from verifying your email address during registration.
- Open Security on the Account Settings page.
- Select Two-Factor Auth in the security area.
- On the Two-Factor Authentication page, review your account's status and the available methods.
Check whether protection is enabled, then open setup for the method you intend to use.
Step 1: Read the current status
- Read the current status
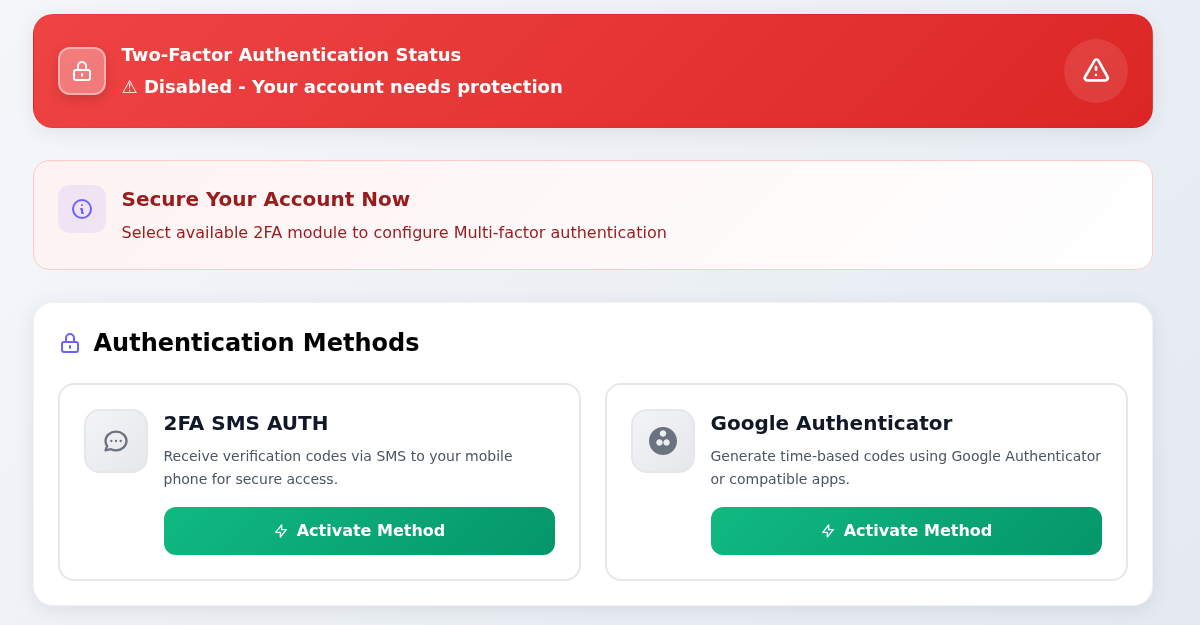
Disabled under Two-Factor Authentication Status means two-factor authentication is not currently enabled for this account.
- Open the authenticator-app option
If you want to use Google Authenticator or a compatible code app, select Activate Method in the Google Authenticator card.
- Use the SMS card if that is your choice
If you prefer codes by text message, select Activate Method in 2FA SMS AUTH. The two cards are alternative setup paths; you do not need to select both in sequence.
This is the method-selection screen; two-factor authentication was not enabled. Opening a method’s setup alone does not enable protection. Complete setup and then confirm the status is enabled.
Authentication Methods lists 2FA SMS AUTH and Google Authenticator. The first uses codes sent to your phone by SMS; the second uses codes generated by an authenticator app. Activate Method is the entry point to the chosen method's setup flow.
Screenshot context: The example account shows Disabled because two-factor authentication has not been enabled. Seeing the methods or opening a setup link does not mean protection is active. Review actual setup screens and IP access options in the account security guide.
Keep verification codes private. If you cannot access your account, follow the checks in the sign-in guide. If you are still blocked, use the contact page to explain which step you reached.
If you cannot find a service or task
First open the profile menu at the top right and check that you are in the correct account. Then open the relevant service menu. An empty list may mean that no service has been purchased in this account; check any existing order and invoice status.
If a task does not produce the expected result, read the status and any error message on the screen. Opening a form does not confirm that a change was saved or a payment completed. Find the step you reached and compare it with the result described in the relevant guide.
If you still need help, include the service or invoice number, the time of the action and the error message in a support request. Do not include your password or verification code.
Other frequently used guides
- Find invoices and check renewal status.
- Prepare a support request in the portal.
- Choose a VPS/VDS plan and system for an order.
- Start using your hosting service.
Affiliate program entry
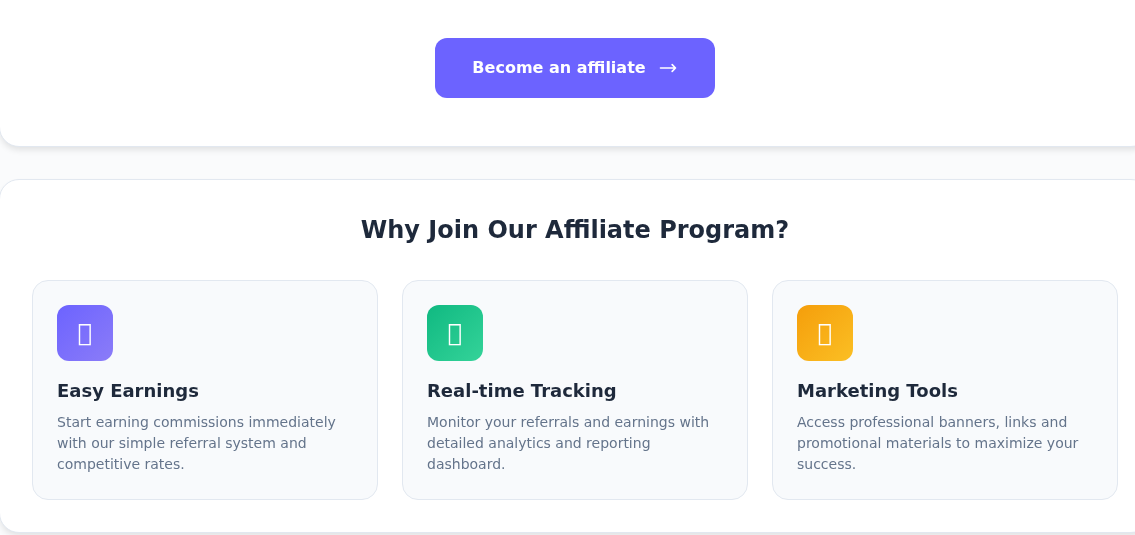
Account Settings → Satış Ortaklığı opens the Affiliates page. Become an affiliate is the enrollment entry point; visiting the page does not activate membership.
Satış Ortaklığı in Account Settings opens the Affiliates page.
Step 1: Find the enrollment control
- Find the enrollment control
Become an affiliate is the enrollment control. Opening the page alone does not mean you joined.
- Find the marketing-tools explanation
The Marketing Tools card describes promotional tools. This enrollment preview does not contain your account-specific referral link; review current program terms for access to those tools.
Become an affiliate was not used; this is not proof of enrollment or earned commission. Confirm the current program terms before joining.
Read the current commission, eligible-transaction and payout terms before joining. This enrollment preview does not show an account-specific referral link. The program was not activated for this guide, and no earnings or payout are represented.
Social media program
On the dashboard, Social Media Earnings Program → Details & join opens a separate program's terms. This is distinct from affiliate enrollment.
Details & join on the dashboard opens this program window. It is separate from the Affiliates page.
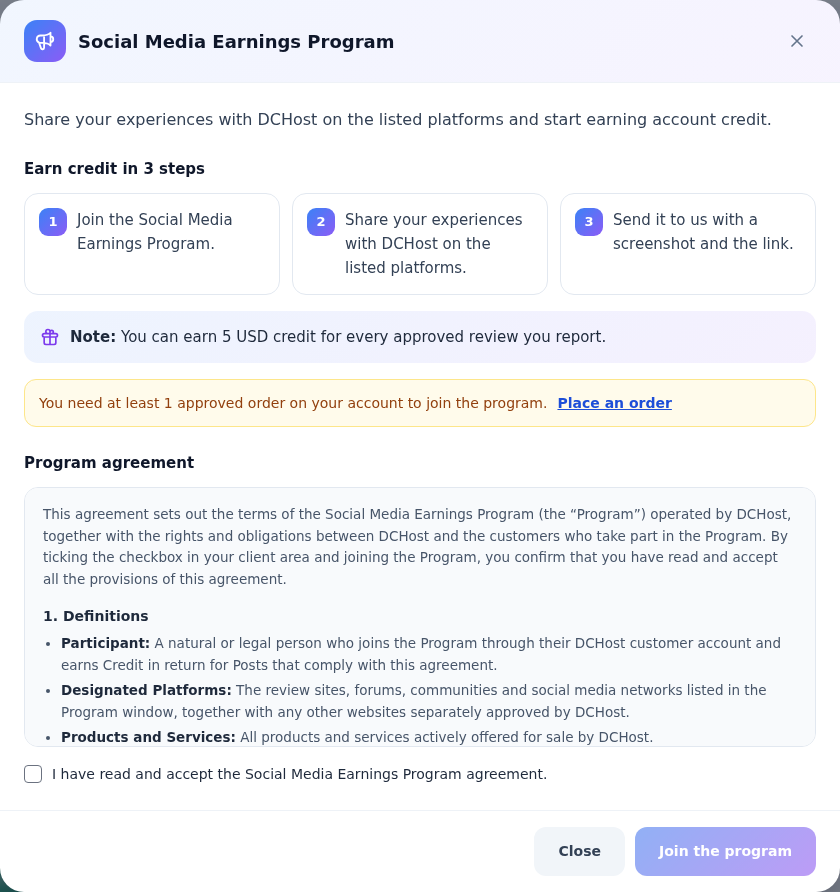
Step 1: Read the participation requirement first
- Read the participation requirement first
This example requires at least one approved order. A pending order does not prove the requirement is met.
- Review the program agreement
Scroll inside Program agreement to read the current terms. This is information shown before joining.
- Recognize the disabled enrollment state
The agreement checkbox and Join the program are disabled for this demo account. Close dismisses the window; this is not an enrollment or earnings result.
The program was not joined, and no post or report was submitted. Read the current agreement in your own account for participation and earnings terms.
The example account is told that at least one approved order is required, and Join the program is disabled. Reading the terms or starting an order does not confirm acceptance or earned credit. Review current eligibility, submission-review and reward conditions before joining. No enrollment or social submission was made for this guide.