Update your DCHost profile, contact details and account email
Keep your DCHost profile up to date when your phone number, address or company details change. Your login email uses a separate Change Email form. Select a number in the screenshots below to inspect the relevant field.
Before you start: Sign in to the customer portal and check that you are using the correct account. Personal details are masked in these screenshots. Enter your own current information in the fields. Menu names match the English interface shown.
1. Open your account details
Choose Settings in the top navigation, then Edit Details. You should see Account Details. Alternatively, open the account icon at the top right and choose Profil.
Each type of information has its own section in Edit Details.
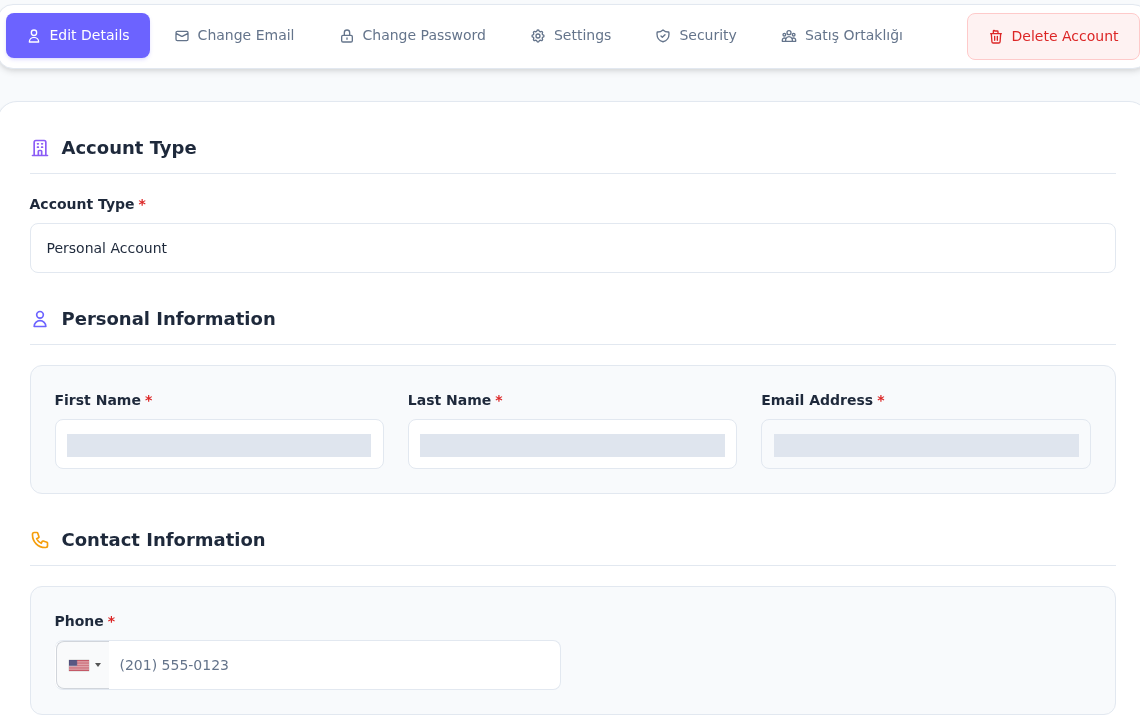
Step 1: Select the account type
- Select the account type
Use Personal Account for an individual or Business Account for a company. Choose the option that matches the actual account holder.
- Start with First Name
Enter the account holder’s first name in First Name and last name in Last Name. Email Address on the right displays the current login address.
- Check the phone country code
Check both the country selector at the start of Phone and your phone number. The grey number shown here is a formatting example.
Complete the fields marked with an asterisk. Use Change Email above to change the email address; it is not editable in this form.
| Field | What to enter |
|---|---|
| Account Type | Personal Account for an individual or Business Account for a company. |
| First Name | The account holder's first name. |
| Last Name | The account holder's last name. |
| Email Address | Your current login email. This field is disabled; use the email change instructions. |
| Phone | Your phone number with the appropriate country selector. The grey example number is a placeholder, not a saved number. |
Complete the fields marked with an asterisk *. Changing account-holder information is not evidence of a completed service ownership transfer; contact support for a transfer.
2. Check the company name for a business account
Selecting Account Type → Business Account reveals Company Name. Enter the registered company name and review the personal name and contact details too.
Choosing Business Account reveals Company Name.
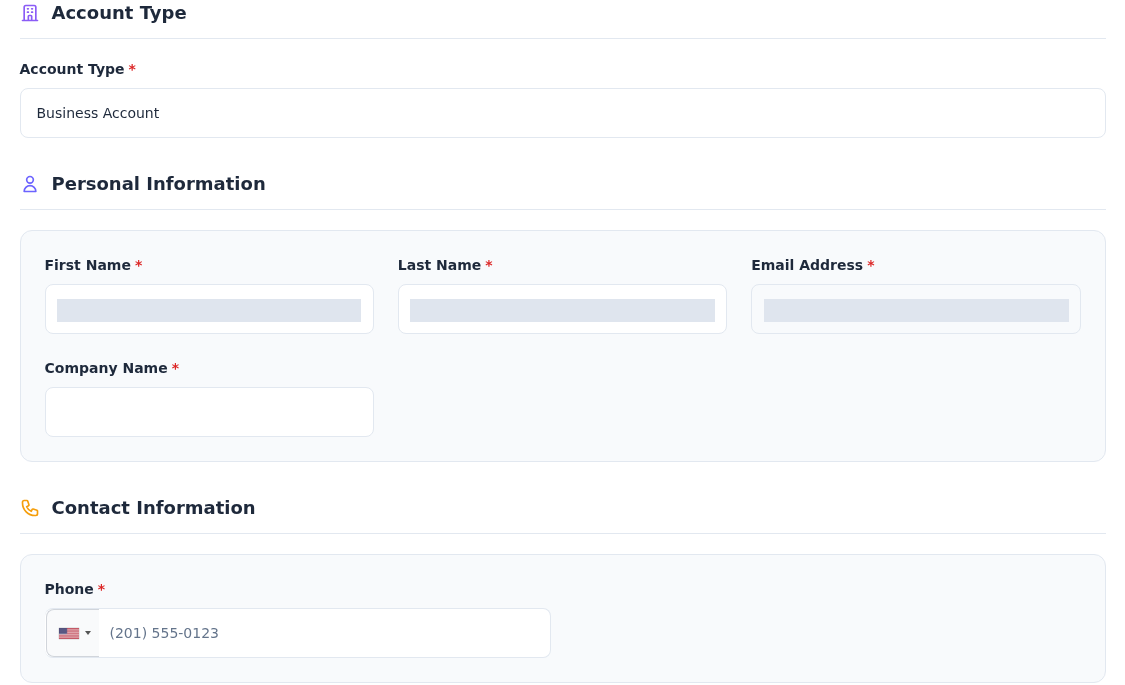
Step 1: Choose Business Account
- Choose Business Account
Select Business Account in Account Type and check that Company Name appears below.
- Enter the registered company name
Enter the registered company name in Company Name. Review the name and phone fields before continuing to the bottom of the form.
The option was selected to reveal the field; the account type was not saved. Contact support about corrections to invoices already issued.
This screen includes a company name field. Do not treat it as a tax office or tax identification field. If additional billing details are required, follow the relevant portal screen or support instructions. Changing the company name here does not confirm that an invoice already issued has been corrected.
3. Complete the address and postal code
Scroll to Address Information. Choose Country first. Selecting Turkey shows Turkish provinces in State.
Choose Country first; the State list depends on the country.
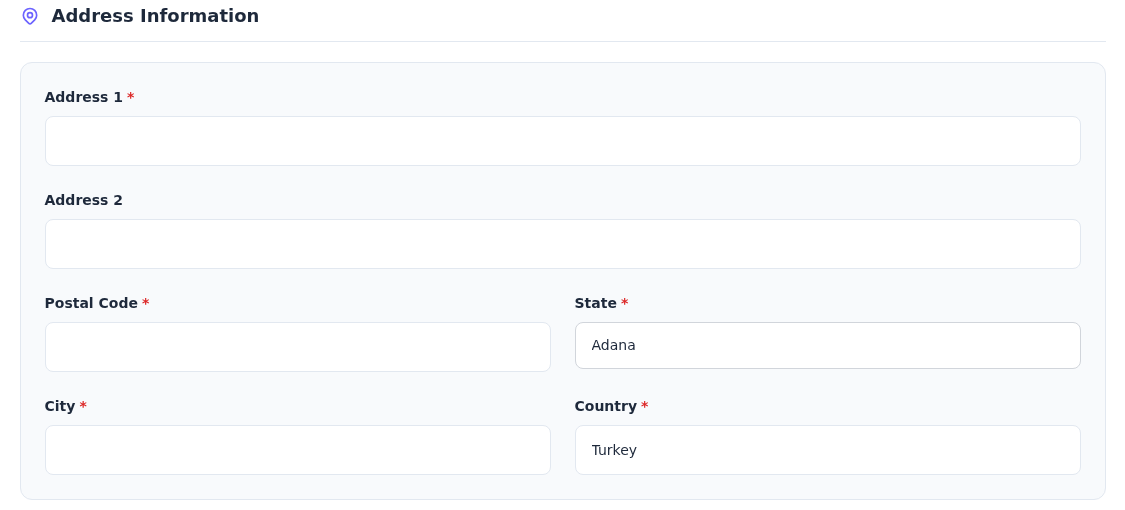
Step 1: Choose your country
- Choose your country
Select the country of your address in Country. Türkiye appears as Turkey in this interface.
- Check the region and city
Choose your region in State and enter the city in City. After changing the country, do not leave the first region selected unless it is correct.
- Include the postal code in the address
Address 1 is the main address line. Use Address 2 for additional address details, and enter the postal code in Postal Code.
Turkey is an unsaved example selection. Adana is the first region shown after the list refreshes; choose your own region.
- Select your region in State. Changing country may show the first available region; check it before continuing.
- Enter your city in City.
- Enter the main street address in Address 1. Use Address 2 if you need an additional line.
- Enter the address's postal code in Postal Code.
The country was selected only to show the available fields and was not saved. Do not copy the example country or region instead of your own address.
4. Review additional information and save
Additional Information contains Date of Birth and Passport Number. If entering a date, follow DD/MM/YYYY, meaning day/month/year. Passport Number is specifically for a passport, not a general tax or national ID field. Neither field has a required-field asterisk in this screenshot.
Save Changes at the bottom saves the profile details.
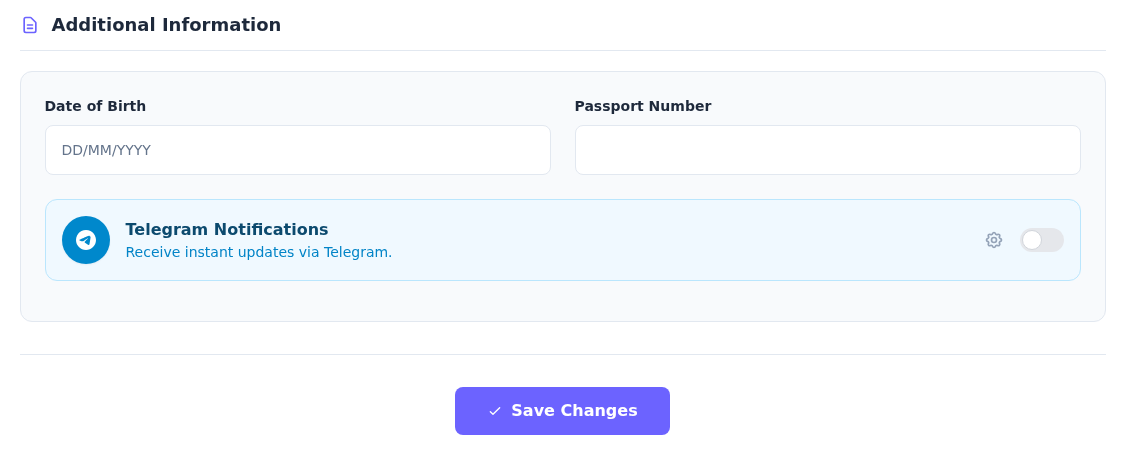
Step 1: Follow the displayed date format
- Follow the displayed date format
DD/MM/YYYY in Date of Birth means day/month/year. Passport Number is for a passport number, not a general tax or national ID field.
- Save with Save Changes
Also review the name, phone and address fields above. When ready, select Save Changes and correct any field identified by an error.
Date of Birth and Passport Number are not marked with an asterisk in this screenshot. Provide information that is requested and relevant to your account.
Select Save Changes. If the portal reports an error, read the message and correct the identified field. After the update is accepted, reopen Edit Details and check that the information is correct. No profile changes were saved during this walkthrough.
If you saved incorrect information: Enter the correct value in the same field and select Save Changes again. If a field cannot be edited, name it in your support request.
For the Telegram option, use the notification preferences guide.
5. Change the login email
Select Change Email near the top of the page. There are two fields under Change Email Address.
Change Email asks for the new address and your current password.
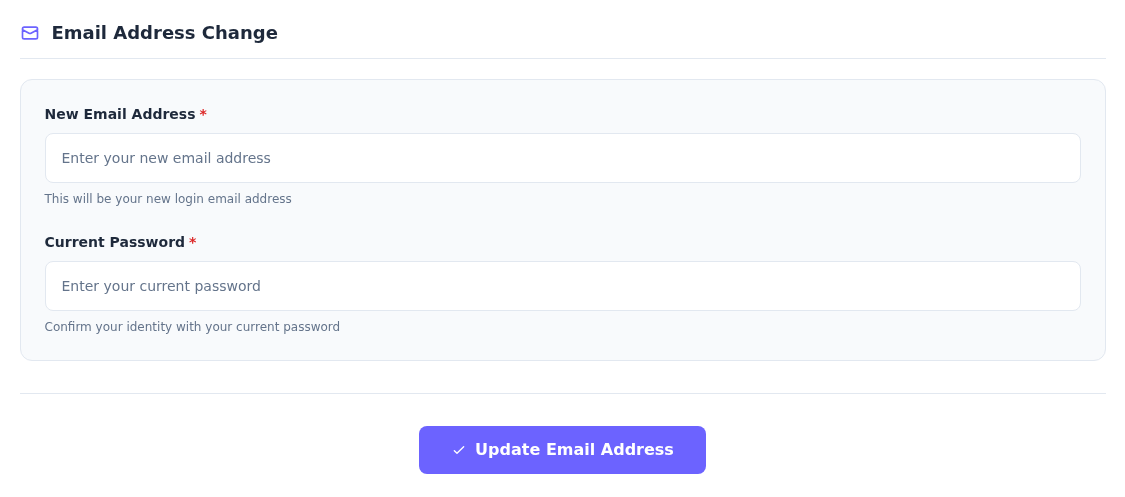
Step 1: Enter an email address you can access
- Enter an email address you can access
Enter the new login address in New Email Address. Check for typos and make sure you can open that mailbox.
- Enter the current account password
Enter your current DCHost customer account password in Current Password. This is not your mailbox or hosting-panel password.
- Review and update the address
When the new address and current password are correct, select Update Email Address. After completing the process, check the address in your account details.
This screenshot shows the empty form; an email change was not submitted. Follow the verification or error messages displayed after your own submission.
- Enter an address you can access in New Email Address. This will be your new login email.
- Enter your current DCHost customer account password in Current Password.
- Check the address again and select Update Email Address.
- Read the result. If additional verification is requested, complete the displayed instructions. After the process succeeds, check the email shown in your account details.
The screenshot is from the actual form; the demo account's email was not changed. It does not establish what verification is required after submission or how long that process takes.
If the email change does not work
- The address cannot be edited: You may be viewing Email Address in Edit Details. Open Change Email above it.
- The password is rejected: Check that you are using the customer portal password. Your mailbox or hosting-panel password may be different.
- You cannot access the new address: Use an accessible address before completing the change. If access is lost after completion, contact support instead of creating another account.
- You also want to change the password: Follow the password change guide.
6. Review the account deletion request screen
Delete Account in the account tools opens Account Deletion Request. The account used for this guide displayed Outstanding Invoices: unpaid invoices must be resolved before proceeding. No deletion form or deletion confirmation was displayed.
Delete Account opens Account Deletion Request.
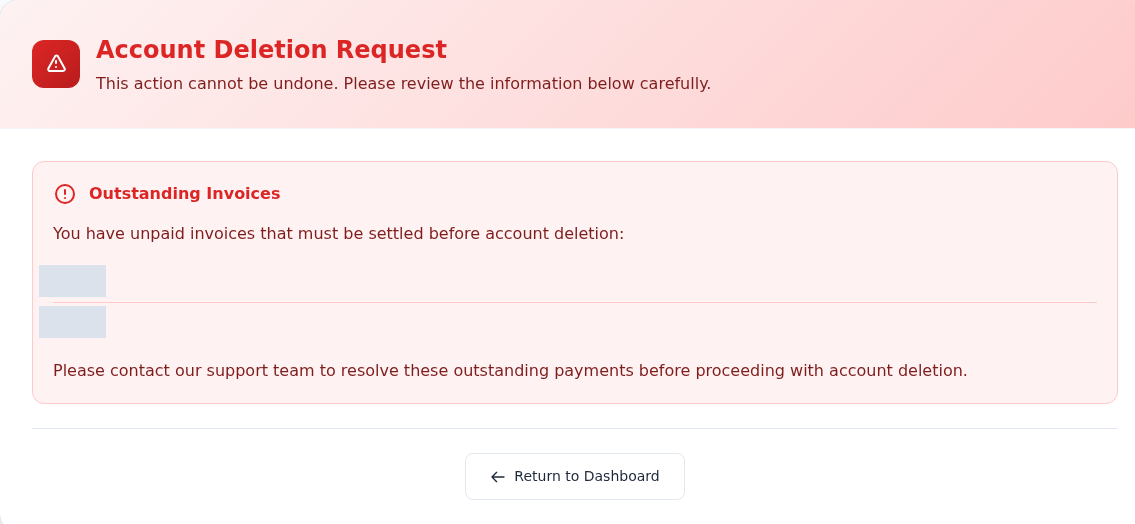
Step 1: Read the Outstanding Invoices notice
- Read the Outstanding Invoices notice
The page asks for unpaid invoices to be resolved first and directs you to support. It is not a service cancellation or refund result.
- Return to the dashboard
Use Return to Dashboard to go back. This example contains no deletion confirmation or success result.
Invoice numbers are masked. Outstanding invoices prevented this account from showing a deletion form; no account was deleted.
If you see the same message, review the invoices and their status. Contact support if you dispute an invoice or have a question about closing the account. Use Return to Dashboard to leave the screen. Opening it does not mean the account has been deleted; this screenshot does not establish a deletion time, refund or data retention outcome.
A profile update does not create a service order. Return to the portal navigation guide to choose your next task.