How to prepare a useful support request
Start with three details: which address, what time and what error? You do not need technical vocabulary. Describe what you tried to do and what appeared on your screen.
Use the DCHost customer portal support area for account, payment and service-specific issues. If you cannot access the portal, report that through the contact page.
You can write a useful request without technical vocabulary.
- Which address?
Include the affected domain, page or service identifier.
- When?
Add the date, time and timezone when you saw the error.
- What error?
State what you tried to do and what appeared on screen.
Example: “Send on the contact page shows an error; today at 14:20, UTC+3.”
Open the support request form in the portal
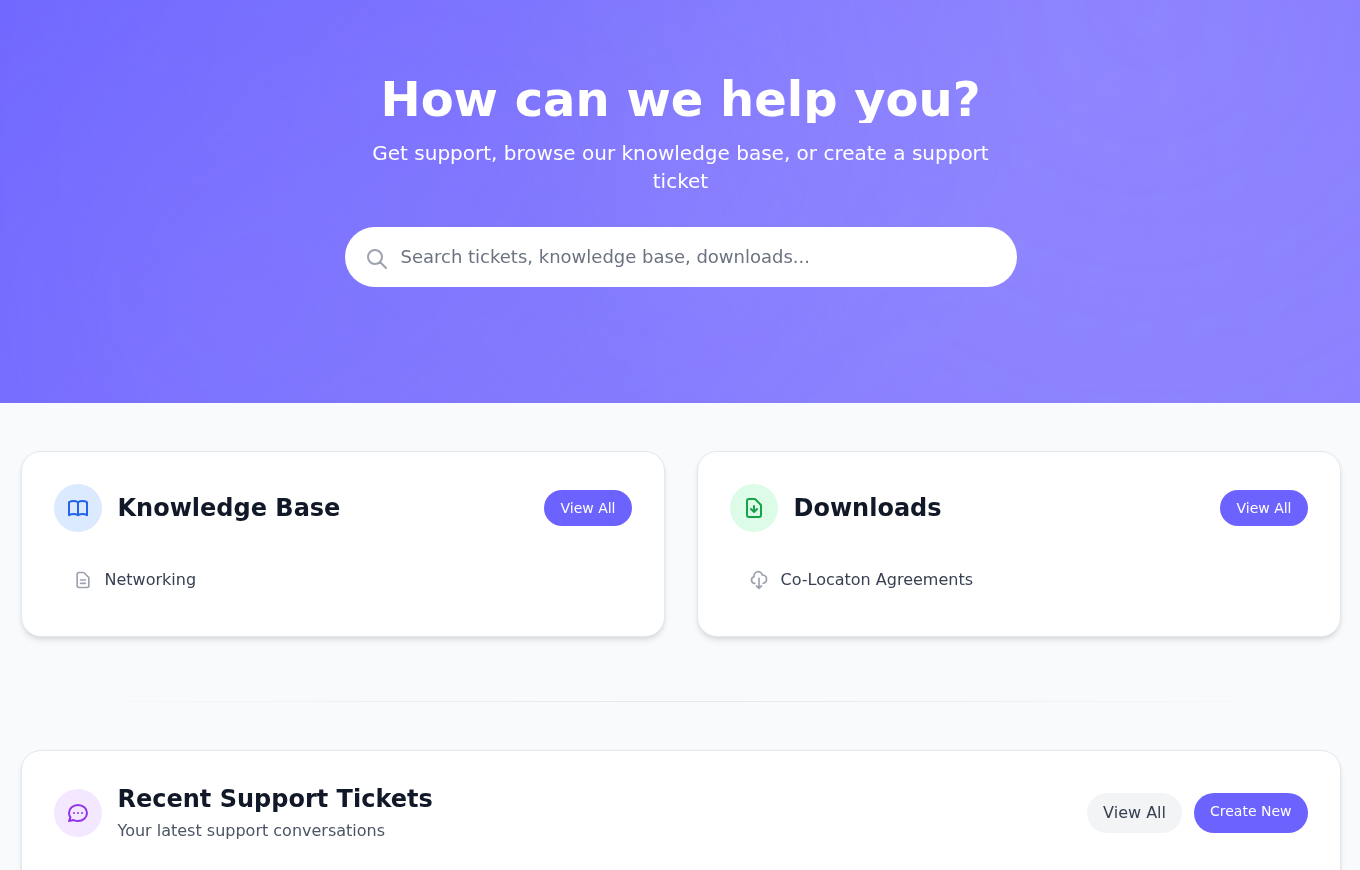
Open the DCHost customer portal support center. Select Create New under Recent Support Tickets. If you are preparing your first request, the empty list also contains Create New Ticket. Both links open the same form.
Search existing support content or start a new support request.
Step 1: Search with a few words
- Search with a few words
Enter a few words describing your issue in Search tickets, knowledge base, downloads....
- Open the form with Create New
Select Create New to the right of Recent Support Tickets. On the next screen, choose a department and describe the issue.
Reply to your existing ticket if it concerns the same issue. Use Create New for a new issue.
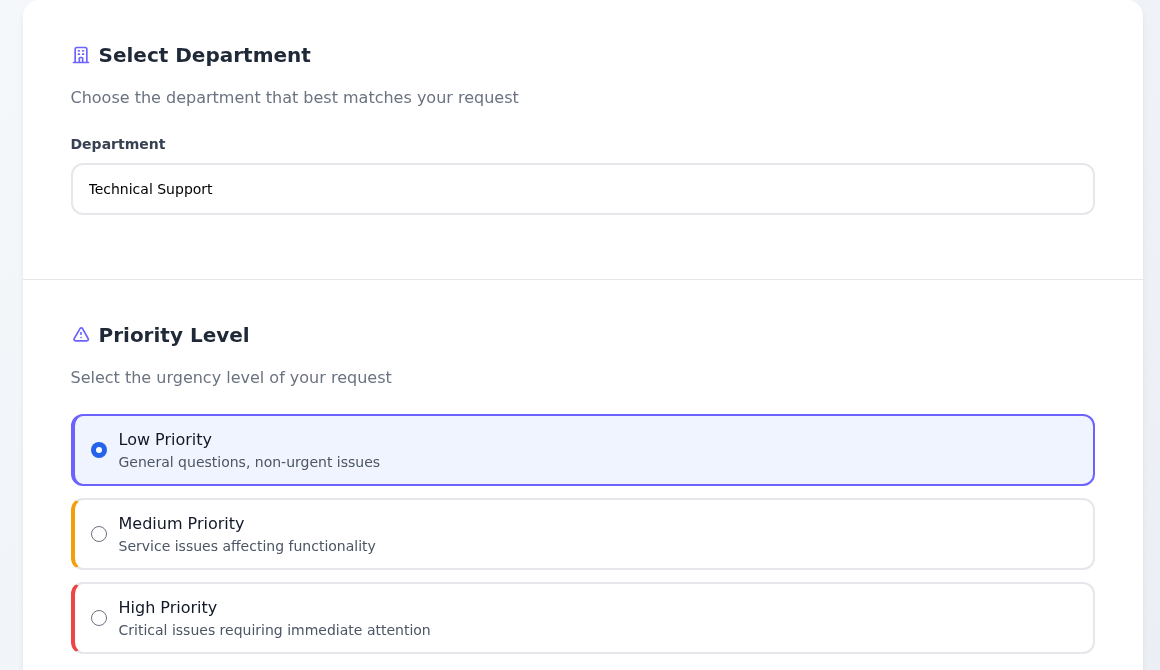
Choose the relevant team in Department: General for general questions, Sales for sales enquiries, Accounting for invoices and payments, or Technical Support for technical issues.
Identify the type of request and how it affects your service.
Step 1: Select the relevant department
- Select the relevant department
Open Department. Use Technical Support for a technical issue, or Accounting for a payment or invoice question.
- Match the priority to the impact
Read Low Priority for general questions, Medium Priority for issues affecting functionality, and High Priority for critical incidents. Select the circle on the appropriate row.
The example draft has Low Priority selected. Choose a priority that matches the impact of your actual issue.
Choose a Priority Level that matches the impact. Low Priority is for non-urgent questions, Medium Priority for issues affecting service functionality, and High Priority for critical issues requiring immediate attention. Describe the impact in the message too; the priority alone does not explain the problem.
What you should see: The page heading is Create New Support Ticket, followed by Ticket Details. Opening or filling in the form does not submit a ticket. Prepare the details below before writing your message.
1. Identify the affected service and outcome
- Find the service identifier in the DCHost customer portal. Include the relevant domain or server.
- State what you wanted to do: “Send the contact form.”
- Describe what happened: “An error appears when I press Send.”
- Add the date, time and timezone when it happened, such as “13 October, 14:20, UTC+3.”
- Say who is affected. Is it only your connection, or have others seen the same issue? Write “I don't know” if you have not checked.
For an issue that comes and goes, record several times when you saw it.
2. Start with the symptom
| Symptom | Initial check |
|---|---|
| A domain reaches the wrong destination | A/AAAA and nameserver records |
| HTTPS shows a warning | Certificate name, validity and mixed content |
| SSH access to a Linux server fails | Distinguish SSH connection errors |
| An application has slowed down | For hosting, check the control panel; for a server, review CPU, RAM and disk usage |
| Email is not delivered | First check the mailbox, MX and client settings, then sender authentication |
Do not delay a request because you lack the access needed for a check; explain where you are blocked. Avoid changing DNS, firewall and application settings together during investigation.
3. Include the error and recent changes
- Copy the error text. If you cannot copy it, take a readable screenshot.
- Crop the screenshot to the relevant area.
- Mention the last change before the issue: a migration, update, DNS change or licence change. Say so if you made no changes.
- Include the result of each check. A short sentence such as “The same error appears in another browser” is useful.
What is a log? It is a file where an application or server records events. If you share one, include the short section around the error and its timestamps rather than the entire file.
4. Remove sensitive information
Keep useful evidence and remove information that grants account access.
- Include in the ticket
Service identifier, error message, time and the checks you tried.
- Remove before sharing
Passwords, private keys, access codes, session details and card data.
Do not post account or invoice documents in the public community.
Read the message and inspect the screenshot once before sending:
- Remove passwords, private SSH keys, API keys and one-time verification codes.
- Session cookies and access tokens can grant account access; do not share them.
- Hide card details and unnecessary email content.
- The part of a browser address after
?can contain secret codes. Remove any such code while leaving enough information to identify the affected page.
Where should you send it? Keep account and invoice documents out of the public community. Continue the service investigation in the relevant DCHost customer portal support ticket.
Request template
Copy these fields and fill them with your own information. Write “I don't know” rather than guessing.
Affected service:
Affected address or application:
First observed time and timezone:
Expected result:
Actual error (sensitive information removed):
Recent change:
Checks attempted and their results:
Affected users / frequency:
For a payment issue, add the invoice number, amount, currency and transaction date. Do not repeat a payment before clarifying the original transaction's status.
Put your prepared details into the form
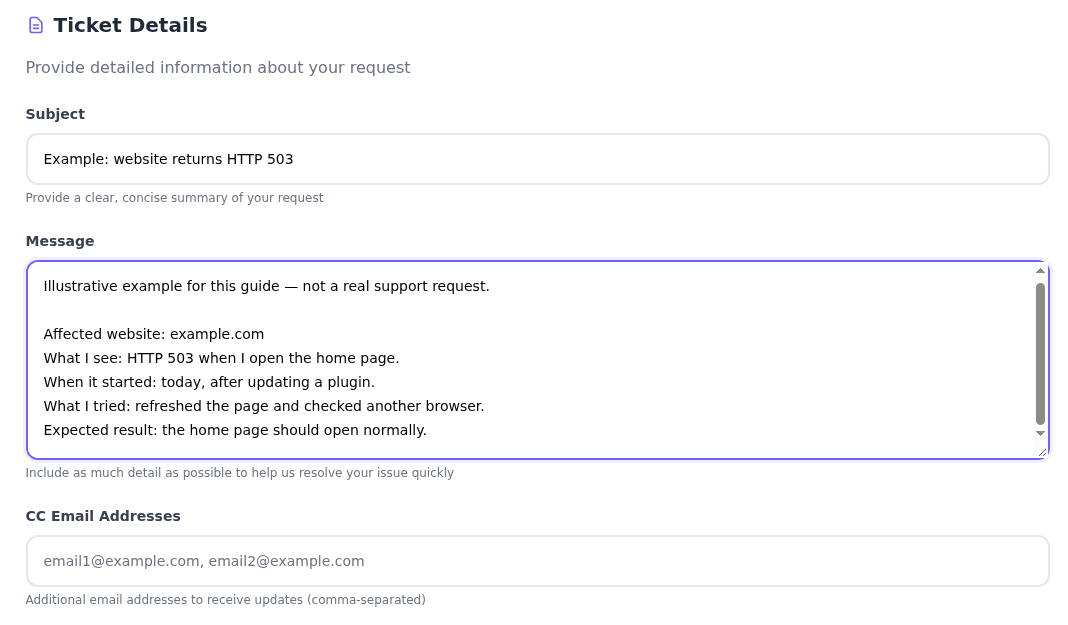
Use Subject for a one-sentence summary, such as “The home page returns HTTP 503.” Put your completed version of the template above in Message. The domain and error in the screenshot are examples; replace them with your own details.
A short subject and specific details help support understand what you are seeing.
Step 1: Write a short Subject
- Write a short Subject
Summarize the issue in one sentence, such as “The home page returns HTTP 503.”
- Explain what happened in Message
Include the affected address, the error, when it started and the checks you tried. Add what you expected to happen.
- Use CC only when needed
CC Email Addresses is for additional people who should receive updates. Separate multiple addresses with commas, or leave it empty if no one else needs a copy.
The example.com and HTTP 503 text is an illustrative draft; no support ticket was submitted. Use your actual address and error in your own request, without passwords or secret keys.
CC Email Addresses is for additional addresses that should receive ticket updates. Leave it empty if none are needed. Separate multiple addresses with commas and include only people who should see the conversation.
Attach files and check before sending
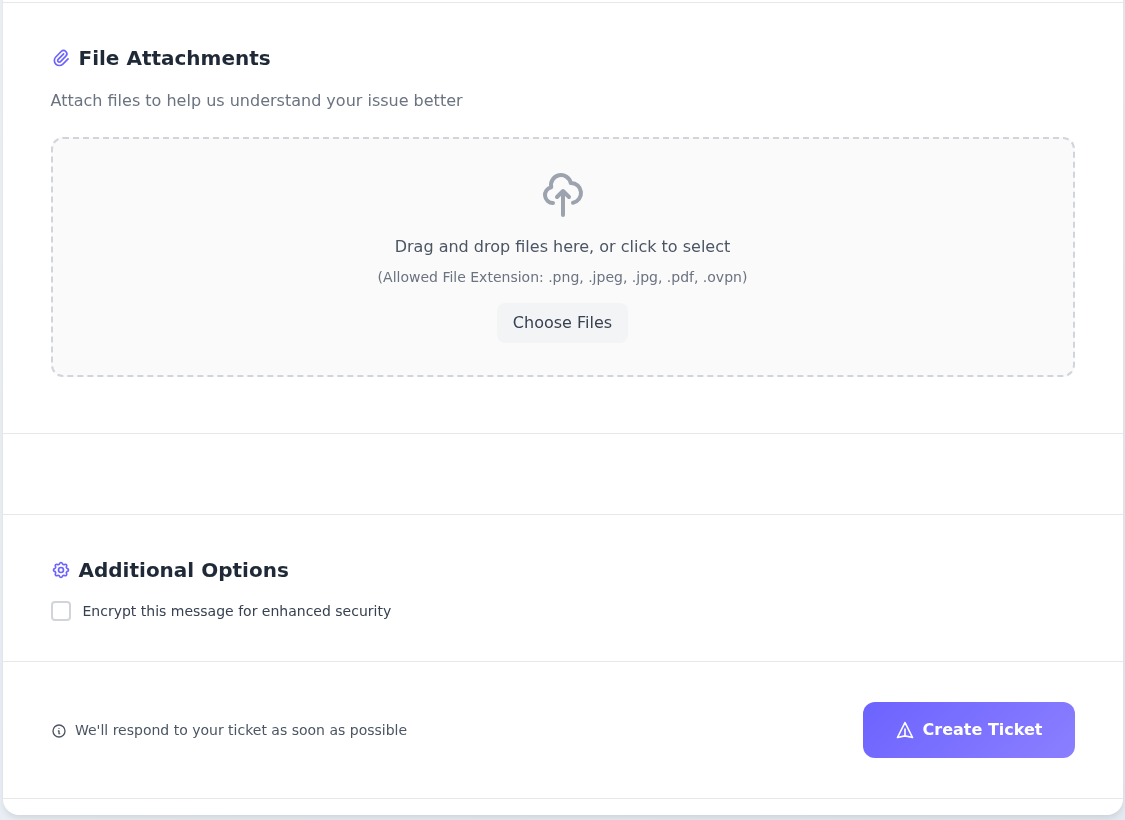
To attach a screenshot or document, use Choose Files under File Attachments. You can also drag a file into that area. Check the portal's Allowed File Extension list and use a supported file type.
Attach only files that help explain the issue.
Step 1: Choose the relevant file
- Choose the relevant file
Select Choose Files and choose the file on your computer. The screen lists .png, .jpeg, .jpg, .pdf and .ovpn as allowed extensions.
- Use Create Ticket when the request is ready
Review the department, priority, subject, message and attachments. When your actual request is ready, select Create Ticket once.
No file was uploaded and Create Ticket was not selected in this example. Remove passwords, verification codes and unnecessary personal details from screenshots.
Open the file and check that sensitive information has been removed. Technical files such as VPN configurations can contain access details; share only the necessary information that is appropriate for the request. When the message, recipients and attachments are ready, use Create Ticket at the bottom of the form to submit it. If an error appears, read it and check the submission status before creating the same request again.
Screenshot context: An example request was prepared in the form for this guide and was not submitted. The screenshots do not show a ticket number or submission confirmation.
Continue in the same ticket when a reply arrives. Identify a new error or different service explicitly. Use the community for general experience sharing and sales contact for service selection. Review who maintains each part in the management scope reference.