DCHost billing settings explained
Billing settings control your preferred payment method, automatic use of account credit and how invoices are organized. Company name and address are edited elsewhere: use profile details. To give your accountant access, use contacts and permissions.
Open billing preferences
- In the customer portal, open Billing → Billing Settings.
- Confirm you are in Account Settings → Settings.
- Select the Billing tab. The initial General tab contains different preferences.
Default payment gateway selects the preferred method; the checkbox below controls its scope.

Step 1: Select the default gateway
- Select the default gateway
Open Default payment gateway. Review None, Crypto, Credit Balance or Credit Card | Google Pay according to your needs.
- Decide whether it applies to existing services
Apply this selection to all existing services extends the choice to current services. Leave it unchecked if you do not want that scope; it is unchecked here.
No preference was changed in the screenshot. This field selects a gateway; it does not by itself confirm a saved card or an active automatic charge.
Default payment gateway
Default payment gateway selects your preferred payment method. The observed list included None, Crypto, Credit Balance and Credit Card | Google Pay. Use the methods offered in your own account.
- None: No specific default method selected.
- Credit Balance: Account credit as a payment method; this does not add credit.
- Crypto / Credit Card | Google Pay: A preference for that method. Selecting it does not pay an invoice by itself.
Apply this selection to all existing services requests that the preference apply to existing services too. Consider its scope separately if you only intend to set a preference for new transactions. On a business account, check which services will be affected before changing an established billing process.
Automatic use of account credit
Auto-apply credit offers two choices:
- Yes: Available credit may be applied immediately to new orders and recurring invoices.
- No: Credit is not applied automatically; follow the payment options on each invoice yourself.
Using existing account credit is different from charging a card or bank account.
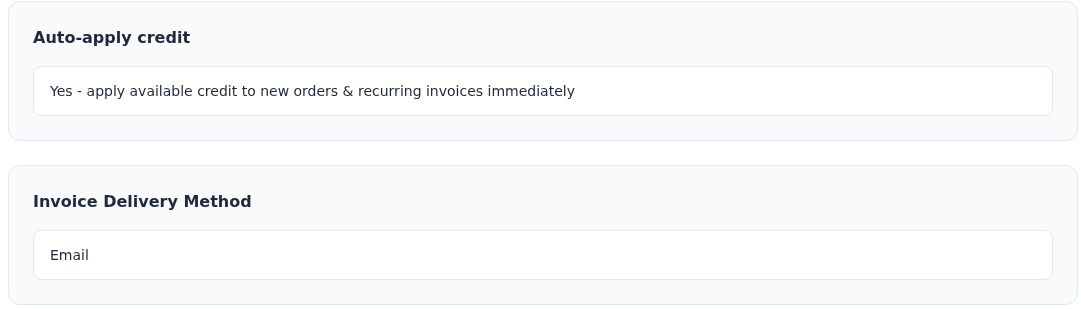
Step 1: Review Auto-apply credit
- Review Auto-apply credit
Yes applies available credit to new orders and recurring invoices automatically. No disables that automatic use. This setting does not add new money to the account.
- Select an invoice delivery preference
Review Email, Paper or Email + Paper under Invoice Delivery Method. Email is selected in the screenshot.
The presence of Paper or Email + Paper does not guarantee physical postal delivery. Confirm availability with support if you need it.
If you want to reserve credit for a future order, consider this setting first. Automatic application may use it for another eligible invoice. Follow Decrease and Related Invoice in Credit Logs to see where it went.
This is not authorization to charge your card. Charging a saved card automatically is a separate subject in Auto-Pay Setup.
Invoice delivery preference
Invoice Delivery Method includes Email, Paper and Email + Paper. If you use email, make sure your profile address is correct and accessible.
The presence of Paper does not establish that postal delivery is available for your account or included at no charge. Confirm availability with support if you need printed delivery. Also review Notifications → Billing: delivery format and notification preferences are separate settings.
Merge invoices
If you have several services, Merge Invoices can help organize billing. There are three choices:
| Option | Intended arrangement |
|---|---|
| Generated on the same day | Group invoices created on the same day |
| With the same due date | Group invoices sharing a payment deadline |
| Separate invoice for each service | Track each service on its own invoice |
Merge Invoices distinguishes the invoice creation day from its due date.
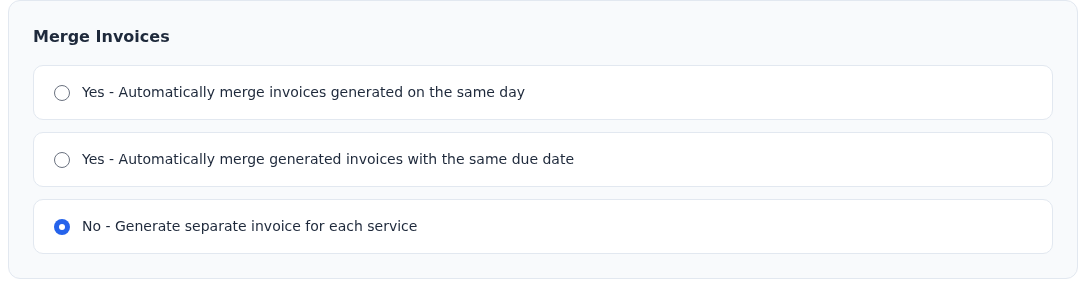
Step 1: Distinguish the date used for merging
- Distinguish the date used for merging
The close-up shows with the same due date in the second option: invoices sharing a payment deadline. The first option uses their creation day. Select the corresponding radio button on your own screen.
- Use No if you want separate invoices
Select No - Generate separate invoice for each service if you want an individual invoice for each service. This is the selected option in the screenshot.
This preference concerns invoice grouping; it does not mark an outstanding amount as paid. No change was saved in the screenshot.
Invoice Date is the creation date; Due Date is the payment deadline. Two invoices created together may have different deadlines, so the first two options are not interchangeable.
Merging is not a discount, renewal or payment. Do not assume it retroactively rewrites existing documents. After saving, review the service lines and dates on newly generated invoices.
Automatically charge bank accounts
Auto charge bank accounts is the preference for charging stored bank accounts. Select No, Do not charge automatically to disable the preference, or Yes, Charge automatically stored bank accounts to request it.
Review the bank preference in the final section, then use Save Settings at the bottom.
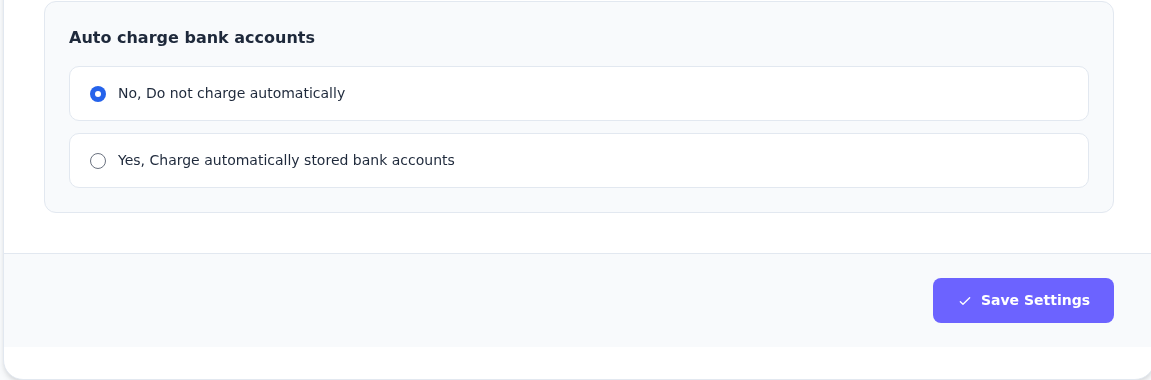
Step 1: Choose the bank-charge preference deliberately
- Choose the bank-charge preference deliberately
No, Do not charge automatically keeps automatic bank charging off. Yes concerns automatic charges to saved bank accounts; ask support if its availability or scope is unclear.
- Use Save Settings when ready
Review all the preferences above. When your selections are ready, select Save Settings at the bottom and read the result shown on screen.
This option does not establish that a bank account is saved or that bank charging is supported for your account. No preferences were saved and no charge was made for this screenshot.
This is not confirmation that you made a bank transfer. Automatic charging requires a supported stored account, appropriate authorization and an available payment integration. An active stored bank account was not verified in the demo account.
Save and verify
- Review the choices, especially the option applying the method to all existing services.
- Select Save Settings at the bottom.
- Read the success or error message.
- Reopen the Billing tab and confirm that the preference persisted.
- If you intend to use automatic payments, also check Auto-Pay Setup.
If screens show inconsistent selections, do not assume automatic payment is active. Track the invoice deadline and report both states to support. The demo settings were not changed; selected options in these screenshots are not a recommended configuration for your account.
Find the setting for your task
| Task | Location |
|---|---|
| Company name, address and phone | Edit Details |
| Billing notification emails | Notifications |
| Automatic account-credit use | Auto-apply credit on this page |
| Automatic card charges | Auto-Pay Setup |
| Pay a particular invoice | Invoice → Pay Now |
| Separate accounting access | Contacts and permissions |
| Verify a service's new expiry date | Renewal guide |