Contacts, teams and access permissions in the customer portal
Use Identity & Access Management when an accountant needs to follow invoices or a technical colleague needs service access. Give each person the permissions needed for their role instead of sharing the main account password.
Choose how to add access
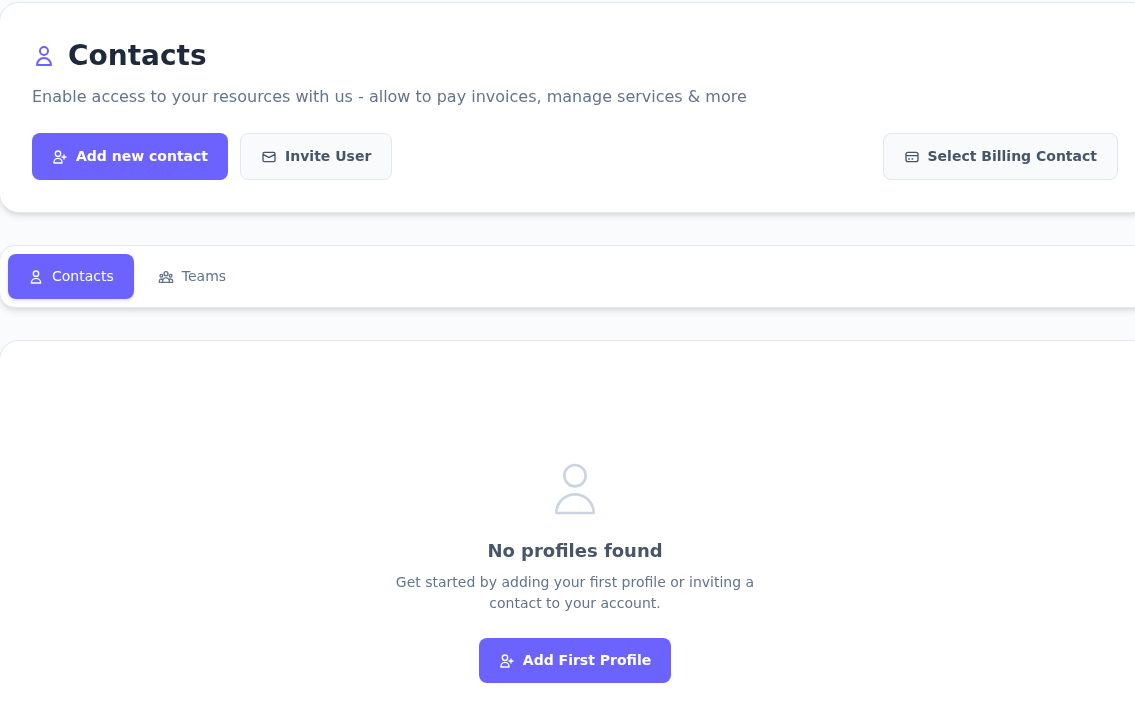
Open Identity & Access Management in the top-right profile menu. Contacts contains contact creation, invitations and billing-contact selection. Teams opens team management.
Contacts is the starting point for granting people access.
Step 1: Choose contact creation or invitation
- Choose contact creation or invitation
Add new contact opens the detailed contact form; Invite User opens the email-and-name invitation form.
- Use Teams for team access
The Teams tab below the contact actions leads to team creation and invitations.
- Open billing-contact selection separately
Select Billing Contact chooses the person’s details used for billing/payments.
No profiles found means this list has no contact; it is not a main-account deletion notice.
| Your task | Control to open |
|---|---|
| Enter a person's details and sign-in password | Add new contact |
| Prepare a user invitation using an email address | Invite User |
| Group existing people into a team | Teams → Add new team |
| Prepare team access using an invitation code | Teams → Invite Team |
| Choose whose details are used for billing/payments | Select Billing Contact |
No profiles found means no contacts appear in this list. It does not mean the main account was deleted.
Complete a new contact's details
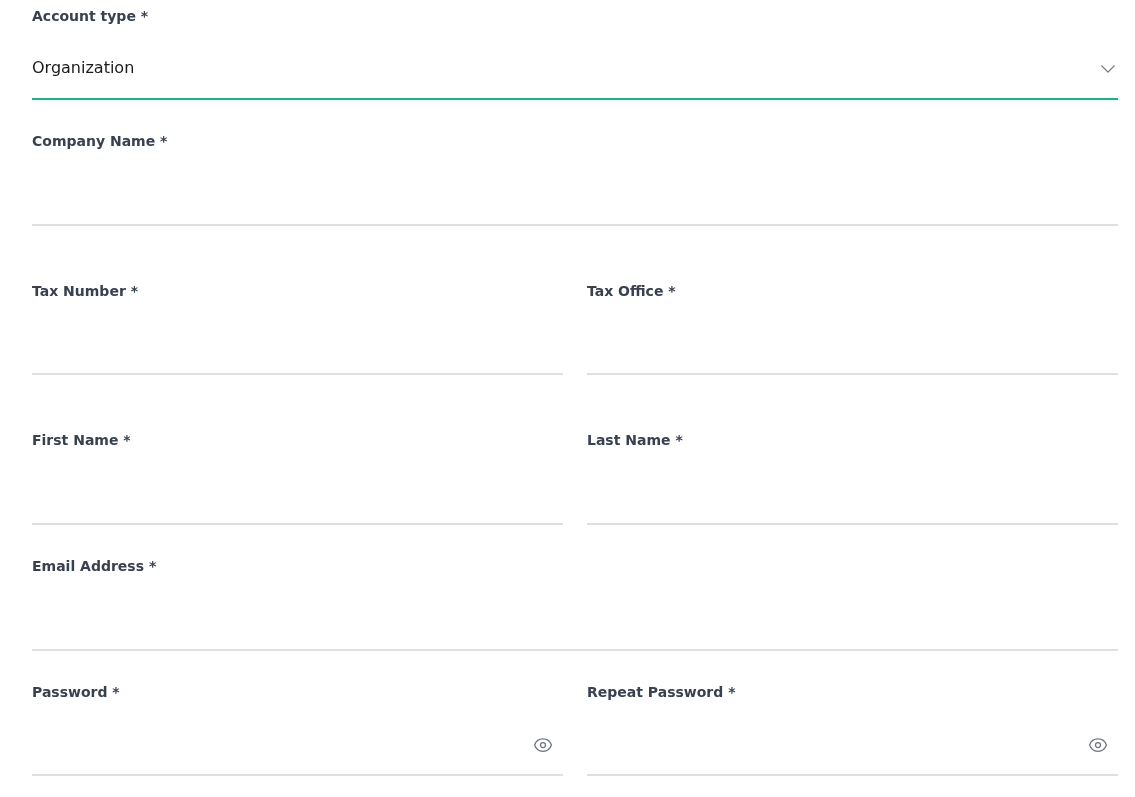
Open Add new contact. In Account type, choose Personal for an individual or Organization for a business. Fill in with the main profile details is the main-profile autofill control; check every copied detail when the contact is a different person.
Organization adds company and tax fields.
Step 1: Choose the account type
- Choose the account type
In Account type, Personal is for an individual and Organization is for a business contact.
- Read the company name and tax number
Company Name is the registered company name; Tax Number and Tax Office are the tax details.
- Enter the name, email and password
First Name and Last Name identify the person. Use a reachable Email Address and enter their sign-in password in both password fields.
The form remains empty and Organization was not saved. Complete required fields with accurate details.
- Enter the person's first name, last name and reachable email in First Name, Last Name and Email Address.
- Enter the same contact sign-in password in Password and Repeat Password. Do not reuse the main account password.
- For Organization, complete Company Name, Tax Number and Tax Office with the business's official details.
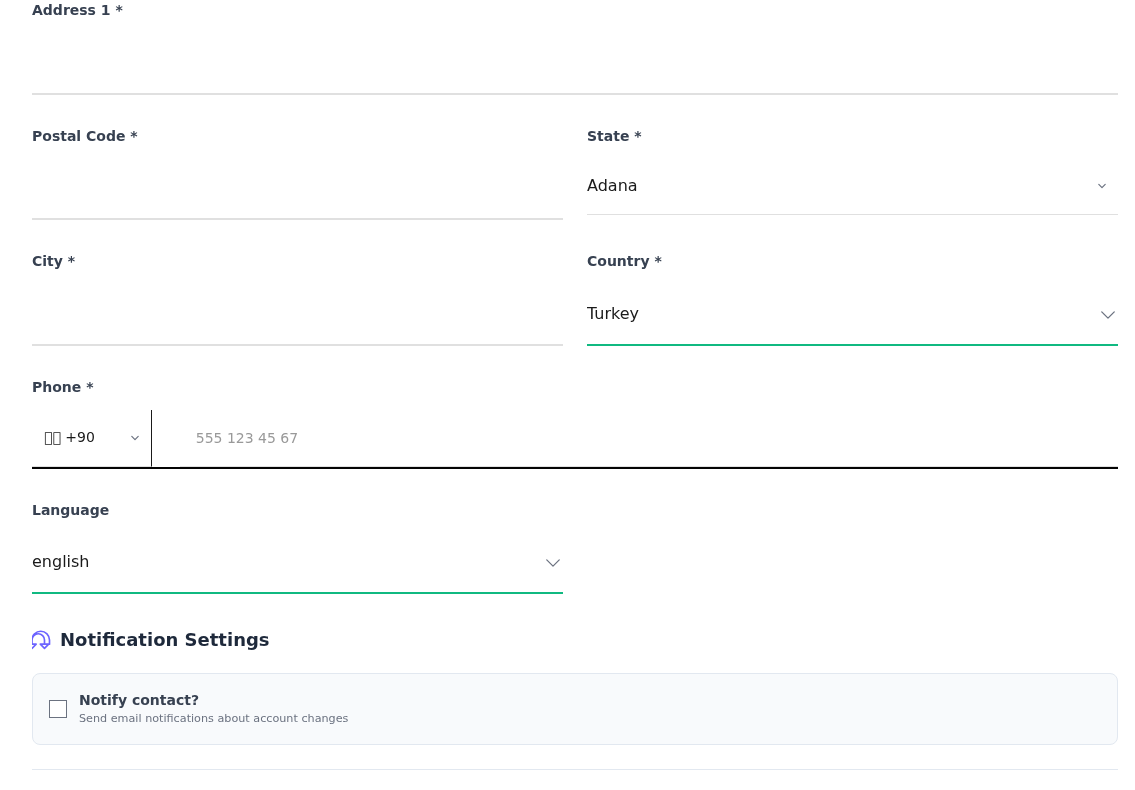
- Complete Address 1, Postal Code, State, City and Country. Choose the country first so the region list can update.
- Check the country code and number together in Phone. Select the contact's Language; the inspected form offers english, farsi, german and turkish.
Selecting Turkey refreshed the State list to Turkish regions, initially showing Adana. Choose the actual region. The country change did not change Language to turkish; review it separately.
Country selection and contact language are separate settings.
Step 1: Check the country and region
- Check the country and region
Selecting Turkey in Country refreshes State. Address 1 is the street address and Postal Code is the postal code.
- Select phone details and language separately
Check both the Phone country code and number. Choose turkish or another appropriate contact language in Language.
- Review Notify contact?
This checkbox concerns account-change emails. Action permissions are in Access Permissions below.
Adana is the first region shown after selecting Turkey. Choose the actual region; changing country did not change language.
Notification Settings → Notify contact? is for account-change emails. It is separate from Access Permissions below: receiving a notification and performing an action are different permissions.
Set access permissions before sending the form with Submit. Review the details and permissions, especially invoice payment and service management, against the person's actual role.
Invite a user
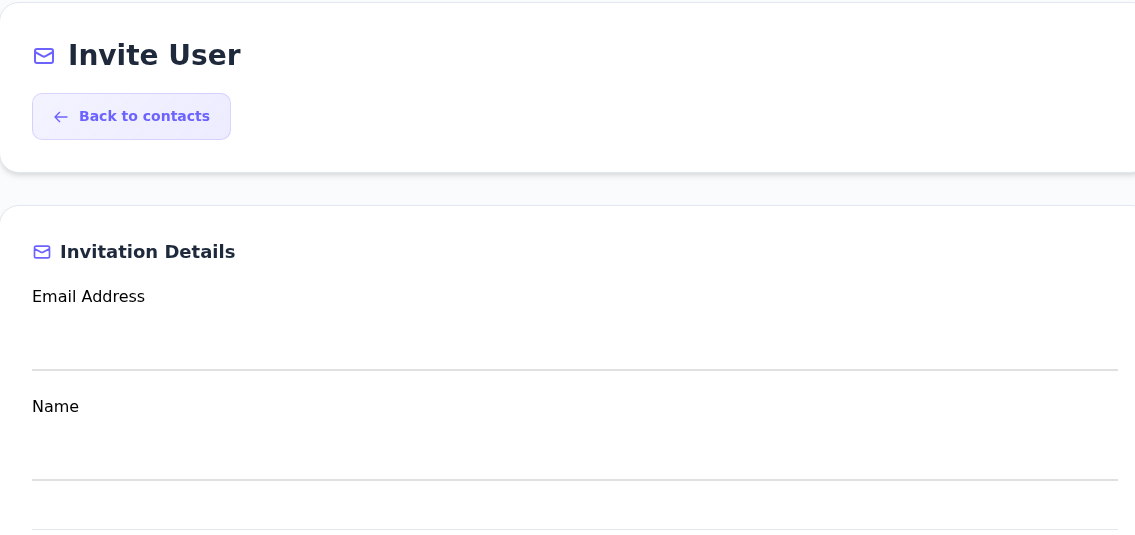
Open Contacts → Invite User, then complete Email Address and Name. This invitation form does not show the address and password fields of contact creation. Set Access Permissions, then use Submit to send the invitation.
Invite User is shorter than the new-contact form.
Step 1: Enter the address to invite
- Enter the address to invite
Carefully enter Email Address so the invitation goes to the intended person.
- Add the person’s name
Enter a recognizable Name, then continue to the permissions below.
No invitation was sent. Review Access Permissions below before using Submit.
Check the email address before sending. No invitation was sent for this guide, so there is no claimed acceptance or access-success screen. For your invitation, check the portal response and Contacts list; do not repeatedly submit if an error appears.
Choose a preset and review the individual permissions
Pre-made privileges provides a starting selection. Expand Billing, Support or Misc using its heading/arrow. A row checkbox selects that permission; a group checkbox selects permissions in that group. Wait for the boxes to update after choosing a preset.
The selected boxes show more detail than the preset name.
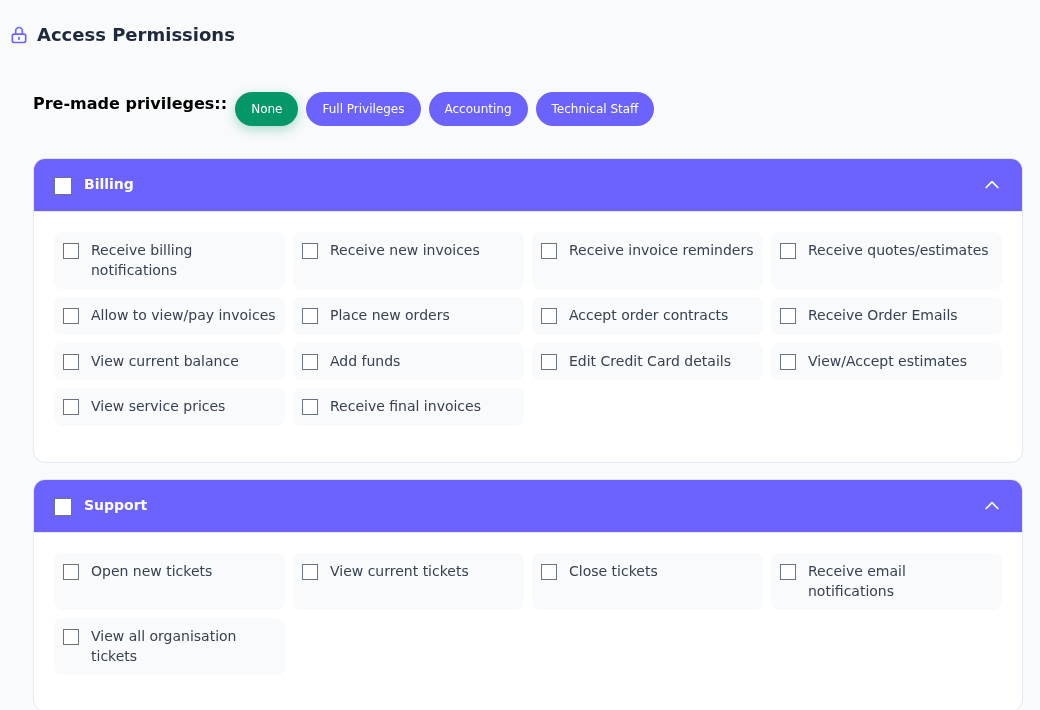
Step 1: Start with a preset
- Start with a preset
None clears permissions; Accounting, Technical Staff and Full Privileges select different sets. Wait for the boxes to update.
- Read the Billing permissions individually
Receiving notices, paying invoices and placing orders are separate rows. Select only those needed for the person’s role.
- Check access to all organisation tickets
Open new tickets, View current tickets and Close tickets are separate permissions. View all organisation tickets gives broader visibility.
Technical Staff also selects full service and domain control. None is selected here; no permissions were saved.
| Preset | Scope observed in the form |
|---|---|
| None | Clears all permissions so you can select them individually. |
| Accounting | Selects all 14 Billing permissions below, including order and payment-detail actions. It is more than invoice viewing. |
| Technical Staff | Selects the five Support permissions plus Full control over services and Full control over domains. |
| Full Privileges | Selects every Billing, Support and Misc permission and full service/domain control. |
Technical Staff is broader than ticket access. If someone only needs to follow tickets, start with None and choose the necessary Support rows. Review selected boxes rather than relying on the preset's name.
Billing permissions
| Exact label | Purpose |
|---|---|
| Receive billing notifications | Receive billing notifications |
| Receive new invoices | Receive new-invoice notices |
| Receive invoice reminders | Receive invoice reminders |
| Receive quotes/estimates | Receive quote/estimate notices |
| Allow to view/pay invoices | View and pay invoices |
| Place new orders | Place orders |
| Accept order contracts | Accept order contracts |
| Receive Order Emails | Receive order emails |
| View current balance | View the current balance |
| Add funds | Add account funds |
| Edit Credit Card details | Edit card details |
| View/Accept estimates | View and accept estimates |
| View service prices | View service prices |
| Receive final invoices | Receive final-invoice notices |
Support permissions
| Exact label | Purpose |
|---|---|
| Open new tickets | Create tickets |
| View current tickets | View existing tickets |
| Close tickets | Close tickets |
| Receive email notifications | Receive support email notifications |
| View all organisation tickets | View the organisation's complete ticket set |
Miscellaneous and resource permissions
| Exact label | Purpose |
|---|---|
| Modify main profile details | Change the main profile |
| Manage service groups | Manage service groups/projects |
| View emails history | Read sent-email history |
| Receive generic emails | Receive general emails |
| Edit allowed IP access | Change allowed IP access |
| Manage SSH Keys | Manage portal SSH keys |
| Add / Edit contacts | Create or edit contacts |
| Manage Teams | Manage teams |
| Access affiliates section | Access the affiliate area |
| Access cart/product portfolio | Access the cart/product portfolio |
| Receive file-related emails | Receive file-related emails |
| Full control over services | Full service control |
| Full control over domains | Full domain control |
Misc includes permissions for account details, contacts, keys and resources.
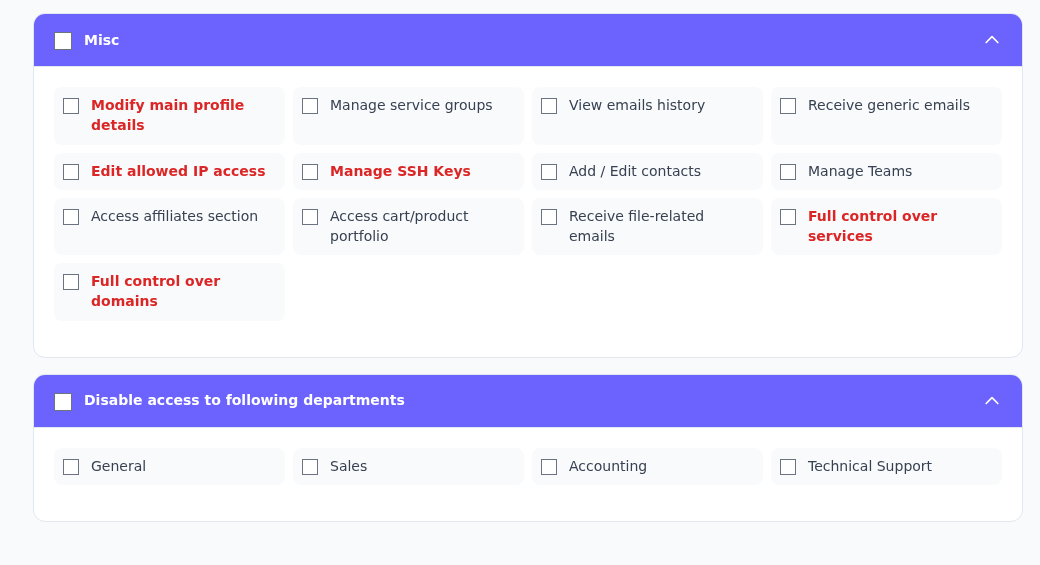
Step 1: Review full control over domains
- Review full control over domains
Full control over services and Full control over domains are broad permissions. Do not assume a support role always needs them.
- Select departments to block
Disable access to following departments lists General, Sales, Accounting and Technical Support. These boxes do not grant access.
Department selection is a deny list: selected departments become inaccessible. All boxes are empty in this screenshot.
Department restrictions are a deny list
Expand Disable access to following departments to see General, Sales, Accounting and Technical Support. Selecting a department here disables access to it. Do not select these boxes to grant support access; review them alongside the Support permissions.
Create a team or use a team invitation code
Go to Contacts → Teams → Add new team. Enter a recognizable Name and a Description of the team's purpose. Select existing people under Team Members, set Access Permissions and send with Submit.
Add new team creates a team from existing contacts.
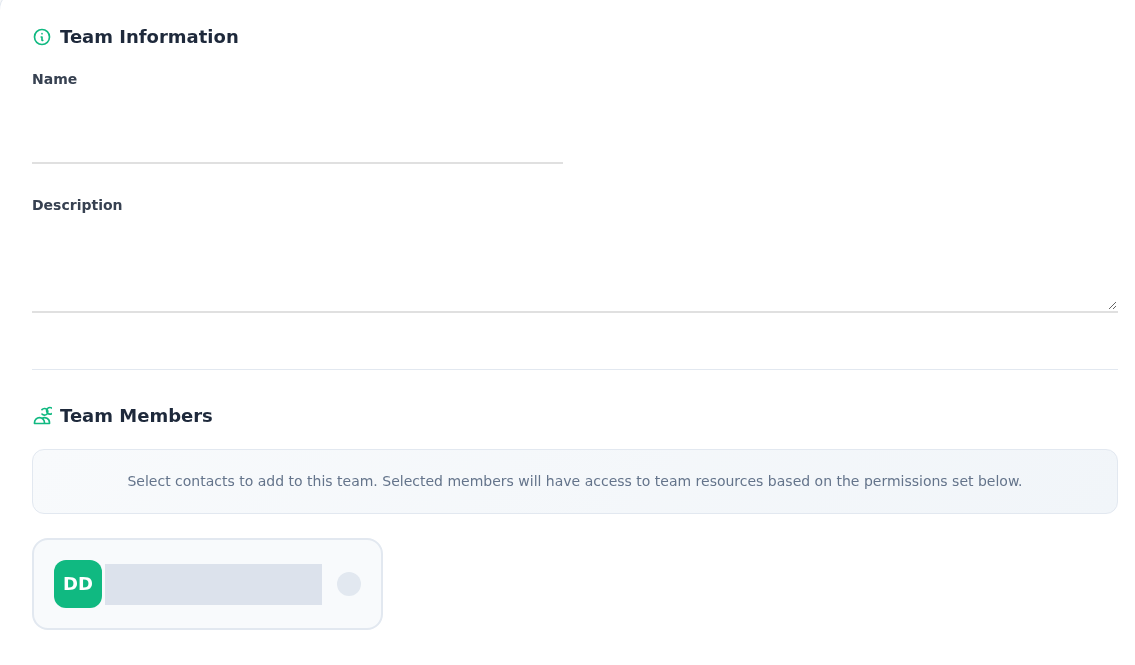
Step 1: Describe the team and its role
- Describe the team and its role
Enter the team Name and describe its purpose in Description.
- Choose members from existing contacts
Use the checkbox in Team Members to include a contact, then review the team permissions separately.
Member details are masked. No team was saved; Access Permissions and Submit are further down.
Invite Team is a different form. After Name and Description, it shows Invitation Code → Invite Code. It uses a team code rather than the email field in Invite User. If you do not have the code, confirm it with the team instead of entering a guess.
Invite Team asks for an Invite Code rather than an email address.
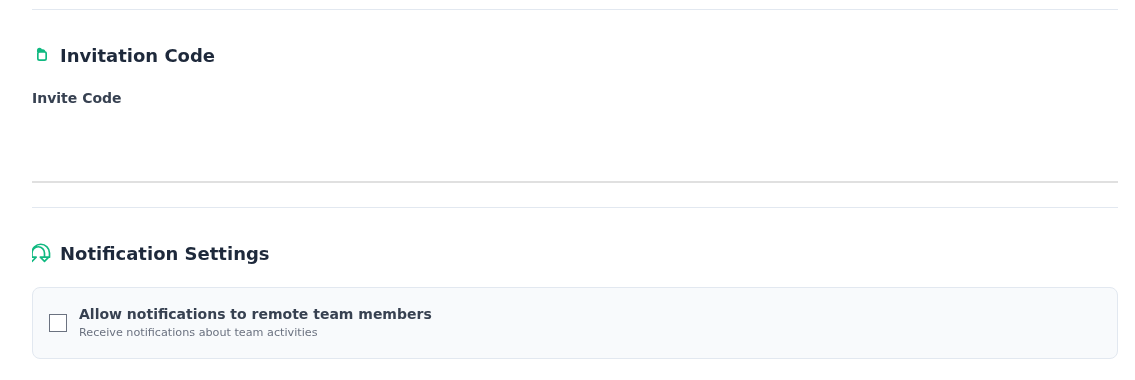
Step 1: Enter the correct team code
- Enter the correct team code
Use the Invite Code field under Invitation Code for the code confirmed with the team.
- Review remote-team notifications
Allow notifications to remote team members is a notification preference; select access permissions separately.
No code was entered and no invitation was sent. Name/Description are above; Access Permissions follows.
Allow notifications to remote team members controls the notification preference. Set access separately in Access Permissions. Before Submit, review the code, notification setting and permissions together.
Select a billing contact
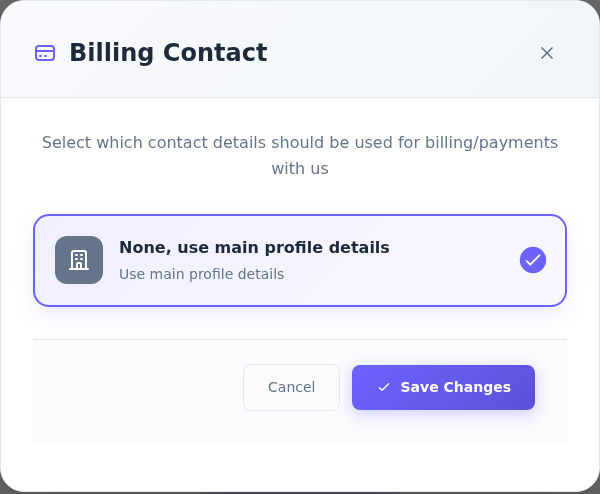
Contacts → Select Billing Contact opens Billing Contact, for choosing the contact details used in billing/payments.
Billing Contact chooses the source of billing details.
Step 1: Read the main-profile option
- Read the main-profile option
None, use main profile details uses the main account details. If another contact is available, verify its information.
- Save or cancel
Save Changes saves the selection; Cancel closes the window. Contact support for corrections to past invoices.
Only the main-profile option appears because there is no linked contact. No change was saved.
The inspected account has no linked contact, so only None, use main profile details is shown. If another contact is available, review its details, select it and use Save Changes. Use Cancel to leave without saving. Do not assume this changes invoices already issued; contact support about those corrections.
Protect account access with IP rules and two-factor authentication, and review changes in account history. Use project management to organize services separately from teams.