Customer account security: IP access rules and two-factor authentication
Two separate controls protect account access: IP Access Control concerns the connections allowed to reach your account; Two-Factor Auth concerns an additional sign-in verification method. These are separate from firewall rules on your server.
Open the security center
After signing in, follow Account Settings → Security. Security Center contains IP Access Control, SSH Keys and Two-Factor Auth. Your Current IP Address shows the public IP of the connection you are using, not the address of a server you rented.
Prepare an IP access rule
IP Access Control limits the connections allowed to access the customer account.
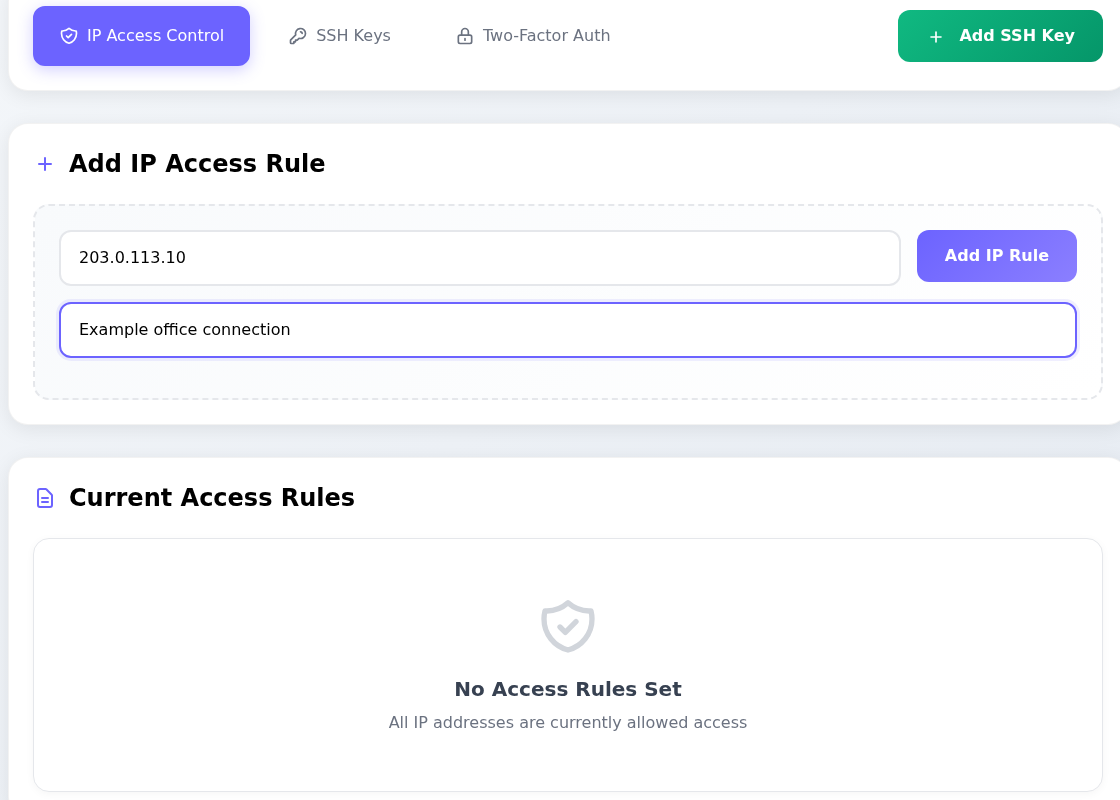
Step 1: Enter the address to allow
- Enter the address to allow
Enter the public IP of your own connection in the first field. Do not confuse it with your server IP.
- Add a description and check
Enter a recognizable Comment. Add IP Rule saves it; an incorrect rule can lock you out.
- Read the current rules
No Access Rules Set and All IP addresses are currently allowed access mean this example has no IP restriction.
203.0.113.10 is an example address. No rule was saved; the network-information card is outside the crop.
In Add IP Access Rule, enter the address you want to allow. Use Comment for a description you will recognize later, such as “Office static connection.” Add IP Rule saves the rule. Before saving, verify that the address belongs to your connection and matches the public IP you use to access the portal.
No Access Rules Set and All IP addresses are currently allowed access under Current Access Rules mean this example account has no IP restrictions. They do not mean it has no password.
If your connection can change: Home, mobile and VPN connections may use different public IPs. Avoid locking yourself out with an incorrect allowlist. Confirm your stable address and recovery contact route before applying a restriction.
Use the correct address format
The field accepts an address or a network range, with different scopes.
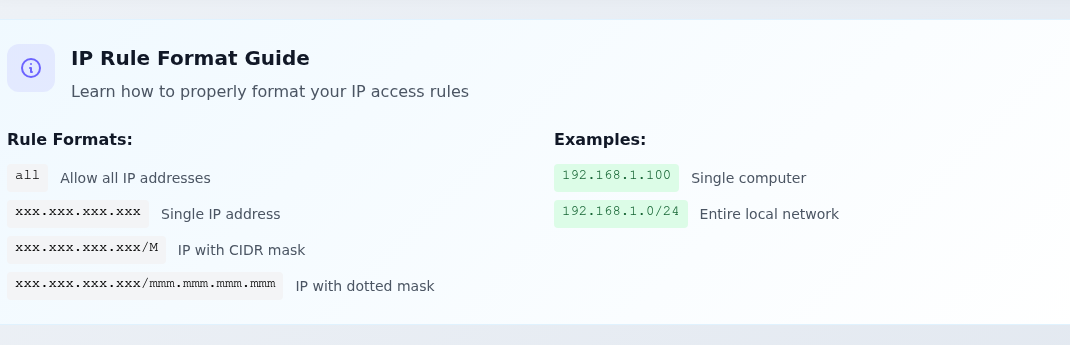
Step 1: Distinguish one address from a network range
- Distinguish one address from a network range
Single IP address means one address; IP with CIDR mask means a network range. all allows every address.
- Check the network mask
IP with dotted mask uses a dotted network mask. A broad range may allow other addresses on that network too.
The addresses are formatting examples. Do not save them in place of your own connection.
| Format shown | Meaning |
|---|---|
| all | Allows every IP address; it does not restrict access to one network. |
| xxx.xxx.xxx.xxx | One IPv4 address. |
| xxx.xxx.xxx.xxx/M | A network range in CIDR notation. /32 is one IPv4 address; /24 covers a wider group. |
| xxx.xxx.xxx.xxx/mmm.mmm.mmm.mmm | A rule using a dotted network mask. |
The addresses in the guide illustrate formatting. 203.0.113.10 is an example address, not your connection. A broad network rule also allows other addresses within that range.
Choose a two-factor authentication method
Two-Factor Auth opens Two-Factor Authentication. Disabled means additional verification is not enabled. Verifying your registration email does not automatically enable this feature.
The status card and setup links are on the same page.
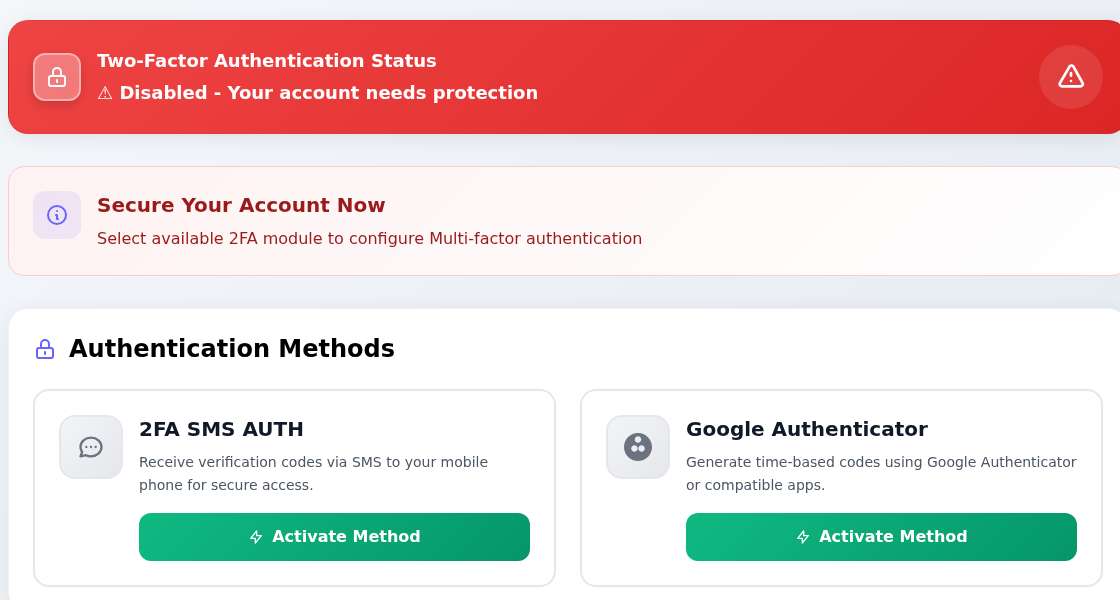
Step 1: Read the current status
- Read the current status
Disabled means two-factor authentication is not enabled. Email verification does not enable it automatically.
- Open authenticator app setup
Activate Method on the Google Authenticator card opens setup.
The account remained Disabled. For the inspected account, the SMS option returned to this list.
- Google Authenticator: Uses codes from a compatible authenticator app. Activate Method on that card opens setup.
- 2FA SMS AUTH: The entry point for SMS verification. For this demo account, the link returned to the method list without showing a phone or SMS-code form. If this happens to you, contact support instead of assuming a code was sent.
Review the authenticator setup screen
This is the portal’s actual Google Authenticator setup view.
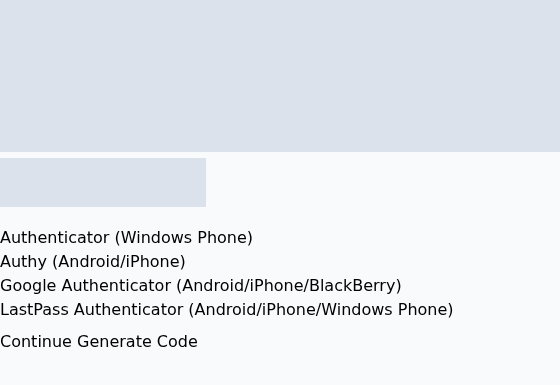
Step 1: Keep the QR and setup key private
- Keep the QR and setup key private
Add your own account’s setup information to your authenticator app. Grey areas cover the private information in this guide.
- Follow the setup prompt
Continue proceeds with setup. After finishing, verify the enabled status on the methods page.
The QR and setup key are covered by opaque masks. Continue and Generate Code were not used; old app names shown are not a recommendation list.
The Google Authenticator setup shows a QR/setup-key area and Continue. Add your own account's setup information only to your own authenticator app. Treat it as a credential; the QR and setup key are hidden in the screenshot.
Continue was not used to enable the method in this example. After completing your own setup, return to the methods page and verify that the status is enabled. If you lose access, explain the step you reached through the contact page, without sending a verification code or setup key.
Use the portal SSH key guide to manage public keys, or account history to review suspicious activity.