Set language, time zone and domain preferences in the DCHost portal
List length, time zone and new-domain preferences are under Settings in the DCHost customer portal. Portal language is changed from the profile menu at the top right. This guide explains where each choice is and what it affects.
Before you start: Sign in to the portal. Note the current value before changing a preference so you can select it again if needed. These screenshots show the English interface.
1. Choose list length and time zone
Open Settings in the top navigation. On Account Settings, go to Settings → General.
The General tab in Account Settings contains these two preferences.
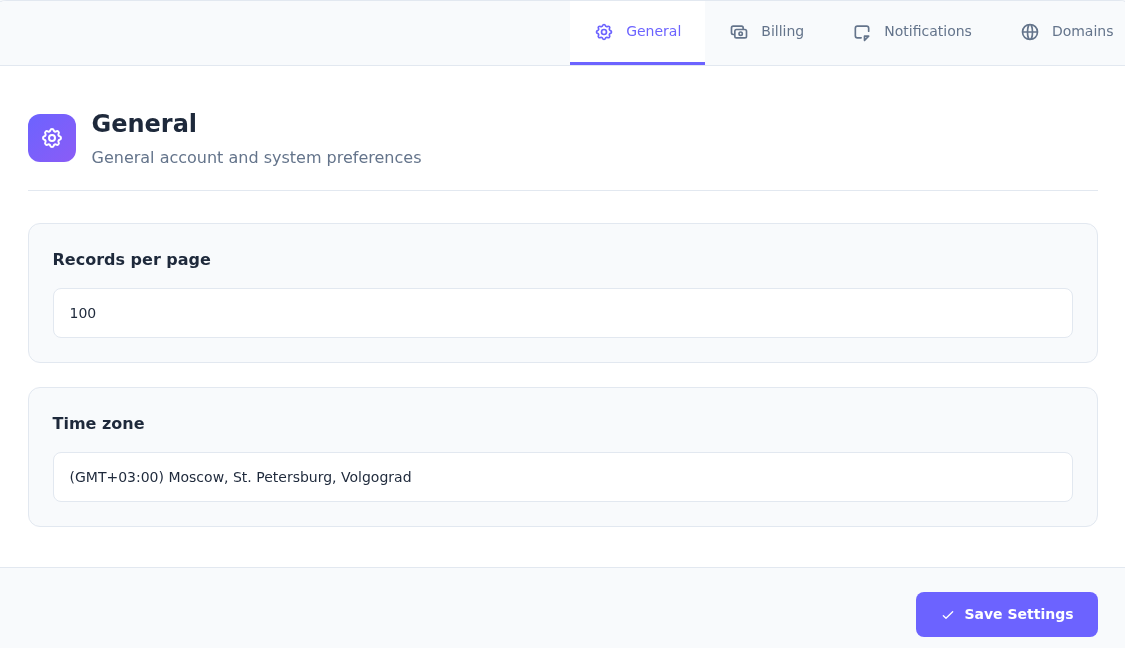
Step 1: Choose how many records a page shows
- Choose how many records a page shows
Choose 25, 50, 100 or 200 in Records per page. Use a lower value for shorter lists or a higher one to see more entries together.
- Choose the time zone for your location
Select the appropriate city in Time zone. This account preference does not change your server operating system’s time zone.
- Save the choices
Select Save Settings. Reopen General afterwards to check the selected values.
100 and Moscow are the demo account’s current choices. The list includes (GMT+03:00) Istanbul for Türkiye. No settings were saved for this guide.
| Preference | Purpose |
|---|---|
| Records per page | Number of entries shown on one list page. Options are 25, 50, 100 and 200. |
| Time zone | The portal account's time zone preference. The list includes (GMT+03:00) Istanbul for Türkiye. |
| Save Settings | Saves the choices. |
Choose a lower record count for shorter pages or a higher count to inspect more entries together. This setting does not delete service or invoice records.
Time zone is not your server operating system's time zone. To change the time used by a server application, check the operating system and application settings separately.
After selecting Save Settings, reopen General and check the selected values. You do not need to copy 100 or Moscow from the demo account screenshot.
2. Choose nameserver defaults for new domains
Open Domains on the same settings page. This section controls defaults for new domain registrations. It is not where you edit an existing domain's A, MX or TXT records.
Domains shows nameserver and DNSSEC preferences for new registrations.
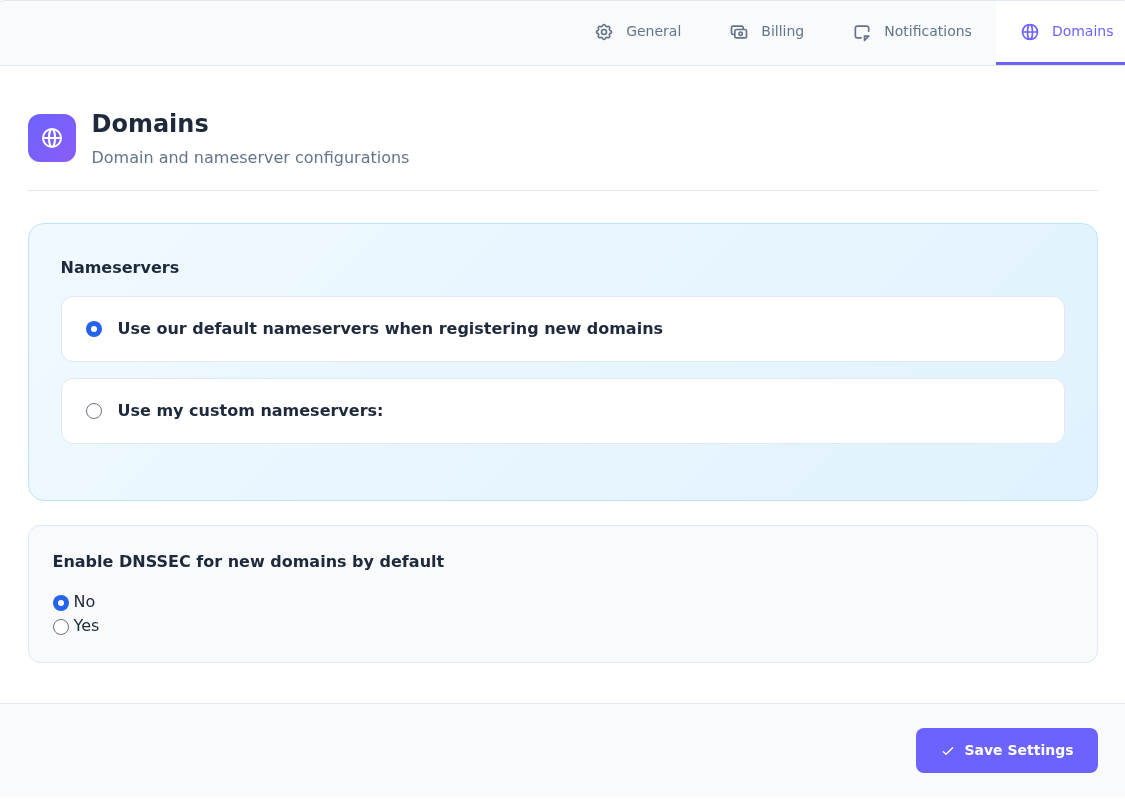
Step 1: Find the default nameserver option
- Find the default nameserver option
Use our default nameservers when registering new domains selects the portal’s default nameservers for new registrations.
- Choose the DNSSEC preference for new registrations
Choose No or Yes under Enable DNSSEC for new domains by default. This preference alone does not confirm valid, active DNSSEC on an existing domain.
- Save with Save Settings
Review both nameserver and DNSSEC choices and select Save Settings. Review the summary of your next domain order as well.
This area does not edit DNS records for an existing domain. Check DNSSEC support with the domain extension and DNS provider separately.
There are two choices under Nameservers:
- Use our default nameservers when registering new domains: Use the portal's default nameserver preference for new registrations.
- Use my custom nameservers: Enter the nameservers provided by your own DNS provider.
If using custom nameservers, prepare the exact hostnames supplied by your DNS provider. Do not guess an ns1 or ns2 hostname.
Use my custom nameservers reveals four separate fields.
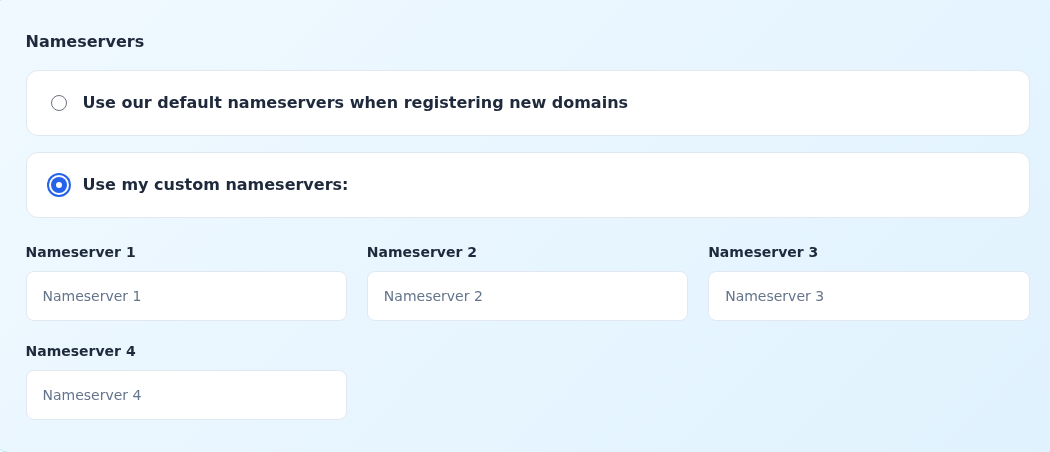
Step 1: Select custom nameservers
- Select custom nameservers
Select the circle beside Use my custom nameservers. Nameserver 1–4 appear below.
- Enter each supplied hostname separately
Starting with Nameserver 1 and Nameserver 2, enter the hostnames supplied by your DNS provider. Use the third and fourth fields if additional addresses were supplied.
The option was selected only to reveal the fields and was not saved. Do not guess nameserver addresses for DCHost or any other provider.
Selecting Use my custom nameservers reveals Nameserver 1, Nameserver 2, Nameserver 3 and Nameserver 4. Enter each supplied hostname in its own field. Use the third and fourth fields if your provider supplied additional addresses. Enter the nameserver hostname provided, not a web page URL beginning with https://.
The custom option was selected only to reveal the fields for this guide. No empty nameserver setting was saved.
For an existing domain: Use the nameserver change guide. For website, mail and verification records, use the DNS records guide.
3. Review DNSSEC and save
Enable DNSSEC for new domains by default offers No and Yes. Yes selects the preference to enable DNSSEC by default for new domains.
Saving this choice does not demonstrate that all existing domains have a valid DNSSEC chain. Support from the domain extension, registration service and DNS provider also matters. If unsure, contact support with the domain and DNS provider details.
Review the nameserver and DNSSEC choices, then select Save Settings. Reopen Domains and check the selected values. Also review the summary when placing a new domain order.
To restore a previous preference: Select the value you noted earlier and save it again. This does not automatically reverse DNS changes on domains already registered.
4. Open the portal language menu
Select the account icon at the top right and choose Localization.
Localization is in the account menu at the top right.
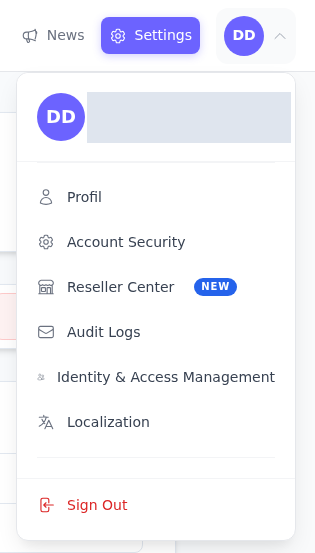
Step 1: Open the profile icon
- Open the profile icon
Select the account icon showing your initials at the top right. This example shows DD.
- Select Localization
Select Localization in the menu to open Select Language.
This menu controls the portal language. The documentation site has its own language selector.
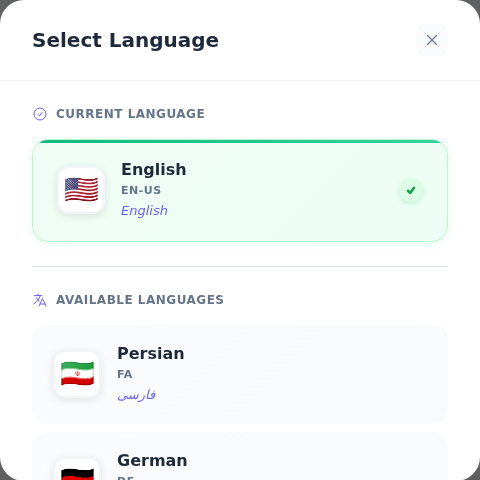
In Select Language, Current Language shows the current choice. The screenshot has English selected. Other options appear under Available Languages.
Current Language in Select Language shows the selected language.
Step 1: Check Current Language
- Check Current Language
English in the green card is the selected language for this session. Your session may have a different selection.
- Scroll inside the language list
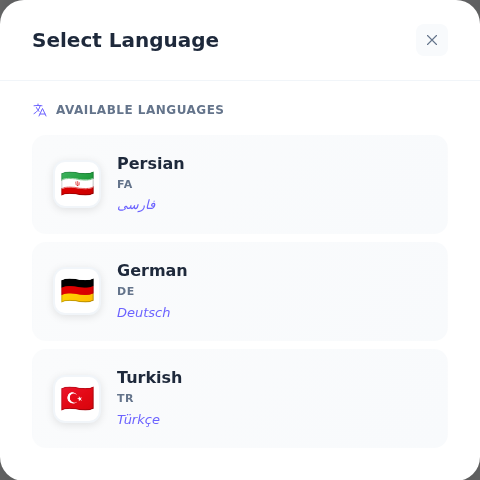
Scroll down within Available Languages. Turkish is farther down the list.
The language was not changed for this capture. Scroll inside the dialog to see the other languages.
To choose Turkish, scroll down inside the dialog and select Turkish / TR / Türkçe. The dialog also includes Persian and German.
German and Turkish are visible farther down the language list.
Step 1: Select Turkish for the Turkish interface
- Select Turkish for the Turkish interface
Select the row labelled Turkish, TR and Türkçe. Check the displayed language when the portal reopens.
- Close the dialog to leave the language unchanged
Use the close button at the top right if you do not want to change the language. You do not need to select a language row.
To return to English, reopen this menu and choose English. Language selection is separate from account country and time zone.
Check the selected language when the portal reopens. To return to English, choose English from the same menu. To leave without a change, use the close button at the top right of the dialog.
Language selection is separate from account country and time zone. To change the documentation language, use the documentation site's own language selector.
If you cannot find a setting
| Situation | What to do |
|---|---|
| Turkish is not visible | Scroll down inside the Select Language dialog. |
| Türkiye is not in the time zone list | Look for Istanbul, rather than the country name. |
| Custom nameserver fields are missing | Select Domains → Use my custom nameservers. |
| A changed preference does not persist | Check that you used Save Settings in the relevant form and that no error is displayed. |
| You cannot find an existing DNS record | This is not the DNS record editor; use the DNS guide. |
For email or Telegram alerts, open notification preferences. For phone and address details, open the profile guide.