Account activity, sent email and portal notification history
Use Logs to find a sign-in or account event, Emails to find a sent-email record and Notifications for alerts inside the portal. These lists answer different questions.
Open the right history page
The top-right profile menu contains Audit Logs. In the inspected interface it opens Portal Notifications directly. Select Logs on that page to view activity records.
| Tab | What it shows |
|---|---|
| Logs | Account events with date, description and status |
| Emails | Sent-email address, subject and date records |
| Credit Logs | Balance movements; see payment history |
| Notifications | Portal alerts and links to their related records |
Search account activity
Logs opens Account History. Select Search to reveal the search and date controls.
Filters appear above the table after selecting Search.
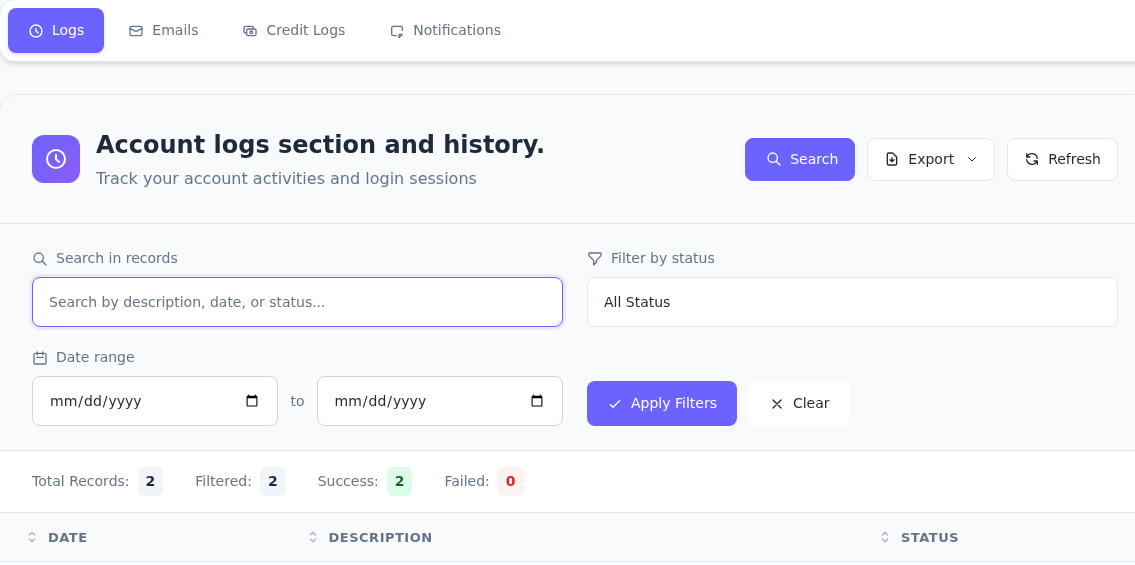
Step 1: Open the search controls
- Open the search controls
Search shows the filters; Refresh reloads the list. Export is the export control.
- Choose the status filter
Enter a short term in Search in records, then choose All Status, SUCCESS or FAIL in Filter by status.
- Apply a date range
Date range sets the start and end dates. Apply Filters applies them; Clear removes the filters.
Record rows are outside this crop. SUCCESS describes a logged event; it does not by itself prove server provisioning.
- Enter a short event-related term in Search in records. Using a term from the displayed description helps match the record.
- Choose All Status, SUCCESS or FAIL in Filter by status. All Status includes both outcomes.
- Set the start and end dates under Date range. A narrow range can exclude the record you need.
- Use Apply Filters to search, Clear to remove filters or Refresh to reload the list.
Export is the export control; no file was downloaded during this inspection. Check exported material for IP addresses and account/transaction information before sharing it.
Interpret the record status in context
The table has DATE, DESCRIPTION and STATUS columns. Total Records, Filtered, Success and Failed summarize the list. SUCCESS applies to the event described in that row: creating an order record, for example, does not prove a server was provisioned. Check the service page for service status.
Find a sent-email record
Emails opens Email History. Find the message using EMAIL ADDRESS, SUBJECT and DATE SENT. View is the message-view control; Refresh reloads the list.
Email History is the list of sent-message records.
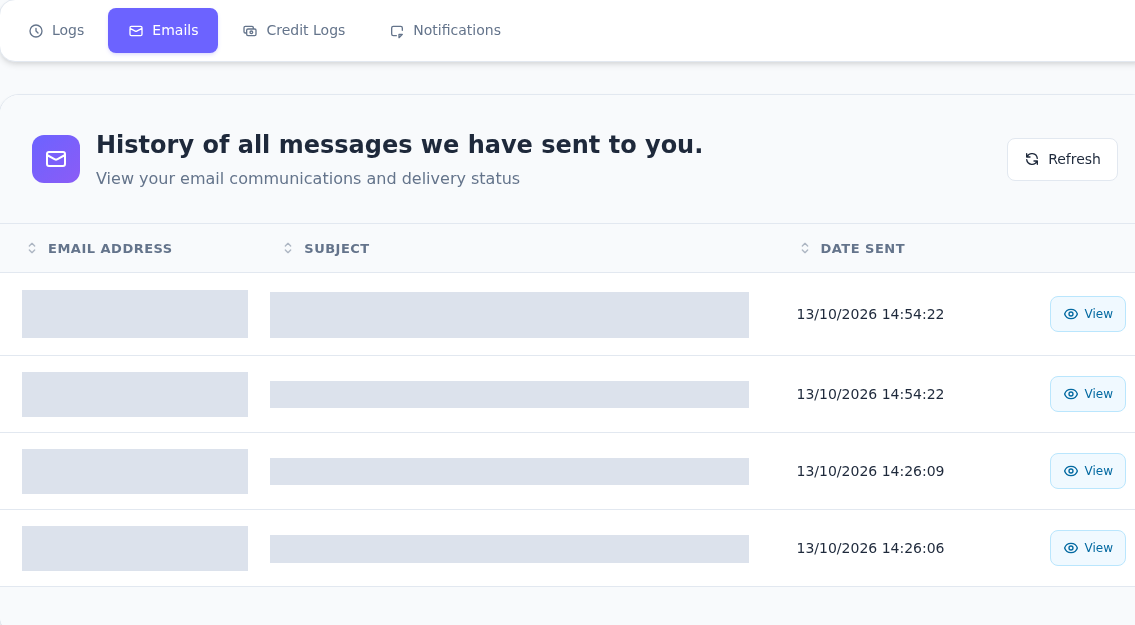
Step 1: Open Emails
- Open Emails
Emails between Logs and Credit Logs opens message history.
- Check the sent date
EMAIL ADDRESS is the recipient, SUBJECT is the topic and DATE SENT is the sent date.
- Open the relevant message
View on the relevant row opens that message. Do not share a message containing a code or private link.
Email addresses and account-specific subjects are masked. A record is not proof of inbox delivery.
Check the subject and date together when looking for an invoice, order or account message. A record in Email History does not prove delivery to your inbox. Check spam/junk folders and the registered address separately.
Do not share messages containing verification codes, sign-in links or account details. Mask addresses and related reference numbers in screenshots sent for help. To change notification preferences, use the notification settings guide.
Follow portal notifications
Notifications shows DATE, SUBJECT, RELATED TO and ACTION. View opens the related record.
Notifications lists alerts inside the portal.
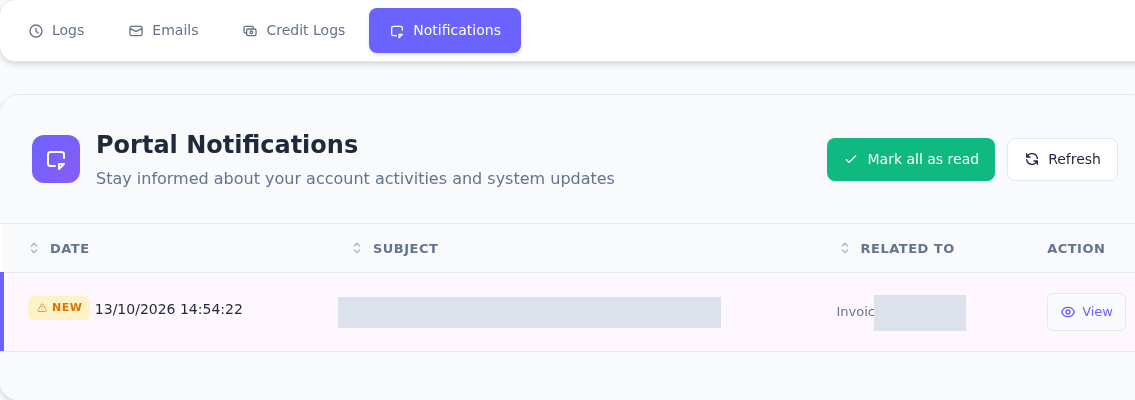
Step 1: Select Notifications
- Select Notifications
Audit Logs in the profile menu also opened this page in the inspected interface.
- Distinguish read status from transaction status
Mark all as read only changes notification read status. Refresh reloads the list.
- Use View to open the related record
Open the record with View under ACTION; verify invoice payment status on the invoice itself.
Account/transaction references are masked. Mark all as read does not pay or activate a service.
Mark all as read marks notifications as read. It does not pay invoices or activate pending orders. If a notification concerns an invoice, verify payment status on the invoice itself.
If you find unfamiliar activity
Read the date and description first, and check whether an authorized teammate performed the action. If you suspect an unfamiliar sign-in or change, review account security and contact/team access.
Include the date, displayed description and your concern in a support ticket. Do not include passwords, verification codes or private SSH keys. If you cannot access the portal, use the contact page.