Add an SSH public key to the customer portal and review the key list
An SSH key is an authentication method for connecting to a server. The public key goes into the relevant server or portal field; the private key stays on your computer. If you do not have a key yet, start with the SSH key creation guide.
Open the portal key list
Follow Account Settings → Security → SSH Keys. This tab in Security Center shows SSH Keys Management.
SSH Keys manages public keys stored in the portal.
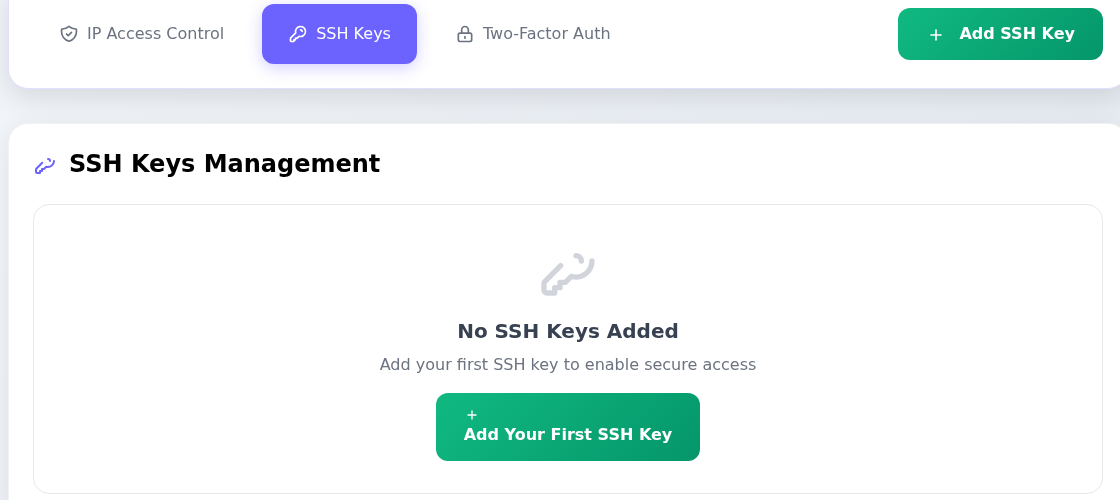
Step 1: Select SSH Keys
- Select SSH Keys
Select SSH Keys in Security Center to open SSH Keys Management.
- Open the add-key dialog
Select Add Your First SSH Key below No SSH Keys Added. Add SSH Key at the top serves the same purpose.
An empty portal list does not prove that no keys were added manually to existing servers.
No SSH Keys Added means there is no key in this portal list. It does not tell you whether a key was previously added manually inside an existing server.
Use Add SSH Key, or Add Your First SSH Key in the empty list, to open the form.
Enter the key name and public key separately
Add New SSH Key asks for two pieces of information.
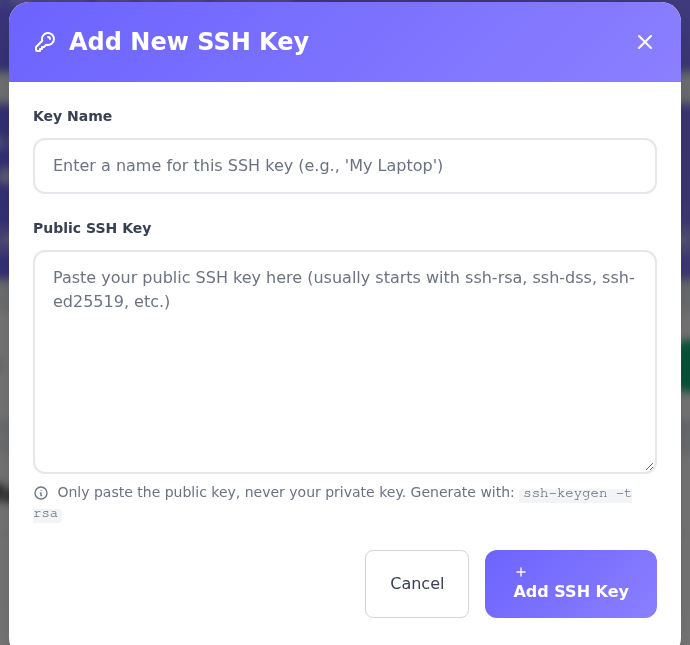
Step 1: Give it a recognizable name
- Give it a recognizable name
Enter a label such as “Work computer” in Key Name; it is not a server password.
- Paste the public key contents
Paste the complete public key file contents into Public SSH Key. Do not use the filename or private key.
- Review and save
Add SSH Key submits the record; Cancel closes the window. Check the list after saving.
No key was saved in this empty form. Never share the private key or its passphrase.
- Enter a recognizable label in Key Name, such as “Work laptop.” This field is not your password.
- Paste the contents of your public key file into Public SSH Key. Use the contents, not the filename, and do not truncate the text.
- Check the name and key, then submit with Add SSH Key inside the window. Use Cancel to close it without adding a key.
Never paste a private key file or content beginning with BEGIN ... PRIVATE KEY here. Keep the private key's passphrase private too. This guide inspected the empty form; no key was saved.
Check the portal record separately from server access
After saving, review SSH Keys Management again. A key appearing in the portal does not prove it was applied automatically to every existing server. Check SSH Key when placing a new VPS/VDS order and confirm the access method provided for the service.
When connecting, you use the matching private key on your own device. Confirm a new key works in a separate session before removing an existing access method. Use the SSH troubleshooting guide to distinguish Permission denied from network connection errors.
If someone needs permission to manage portal keys, review Manage SSH Keys in the contacts and teams guide.