How to install WordPress with cPanel: step-by-step guide
WordPress can run a company website, blog or content site. This guide is for a new installation. If you already have a working site, follow WordPress migration; do not start a new installation over its files.
Before you start
- Check that your hosting service is active.
- Confirm that the domain points to this hosting and its HTTPS connection does not show a browser certificate warning. A WordPress subdirectory that has not been created yet may not open; check the domain connection first.
- Back up existing files and databases before working in a directory that already contains a site. For a separate test installation, choose an unused directory.
- Before selecting HTTPS, check that the domain has a valid SSL certificate. Do not continue by dismissing a browser certificate error.
- Prepare a reachable administrator email address and a new, strong password.
Do I need to buy a domain? You can point an existing domain or subdomain that you are authorized to use to the hosting service. WordPress does not require you to transfer the domain to another registrar. Before changing an existing domain's DNS, check the impact on its website and email.
1. Sign in to the hosting account's cPanel
In the DCHost customer portal, open your project → Websites → your hosting service → Tools & Applications → cPanel Access → Click here to open cPanel. If a login form appears, use the hosting credentials under Access / Login Details.
This form signs in to the hosting control panel, rather than the customer portal.
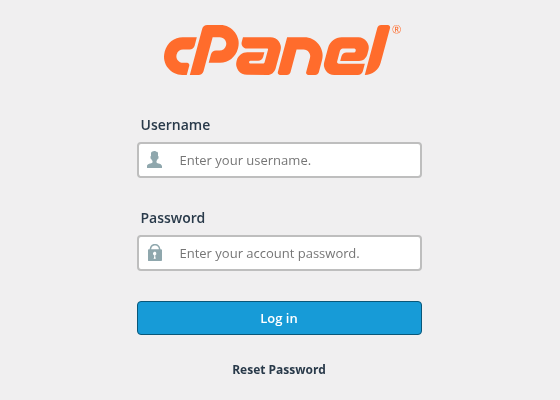
Step 1: Enter the hosting username
- Enter the hosting username
Use the username shown for this hosting service in Username, rather than your customer account email.
- Enter the hosting password
Use the current password for the same service in Password. Keep it distinct from portal and WordPress credentials.
- Continue with Log in
Review the details and select the button once. After signing in, open the Tools page.
The screenshot fields are empty. Use the current details under Access / Login Details for your hosting service.
Check cPanel's Tools page and the correct Primary Domain. For the full route, see the illustrated cPanel access guide.
2. Find the WordPress installation tool
From cPanel Tools → Software, open WordPress Manager by Softaculous. This tool lists WordPress installations and lets you start a new one.
The installer and PHP settings are separate links in the same group.
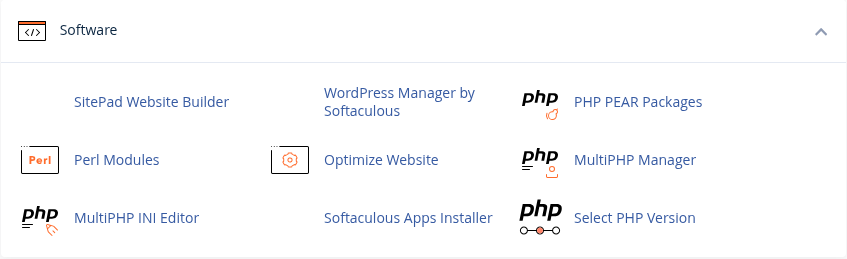
Step 1: Locate the application installer
- Locate the application installer
Softaculous Apps Installer opens the installation tool for applications such as WordPress.
- Identify the WordPress management link
WordPress Manager by Softaculous opens the WordPress management tool. The WordPress administrator account used to manage site content is separate.
Before a new installation, check the domain, directory and HTTPS status. Change PHP only after checking application compatibility.
If you do not have a WordPress installation yet, select Install a new copy in the empty installation list. The WordPress installation page opens with an Install tab. Software Setup defines the target address and version; site and administrator settings follow below.
WordPress Management lists installations and provides the new-installation link.
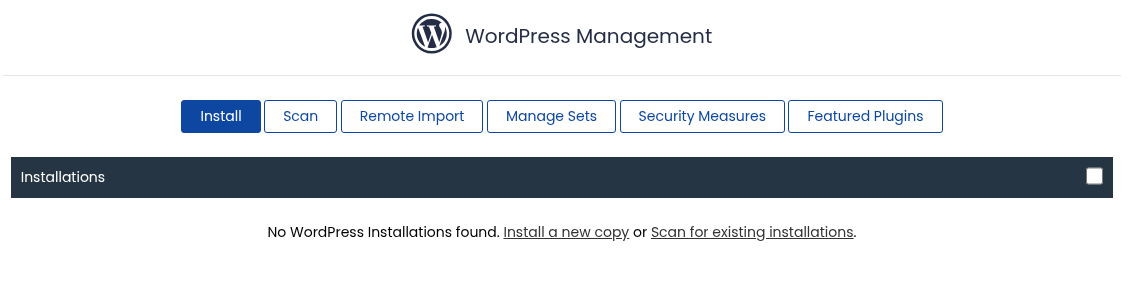
Step 1: Select Install a new copy
- Select Install a new copy
In the empty list, Install a new copy opens a new WordPress installation form. Do not start a new installation to move an existing site.
An empty installation list does not mean the hosting account has no website files. Check the intended installation folder separately.
3. Choose the domain and installation directory
Decide where WordPress should open before starting installation:
| Destination | Meaning |
|---|---|
https://example.com/ | WordPress opens at the domain's main address. Its document root must be available for the new installation. |
https://example.com/test/ | WordPress opens in a separate subdirectory. Confirm that test is not used by another site. |
https://blog.example.com/ | A separate subdomain is used; its DNS, hosting domain configuration and certificate need their own preparation. |
Review these fields under Choose Installation URL:
- Choose Protocol: Select
https://for a working, valid HTTPS connection. - Choose Domain: Select the domain for this installation.
- In Directory: For a separate installation, enter a new, unused folder name such as
test. You do not need to create the folder first; the installer creates it. Leave this field empty if WordPress should open at the domain’s main address. First confirm that an existing site does not use the document root; do not delete another site to make room. - Your installation URL: Read the complete resulting address. Its domain and directory must match the site you intend to create.
Choose the version you want to install selects the WordPress version. Available versions change over time; choose a supported version that meets your application requirements.
The three fields under Software Setup form the installation address.
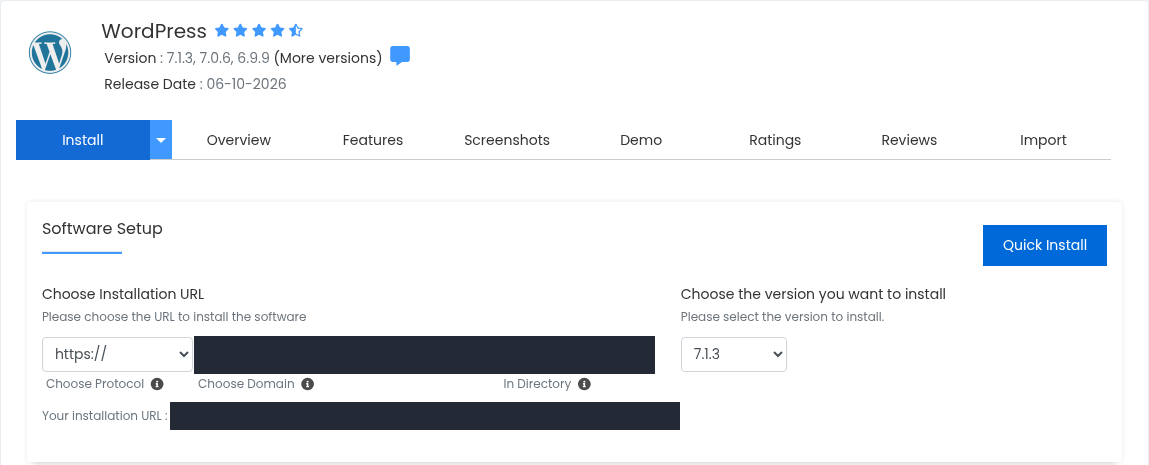
Step 1: Check the protocol
- Check the protocol
Before choosing https:// under Choose Protocol, verify a valid HTTPS connection for your domain.
- Choose the correct domain
Use Choose Domain to select the domain for this WordPress installation.
- Enter a new directory name
For a separate installation, enter an unused folder name in In Directory. You do not need to create the folder first.
- Read the complete resulting address
Check that the domain and folder under Your installation URL form the address you intend to use.
The domain, directory and full URL are redacted. Check your own complete target address instead of copying example values.
4. Check the HTTPS choice
Open the installation domain with https:// in another tab and check that your browser reports no certificate warning. Select https:// under Choose Protocol for a valid HTTPS connection. If DNS or the certificate is not ready, complete the DNS checks and SSL checks first.
5. Complete site and administrator details
Under Site Settings, enter your site name in Site Name and a short description in Site Description. Set up the WordPress administrator under Admin Account:
| Field | What to enter |
|---|---|
| Admin Username | The username you will use to manage WordPress. |
| Admin Password | A strong, unique password for this WordPress account. Check the strength indicator and save it in your password manager. |
| Admin Email | An address you can access for password resets and site notifications. |
Site details are on the left; WordPress administrator credentials are on the right.
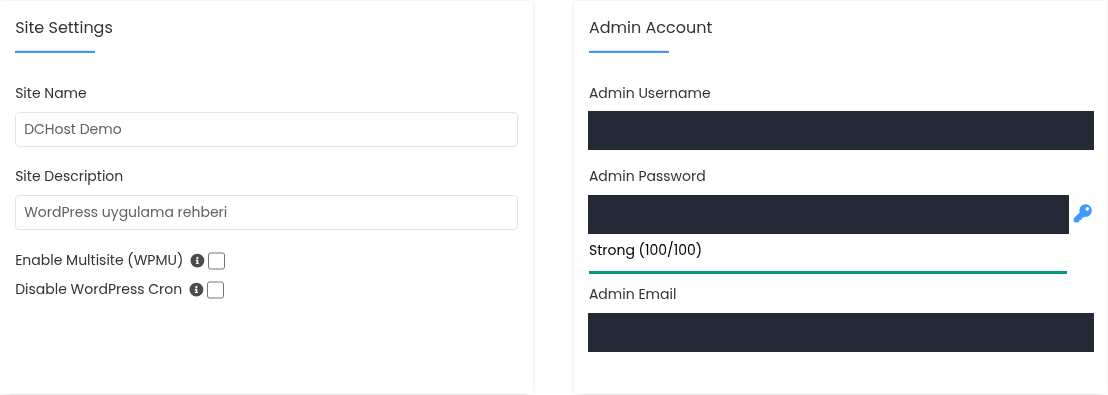
Step 1: Enter the site name and description
- Enter the site name and description
Site Name is the site title; Site Description is a short description. Use your company or project name.
- Choose the administrator username
Admin Username identifies the account you will use to sign in to the WordPress dashboard.
- Create a strong, unique password
Store the Admin Password securely. Check the Strong indicator and keep the password out of shared screenshots.
- Enter an email address you can access
Admin Email is used for WordPress notifications and password resets. Check its spelling.
The entire administrator username, password field and email are redacted. Use separate passwords for WordPress, hosting and the customer portal.
The WordPress administrator account is separate from your cPanel and DCHost customer accounts. For a single site, leave Enable Multisite (WPMU) and Disable WordPress Cron unchecked unless you have a specific requirement.
Choose only the plugins you need under Select Plugins. The screenshot shows no additional bundled plugins selected. You can also add the plugins you need later through the WordPress dashboard.
Choose additional installation tools according to what the site needs.
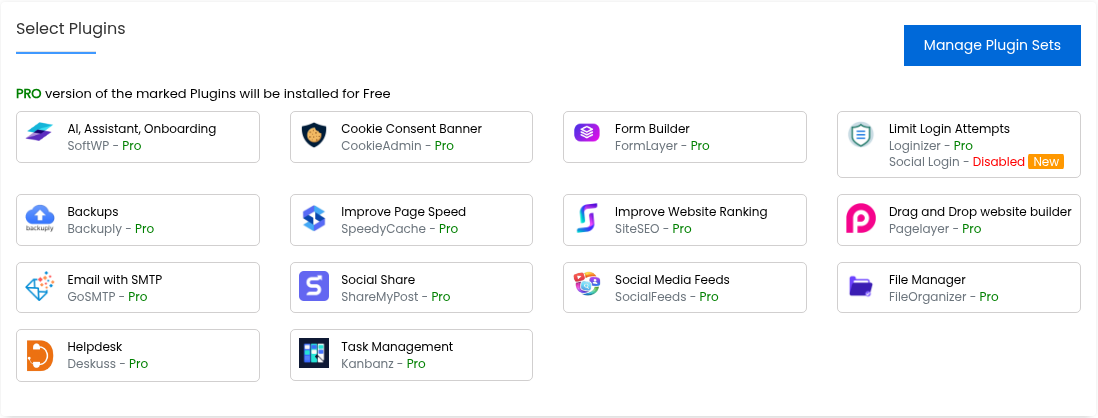
Step 1: Select only the plugins you need
- Select only the plugins you need
Leave unrelated tools unselected under Select Plugins. Consider each plugin’s purpose and maintenance needs.
This example selects no optional bundled plugins. You can add plugins later through the WordPress dashboard.
In Extended Settings → Select Language, choose the language you want WordPress to use. The example selects Turkish; this language choice is separate from the installer interface.
6. Start installation and wait for completion
- Review the full installation address, site name and administrator email once more.
- Choose your intended language under Select Language. Change Advanced Options only if you have a specific requirement.
- Use Email installation details to if installation information should also be sent to another address. This optional field is separate from the administrator’s Admin Email.
- Select Install at the bottom of the page once. Keep the tab open and wait for the result before selecting anything again.
Check the address, account and selections before submitting.
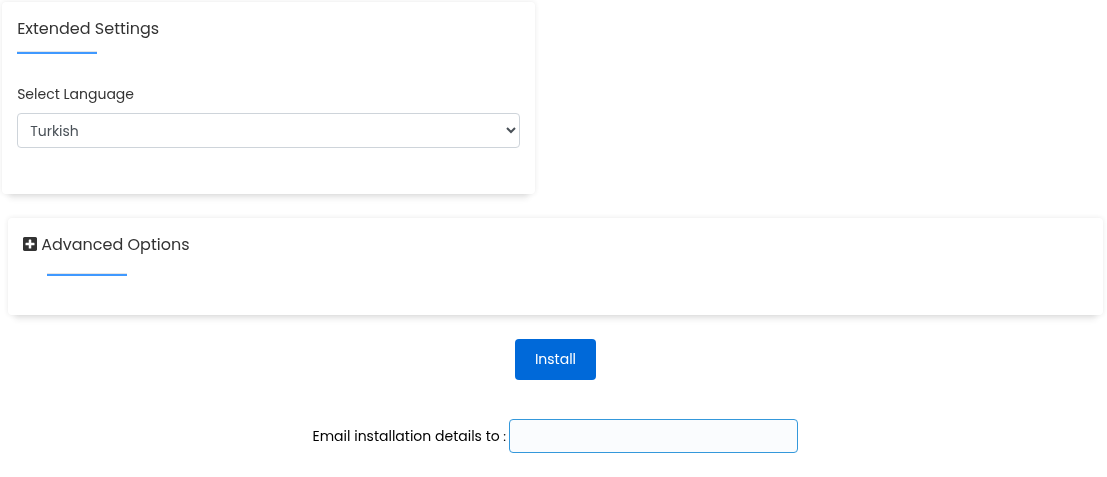
Step 1: Choose the WordPress language
- Choose the WordPress language
Turkish under Select Language installs WordPress in Turkish. Choose the language you intend to use.
- Use the additional email field if needed
Email installation details to specifies an additional destination for installation details. It is separate from Admin Email.
- Submit the request with Install
After reviewing the settings, select Install once and wait for the result. Read any error before submitting the same request again.
The additional installation-details email field is left empty in this example. Use Install only after checking the target address and account details.
When installation completes, look for Congratulations, the software was installed successfully. The first link below it is the website address; Administrative URL opens WordPress administration. Check that both links use your own domain and the folder you selected.
The result lists the website link separately from the administrator link.

Step 1: Read the completion message
- Read the completion message
Congratulations, the software was installed successfully means the installer reports that the operation has completed.
- Distinguish the website and admin URLs
The first link opens the site visitors see. Administrative URL opens WordPress administration. Check the domain and installation folder, if used.
Addresses are hidden in this screenshot. Open your own website and administrator links separately and check both.
If an error appears, do not assume installation completed. Read the message and use the troubleshooting checks before submitting another installation to the same destination.
7. Open the site and WordPress dashboard
The site visitors see
Open the first website link from the success screen in a new tab. Check the domain and folder, confirm that the page loads, and check for browser certificate warnings. This is the site visitors see.
The website link shows the public-facing site, separate from WordPress administration.
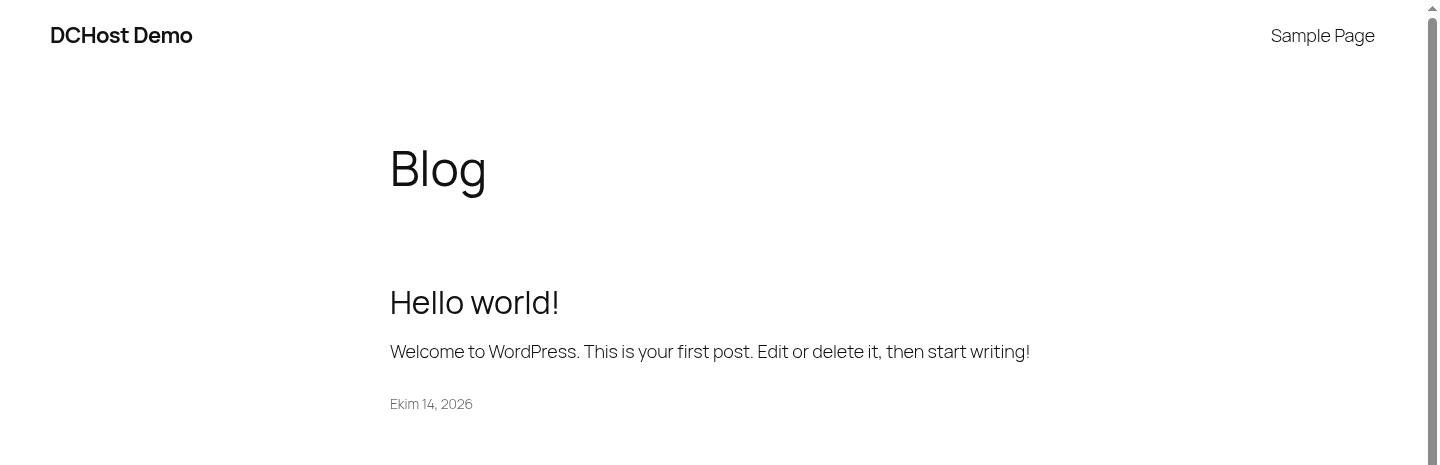
Step 1: Check the site title
- Check the site title
The title entered during installation should appear at the top. This example shows DCHost Demo.
- Recognize the sample content
Hello world! is a sample post included with a new installation. Create your own pages and posts before launch, and review the sample content separately.
The initial appearance depends on the theme and installation content. Sample titles and posts are not finished content for your company website.
A new installation may include a Hello world! post and Sample Page. The initial appearance depends on the installed theme. Your company pages, images and text still need to be prepared.
Sign in to WordPress administration
Open Administrative URL from the success screen. The standard administration address depends on where WordPress is installed:
| Installation location | Example administration URL |
|---|---|
| The domain's main address | https://example.com/wp-admin/ |
A test subdirectory | https://example.com/test/wp-admin/ |
These addresses are examples. Use your own installation's domain and preserve the folder if one was selected.
The screenshots use Turkish WordPress. Follow these labels:
- Enter the Admin Username or Admin Email chosen during installation under Kullanıcı adı ya da e-posta adresi (Username or Email Address).
- Enter the WordPress password under Parola (Password).
- Select Oturum aç (Log In). After a successful sign-in, you should see Başlangıç (Dashboard).
This form asks for WordPress credentials, not your cPanel or customer portal login.
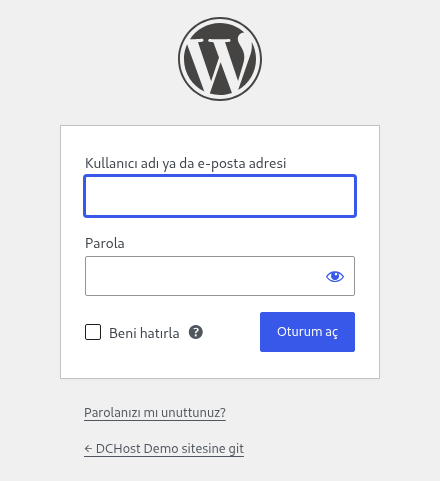
Step 1: Enter the WordPress username
- Enter the WordPress username
In Kullanıcı adı ya da e-posta adresi (Username or Email Address), enter the WordPress username or administrator email chosen under Admin Account during installation.
- Enter the WordPress password
Use the current password for this WordPress administrator under Parola (Password). Hosting and customer portal logins belong to different accounts.
- Select Oturum aç
Check the details and select Oturum aç (Log In). Leave Beni hatırla (Remember Me) unchecked on a shared device.
If you forgot the password, use Parolanızı mı unuttunuz? (Lost your password?) and the email registered to your WordPress administrator account.
Başlangıç is the dashboard for managing content and site settings.
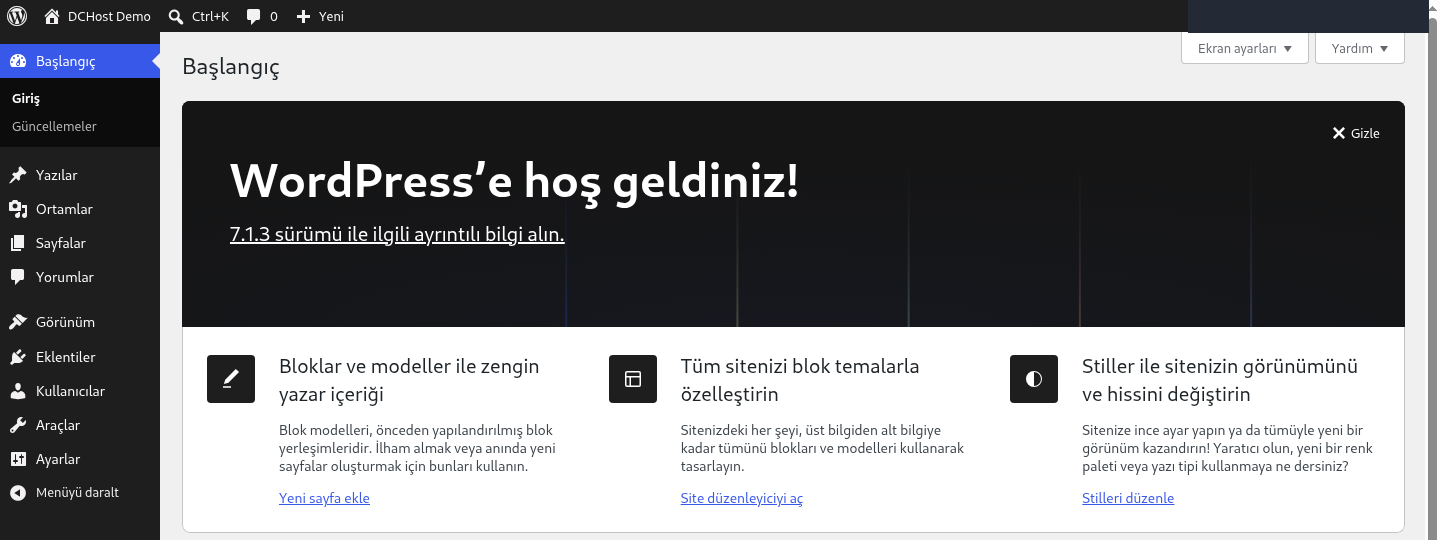
Step 1: Confirm the dashboard is open
- Confirm the dashboard is open
The Başlangıç heading and WordPress menu show that you are in administration. The site-name link at the top opens the visitor view.
- Distinguish pages, posts and media
Sayfalar (Pages) is for content such as About and Contact. Yazılar (Posts) is for blog posts, while Ortamlar (Media) contains uploaded images and files.
- Find the settings menu
Ayarlar (Settings) opens site-wide preferences such as language, timezone, reading and link structure. Continue with the first checks below.
The WordPress version shown belongs to the capture date. Check your current status under Başlangıç → Güncellemeler (Dashboard → Updates).
The WordPress dashboard manages the site's content. cPanel manages hosting files, mailboxes and databases. Store the two sets of credentials separately.
8. Review essential settings before publishing
Site details, language and timezone
Open Ayarlar → Genel (Settings → General). Check that Site başlığı (Site Title) and Slogan (Tagline) describe your company or project. Yönetim E-posta Adresi (Administration Email Address) receives site administration notices and can differ from the email in your user profile.
Ayarlar → Genel (Settings → General) contains the site title, addresses and administration email.
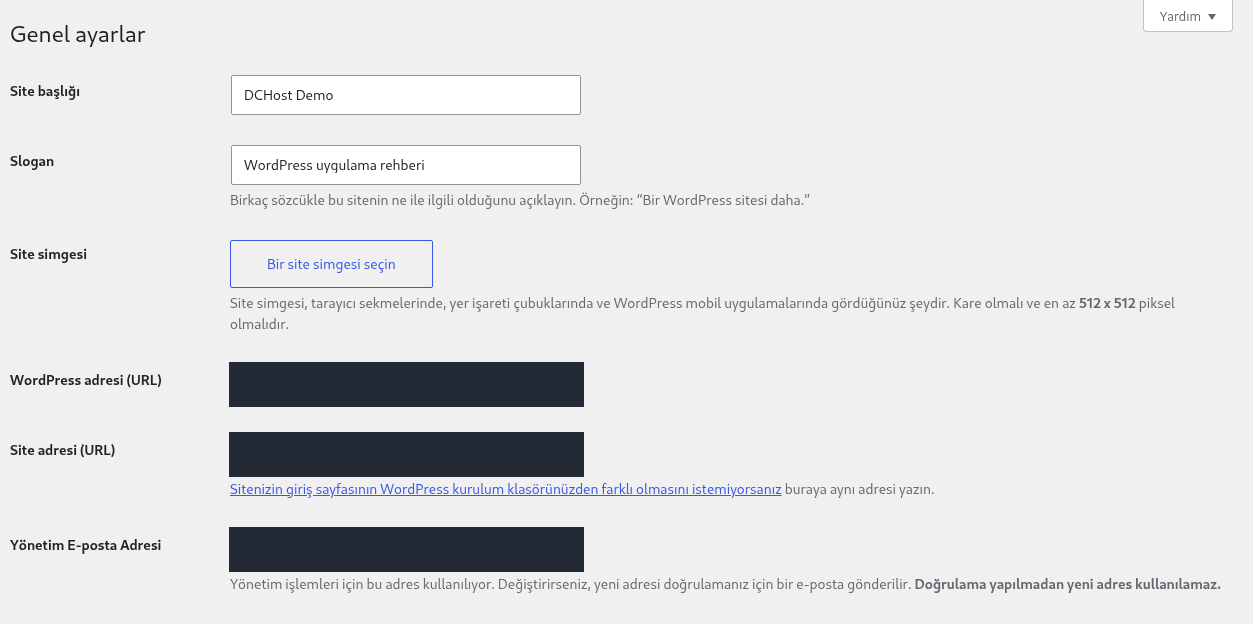
Step 1: Review the title and tagline
- Review the title and tagline
Site başlığı (Site Title) names the business or project. Slogan (Tagline) provides a short description. They come from the site details entered during installation.
- Keep URLs distinct from the site name
WordPress adresi (URL) identifies the WordPress installation. Site adresi (URL) is the address visitors use. They usually match in a standard new installation; do not change them without planning the move.
- Check the administration email
Yönetim E-posta Adresi (Administration Email Address) receives site administration notices. If you change it, complete the confirmation sent to the new address, as explained on the screen.
WordPress Address and Site Address affect a working site’s URLs. You do not need to change them just to rename the site.
Review Site Dili (Site Language) and Saat dilimi (Timezone) for your needs. The screen shows this installation's Türkçe and UTC+0 values. Choose the timezone you intend to use for publishing; changing the language does not also change the timezone.
These two fields appear further down the same General Settings page.

Step 1: Choose the WordPress language
- Choose the WordPress language
Site Dili (Site Language) sets the default WordPress language. Check the language intended for your site; the screenshot uses Türkçe (Turkish).
- Check how publishing times are interpreted
Saat dilimi (Timezone) affects WordPress dates and times. Choose the city or UTC timezone appropriate for your site.
UTC+0 in the screenshot is not a recommendation for every site. Plan publishing times using the local timezone you intend to use.
Homepage and search visibility
Open Ayarlar → Okuma (Settings → Reading). Son yazılarınız (Your latest posts) lists posts on the homepage. To use a company introduction page, create it under Sayfalar (Pages) first, then use Sabit sayfa (A static page) and the Giriş sayfası (Homepage) dropdown.
Review Arama motoru görünürlüğü (Search Engine Visibility) for the site's intended use. Arama motorlarının bu siteyi dizine eklemesine engel olmaya çalış asks search engines not to index the site and can be selected for a test installation. When a public site is ready to appear in search, include clearing this checkbox in your launch checks. The preference does not guarantee search inclusion or rankings.
Ayarlar → Okuma (Settings → Reading) controls the homepage and search-engine preference.
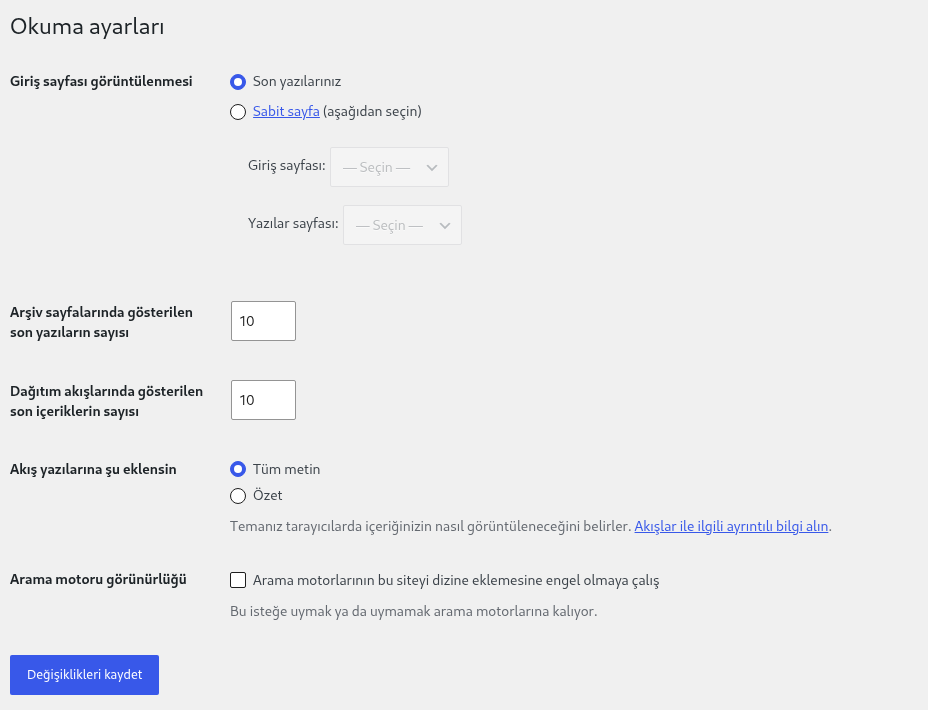
Step 1: Choose what appears on the homepage
- Choose what appears on the homepage
Son yazılarınız (Your latest posts) lists posts on the homepage. To use Sabit sayfa (A static page), create the page under Sayfalar first, then select it in Giriş sayfası.
- Distinguish a test site from a public launch
Arama motorlarının bu siteyi dizine eklemesine engel olmaya çalış asks search engines not to index the site and can be used for test sites. When a public site is ready and should appear in search, review this preference and clear the checkbox.
- Save and verify the result
After changing a setting, use Değişiklikleri kaydet (Save Changes). Read the success notice and reopen the page to verify that your selection remains. If an error appears, check the result before submitting again.
Search visibility is not access protection. A private test site needs separate access controls; this preference does not guarantee search inclusion or rankings.
After changing a setting, use Değişiklikleri kaydet (Save Changes). Read the success notice, then reopen the page and check that the preference remains. If an error appears, do not assume the save completed or submit again before checking the outcome.
Review sample posts and pages before launch. Check WordPress, theme and plugin status under Başlangıç → Güncellemeler (Dashboard → Updates). Before updating, verify that your file and database backup is usable.
A test installation and a public company website may need different publishing settings. Asking search engines not to index a site does not password-protect it; use access controls for a test site containing private content.
If installation does not work
| Symptom | Check first |
|---|---|
| The domain does not open | Authoritative nameservers, DNS records and whether the domain points to the correct hosting. |
| The browser reports a certificate error | Certificate validity and coverage of the selected hostname. |
| The directory you typed already exists! Please type in another directory name. appears | Enter a new, unused folder name in In Directory. The installer creates the folder; do not delete an existing site’s files to dismiss the error. |
| The site opens in another folder | The full URL and directory selected during installation. Back up an existing WordPress site before changing its URL. |
| The homepage works but posts or pages return 404 | Check the content URL and permalinks using the WordPress 404 guide. |
| WordPress administrator login fails | The WordPress admin account, correct site URL and that account's current password. |
| The website or administration address shows a critical error or white screen | Follow the WordPress critical error guide to check recovery mode and the failing plugin; do not start a new installation. |
| A database connection error appears | Check connection settings and user privileges using the WordPress database connection error guide. |
If the problem persists, open a support ticket with the hosting service, target URL, time and error message. Do not send passwords, database passwords or session links.