Proxmox Backup Server installation: scheduled backups and restore
Proxmox Backup Server (PBS) stores backups of Proxmox VE virtual machines and containers on a separate system. This guide covers installation, backup storage, the Proxmox VE connection, scheduled backups, retention and restoring a backup.
A backup appearing in a list is only one part of the job. You also need to check its integrity, keep any encryption key available for recovery, and confirm that the restored machine works. The walkthrough therefore continues from creating a backup through checking a file inside the restored VM.
How Proxmox VE and Proxmox Backup Server work together
| Component | Purpose |
|---|---|
| Proxmox VE | Runs VMs and decides which machines to back up and when. |
| Proxmox Backup Server | Stores incoming backups and runs retention, verification and cleanup tasks. |
| Datastore | The storage location on PBS that holds backup data. |
| Backup job | Creates a new backup of the selected machines. |
| Restore | Recreates a usable machine or file from a selected backup point. |
The Proxmox VE installation guide demonstrates a backup to the host's local storage. If that host or its storage fails, the local backup may be unavailable too. Running PBS on a separate server reduces that dependency.
Installing PBS directly on the Proxmox VE host, or inside a VM running on that host, does not provide an independent backup when the entire host is lost. For production, plan physical host and storage separation, and keep another copy in a separate location. Two separate VDS services do not by themselves establish that the services use different physical hosts, storage systems or data centres.
This walkthrough uses two separate DCHost VDS services: the existing Proxmox VE lab and a new server reserved for PBS. The selected DC VDS4 plan for PBS lists 4 vCPUs, 6 GB RAM and 70 GB storage in the portal. It is a small training environment, not a production backup-capacity recommendation.
The PBS operating system and training datastore share one virtual disk; this layout does not provide a separate or redundant data disk within PBS.
Before you start
Identify your existing Proxmox VE system and the separate server reserved for PBS installation. Installing PBS from its ISO erases data on the selected target disk. Save anything you need from that installation target elsewhere before continuing.
Prepare:
- Management access to both Proxmox VE and the PBS installation target.
- The PBS server's IP address, prefix/netmask, gateway and DNS settings.
- Storage sized for the backup data, daily changes and retention period.
- Connectivity from Proxmox VE to PBS on TCP port 8007.
- A dedicated backup account and API token.
- A safe location outside both servers for an exported encryption key, if encryption is used.
The vendor's evaluation minimum is at least 2 CPU cores, 2 GB RAM and more than 8 GB of disk space. Those values are for evaluation, not production sizing. The production recommendation starts at 4 CPU cores, 4 GiB RAM for the OS and PBS, at least another 1 GiB per TiB of storage, and at least 32 GiB for the OS. Backup capacity is additional. Size it for the amount of data that changes and the number of recovery points you need, as well as the source VM sizes.
Restrict management access through suitable firewall rules, a VPN or a management network. Include the Proxmox VE nodes that must reach PBS for backup traffic when planning those rules.
1. Prepare the PBS ISO
Open the official ISO downloads and select the current stable image for your server architecture. On 30 October 2026, the listed x86-64 installer is Proxmox Backup Server 4.2-1.
| File detail | Value |
|---|---|
| Filename | proxmox-backup-server_4.2-1.iso |
| Release date | 29 April 2026 |
| Size displayed on the official page | 1.48 GB |
Direct download:
https://enterprise.proxmox.com/iso/proxmox-backup-server_4.2-1.iso
The official SHA-256 file contains:
2fb299deac3929253712c9c3dfc9237edbe70af83c8848467616b771a1d5453e
Compare this with the checksum of the downloaded file. If you choose a different release, use that release's checksum. A similar filename does not verify the contents.
In the DCHost customer portal, open the service reserved for PBS. Under Templates & ISO → ISO Management → Upload ISO:
- Enter a recognizable Label.
- Choose File URL and enter the official ISO address.
- Select Upload to start the import.
- Wait while the status is Pending or downloading; do not submit the same import again.
In the DCHost customer portal, open Templates & ISO → ISO Management → Upload ISO. Select File URL to use the official ISO download link.
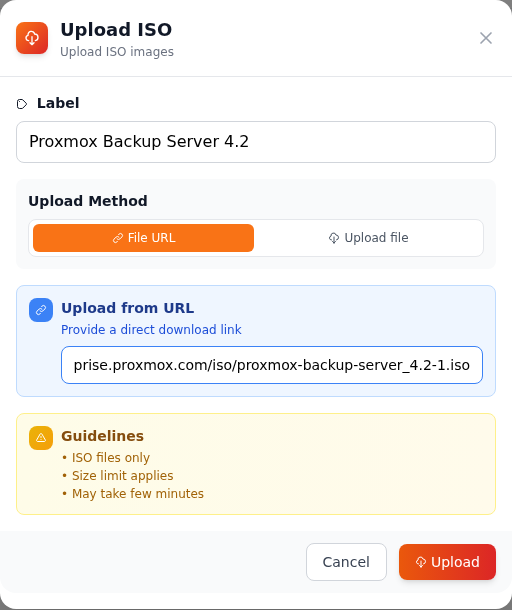
Step 1: Name the ISO
- Name the ISO
Enter a recognizable name in Label. This example uses Proxmox Backup Server 4.2.
- Paste the official ISO URL
With File URL selected, enter the direct ISO link in Upload from URL. The complete link is also provided as text in this section.
- Start the import with Upload
Check the details and click Upload. Verify that the ISO is ready in the resulting list before booting it.
The download URL is prepared here; the import has not started yet.
Video: add the PBS ISO to the portal
Entering the ISO URL and submitting the import request. The recording ends at Pending.
Use fullscreen on a small screen to read field labels and status details.
Adding the PBS ISO to the portal
00:00 — Enter the ISO label and official download URL.
00:04 — Click Upload to submit the import request.
00:08 — Pending: the ISO is not ready yet.
After the import finishes, check for Ready on the ISO card. This confirms the media is available in the portal; it does not mean PBS is installed or the ISO's SHA-256 has been checked.
After the import finishes, the portal marks the ISO as Ready. Check its filename before booting.
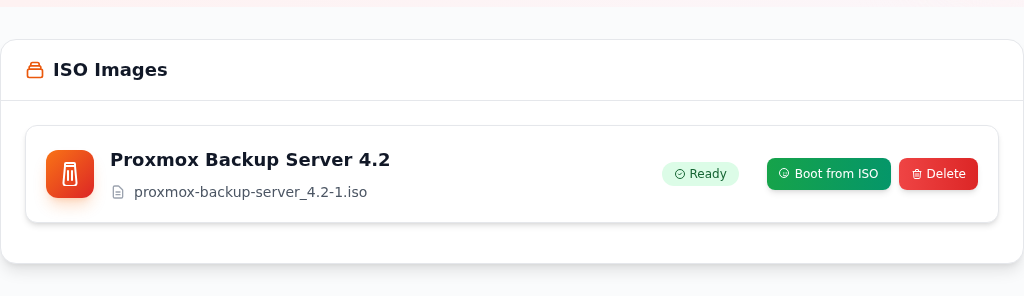
Step 1: Check the Ready status
- Check the Ready status
Verify the ISO filename and the Ready status in the list.
- Click Boot from ISO
Click Boot from ISO on the ready ISO entry to open the boot confirmation.
Ready is the portal’s readiness status; it is not proof of SHA-256 verification.
Check the prepared file's name and open Boot from ISO. Review the restart warning and confirm the intended server before selecting Boot Now.
The portal asks for confirmation before booting the server from the selected ISO.
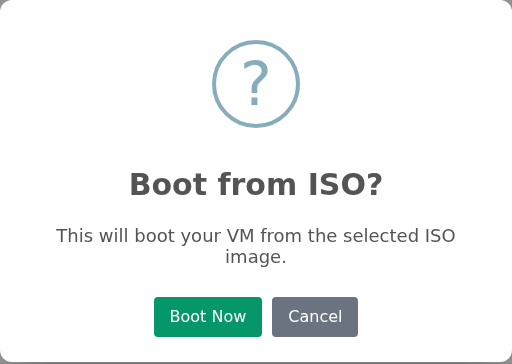
Step 1: Confirm with Boot Now
- Confirm with Boot Now
Check that this is the server reserved for PBS. Boot Now submits the request to boot the selected ISO.
This image is captured before confirmation. Check the console separately for reboot completion and the installer menu.
The full portal workflow is covered by ISO upload and management.
2. Complete the graphical installer
Open the console of the server reserved for PBS. Select Install Proxmox Backup Server (Graphical) in the boot menu. This installs the PBS server; it is not the management screen of your existing Proxmox VE host.
The graphical installer is selected in the ISO boot menu of the separate PBS VDS test environment.
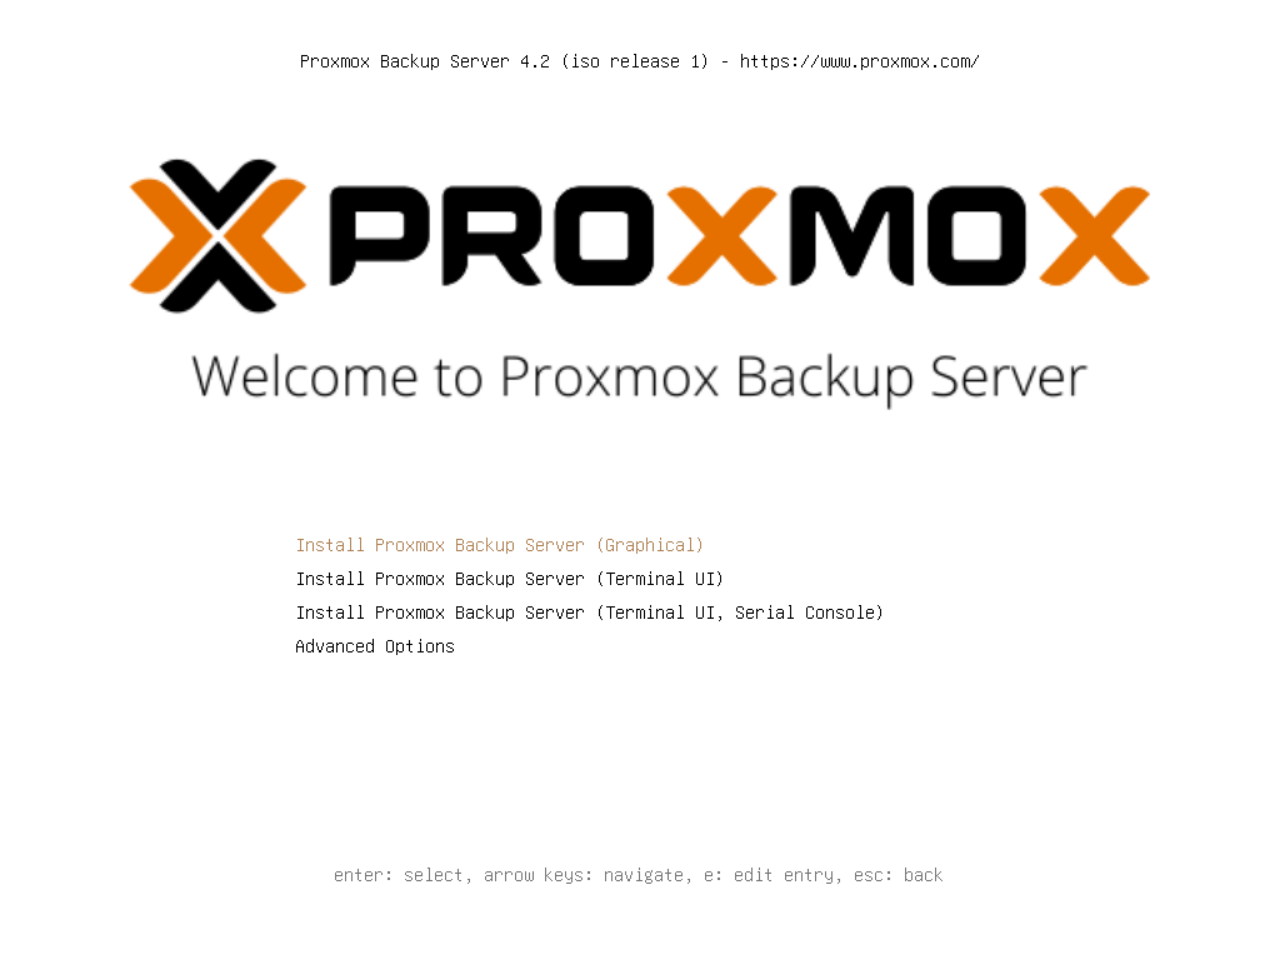
Step 1: Open the Graphical option
- Open the Graphical option
Select Install Proxmox Backup Server (Graphical), then press Enter.
Licence and target disk
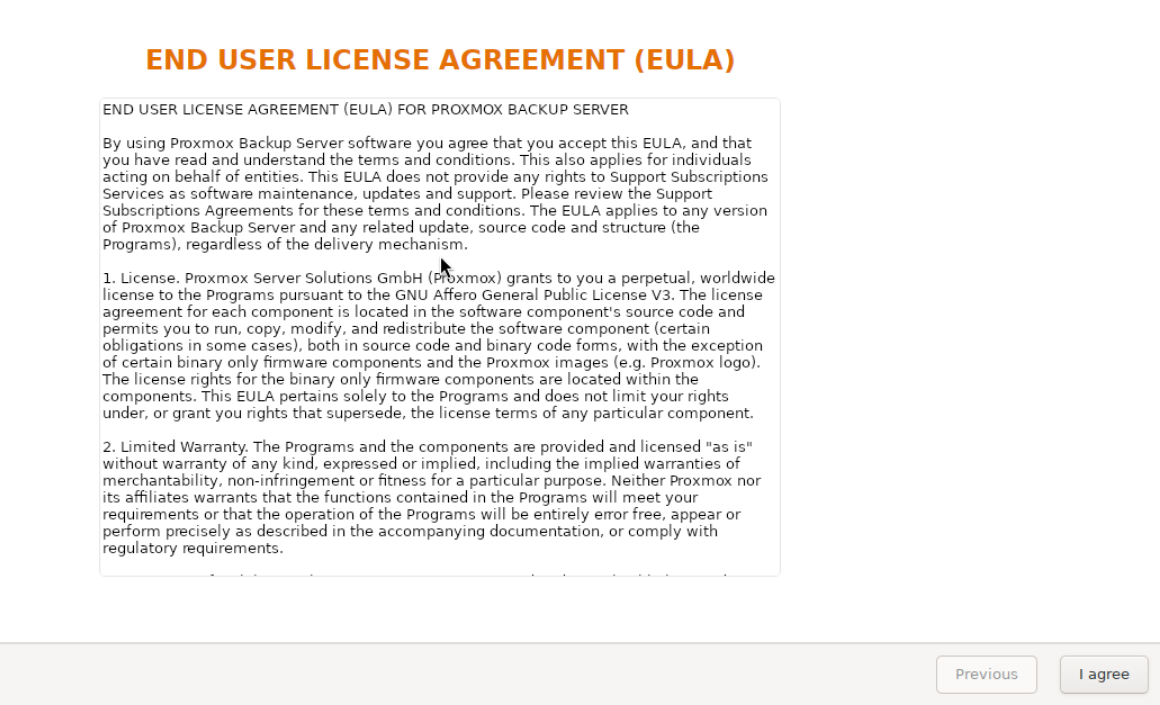
Read the licence and select I agree if you accept it.
The first screen of the actual graphical installer displays the Proxmox Backup Server license agreement.
Step 1: Continue if you accept
- Continue if you accept
Read the agreement. If you accept its terms, select I agree to continue to disk selection.
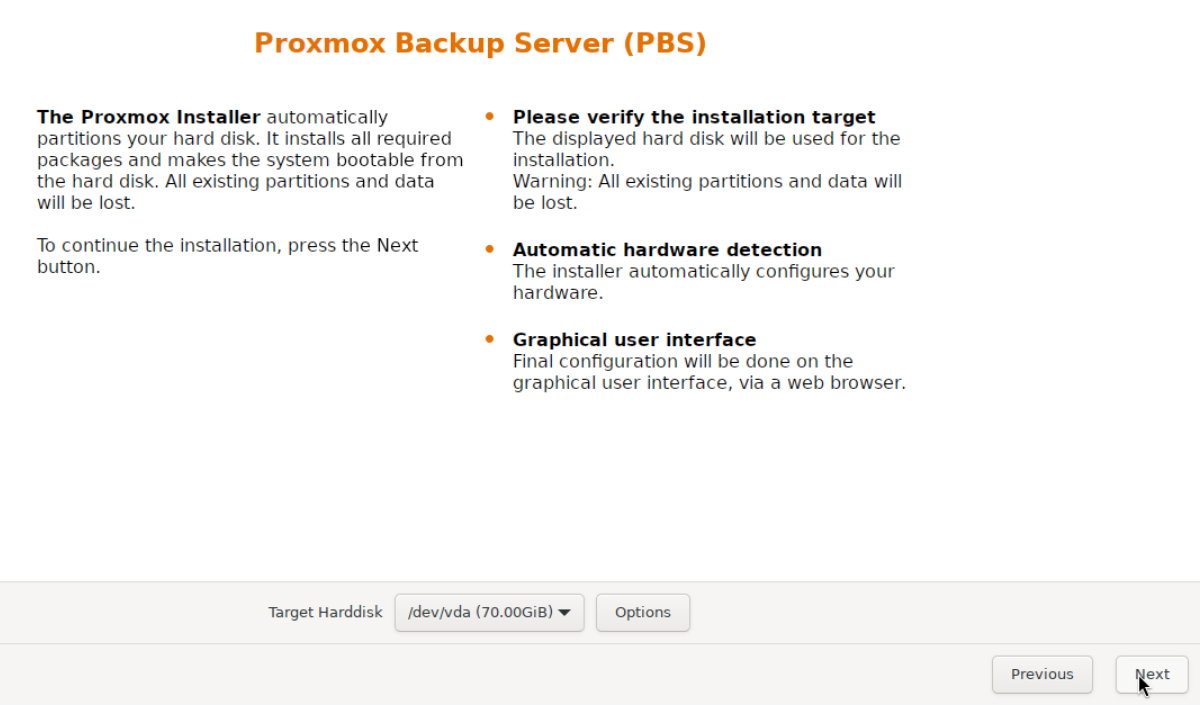
Check Target Harddisk. This lab selected /dev/vda — 70.00 GiB, with ext4 retained as the filesystem. Installation erases the previous system on that target disk.
This separate PBS VDS test environment has the 70 GiB /dev/vda selected. Installation erases existing partitions and data on the selected disk.
Step 1: Read the erasure warning
- Read the erasure warning
Installation erases all partitions and data on the selected disk. Confirm that you have chosen the correct disk before continuing.
- Check Target Harddisk
The recorded target is /dev/vda (70.00 GiB). On your PBS server, select the disk reserved for installation.
The PBS ext4 installer creates root and swap logical volumes in the pbs volume group. This example places its small datastore on the root filesystem created during installation. See the PBS disk options.
Location, account and network
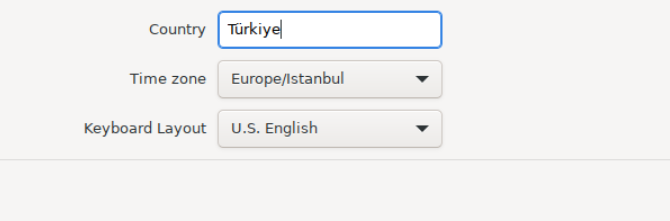
The lab selected Country → Türkiye, Time zone → Europe/Istanbul and Keyboard Layout → U.S. English. Choose values matching your location and keyboard. The layout affects punctuation when entering passwords.
A focused crop of the actual settings fields: Türkiye, Europe/Istanbul, and U.S. English are selected.
Step 1: Verify country, time zone, and keyboard
- Verify country, time zone, and keyboard
This lab uses Türkiye, Europe/Istanbul, and U.S. English. Check the keyboard layout before entering your password.
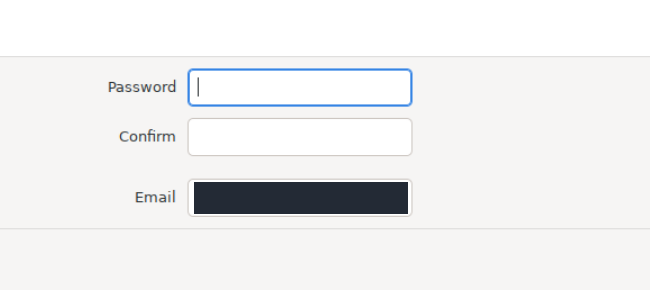
Enter a strong root password unique to this PBS server in Password / Confirm and an administrator address in Email. This installation password can differ from the password displayed in the portal for the original OS template. Use the newly chosen password to sign in to PBS.
Captured before password entry; Password and Confirm are empty. The email value is hidden.
Step 1: Root password and notification email
- Root password and notification email
Enter your strong root password in Password and Confirm. Use an email address you can access for notifications.
Use the network details assigned to this server. In the lab, the management interface is nic0, the example hostname is pbs-lab.example.com, and DNS is 1.1.1.1. The IP and gateway were checked against the portal. A /24 prefix in this example does not imply that every server uses that prefix.
pbs-lab.example.com is the lab's example hostname; it does not establish a working public DNS record or a publicly trusted certificate. This workflow accesses the interface by the server's IP. Replace concealed address fields in the screenshots with your own service's assigned values.
The separate PBS VDS test environment uses nic0 and pbs-lab.example.com. The IP address, gateway, and MAC identity are permanently hidden.
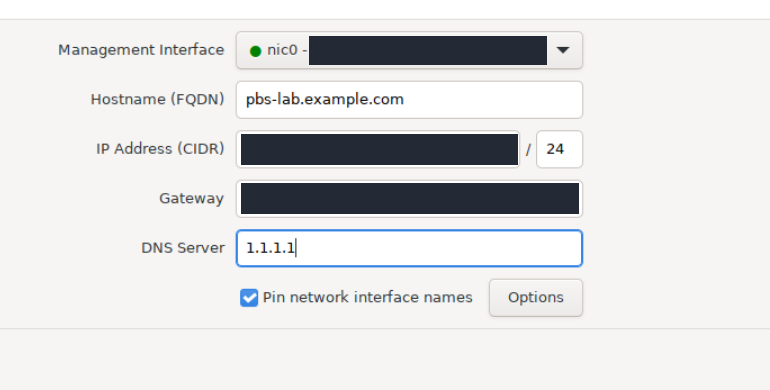
Step 1: Interface and hostname
- Interface and hostname
This capture uses nic0 and pbs-lab.example.com as Hostname (FQDN). Use your own server’s interface and fully qualified domain name.
- Use your VDS network details
Fill IP Address (CIDR) and Gateway with the network details supplied for your VDS. This example uses /24 and DNS Server 1.1.1.1.
Review and start installation
Recheck the disk, ext4 filesystem, location and network information on the summary. In this recording, Automatically reboot after successful installation was cleared before selecting Install. This leaves the success screen available while disk boot is prepared through the portal.
The summary shows ext4, /dev/vda, and the lab settings. Automatic reboot is unchecked before Install is pressed. Installation is not yet complete.
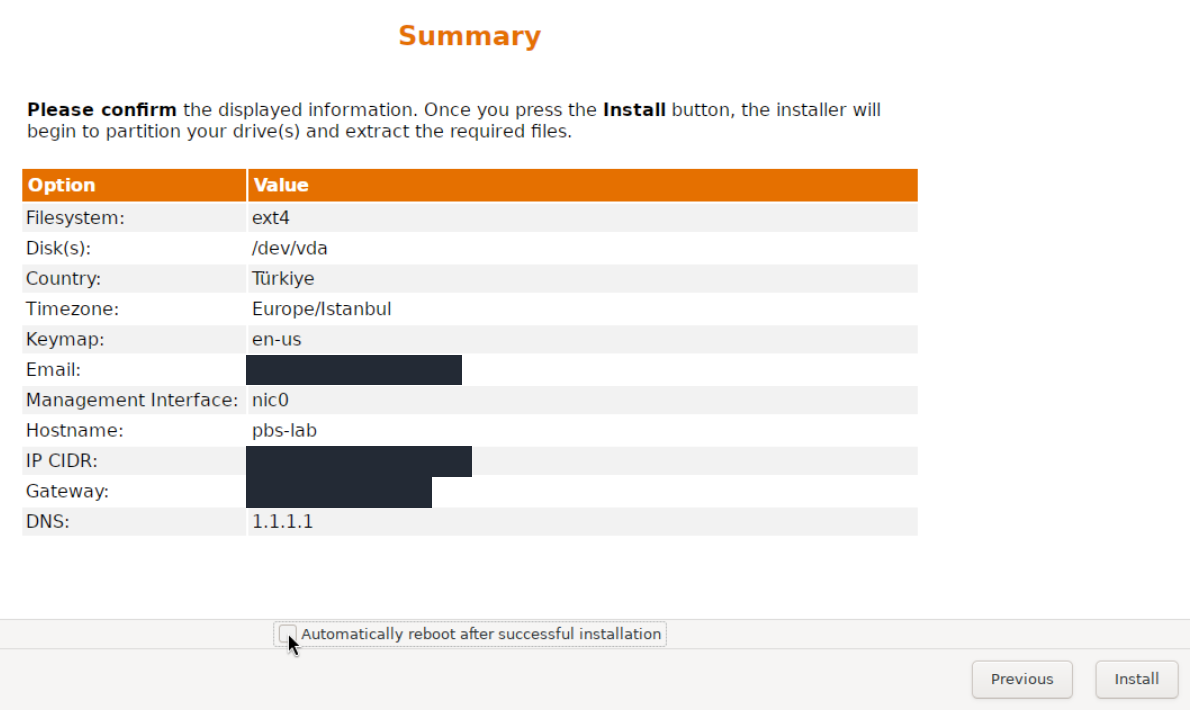
Step 1: Verify disk and region settings
- Verify disk and region settings
Check ext4 and /dev/vda along with Türkiye, Europe/Istanbul, and en-us in the summary. Use Previous to correct a setting.
- Automatic reboot is off
In this capture, Automatically reboot after successful installation was left unchecked before Install was pressed.
- Start installation after checking
After checking the settings and the disk that will be erased, select Install to begin. This screen does not show a completed installation.
Video: start PBS installation
Real recording: summary, automatic reboot turned off, Install, and initial progress. The clip ends at 2% partition creation; it does not show a completed installation.
Use fullscreen on a small screen to read field labels and status details.
Starting the PBS installation — transcript
00:00 — Summary: automatic reboot is turned off.
00:03 — Install starts the installation.
00:06 — Partition creation: 2%. Installation is not complete.
Wait for installation to finish and the Installation successful! screen below to appear.
The success screen confirms installation has finished. Prepare disk boot in the portal.
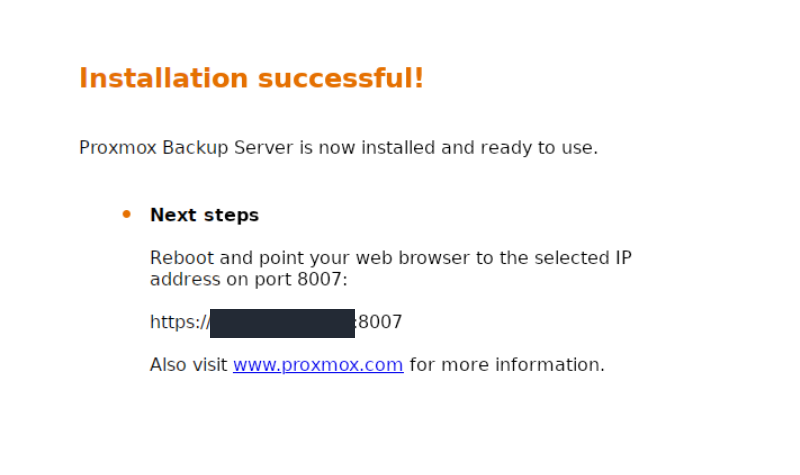
Step 1: Check Installation successful!
- Check Installation successful!
This message confirms installation completed. The management interface uses HTTPS on port 8007.
In this workflow, removing the ISO in the portal also restarts the server. Save the boot order first.
Boot from the installed disk
Follow this order in the portal:
- In the service's Boot Order, set Device #1 → Disk "virtio0". The other two devices were left at None in this lab.
- Select Save to store the boot order.
- Use Templates & ISO → ISO Image. This action asks for confirmation because detaching the ISO restarts the server; review the prompt before continuing.
- After ISO Image detached appears, wait for the restart to finish and refresh the console.
Boot Order has Disk "virtio0" selected for Device #1 and None for the other devices. This image was captured before Save.
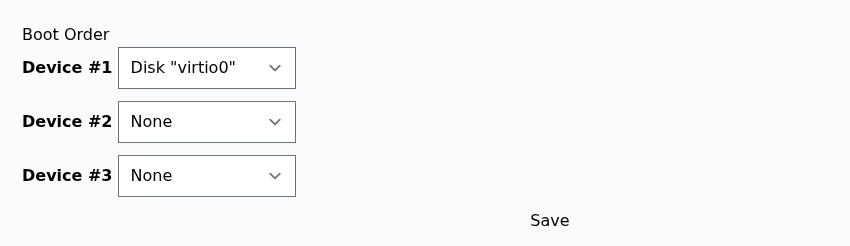
Step 1: Put the disk first
- Put the disk first
Select Disk "virtio0" for Device #1. In this lab, Device #2 and Device #3 were left as None.
- Save the selection
Check the boot order, then select Save. This screen shows the selection; the later console image shows the installed system running.
ISO Image detached confirms that the installation ISO has been removed.
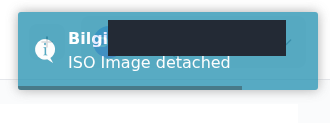
Step 1: Look for ISO Image detached
- Look for ISO Image detached
This notification appears after the ISO Image action. Wait while the server restarts, then refresh the console and check for the PBS login prompt.
The portal restarts the server as part of this action. Wait for the restart to finish, then refresh the console.
The console displayed the PBS welcome text and pbs-lab login: prompt, confirming a successful boot from the installed disk after the media was detached.
After the ISO removal action automatically restarted the server, the refreshed console shows the pbs-lab login: prompt.
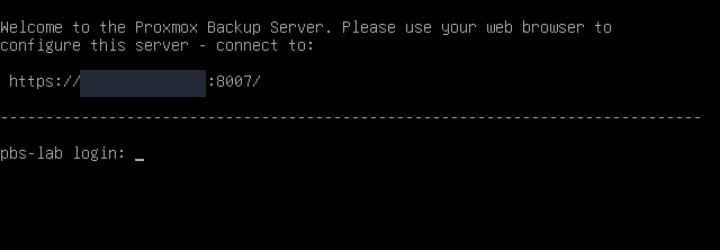
Step 1: Check the pbs-lab login: prompt
- Check the pbs-lab login: prompt
This prompt shows that the installed PBS system is ready at the console. For web management, use your own PBS server’s HTTPS address and port 8007.
3. Sign in to PBS and install updates
Open an address in this format:
https://PBS-SERVER-ADDRESS:8007
Replace the address with your PBS IP or DNS name. 8007 is the PBS interface; 8006 is Proxmox VE.
A self-signed certificate may produce a browser warning on the first visit. Verify the server identity and certificate fingerprint through a trusted channel before proceeding. The Proxmox VE storage connection will use this PBS certificate as well.
A self-signed certificate can trigger a browser warning. Verify the server identity before opening the management interface.
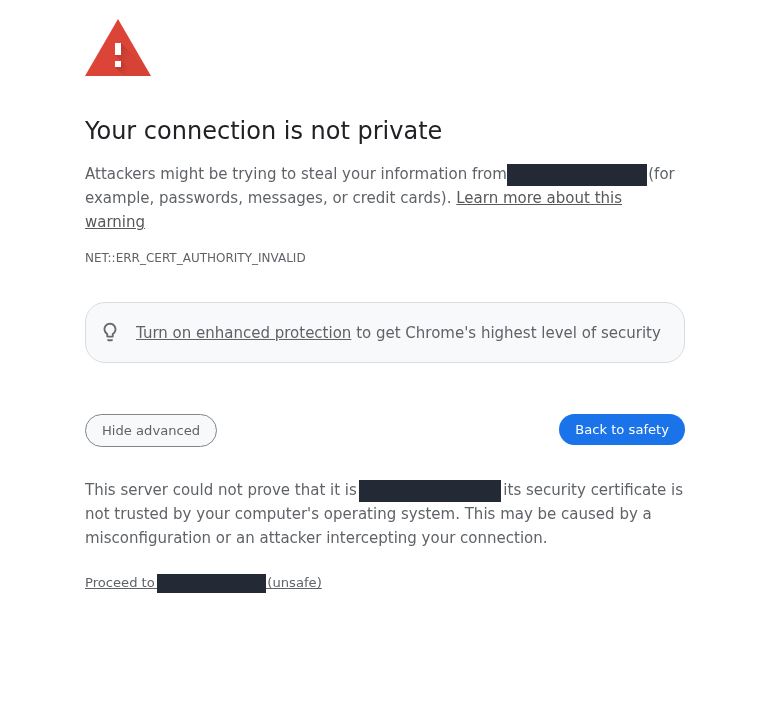
Step 1: Check the identity through a trusted console
- Check the identity through a trusted console
Compare the server and TLS certificate identities with the information from an authenticated server console. The SSH/TLS identities were verified this way in this lab.
- Proceed only after verification
In this lab, Proceed … (unsafe) was used only after the identity check. Complete that verification for your own server before using this link.
If you cannot verify the identity, select Back to safety.
Select User name → root and Realm → Linux PAM standard authentication, then use the password chosen in the ISO installer. The original template password shown in the portal's Root Access section need not match this newly chosen password. The PBS root account is separate from your DCHost customer portal account and the account on the Proxmox VE host.
Use the root password you set during installation and Linux PAM authentication.
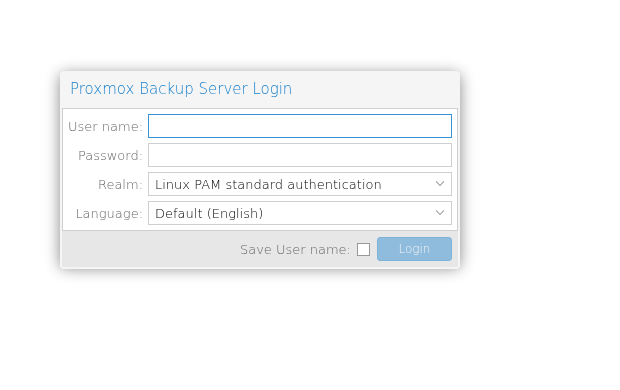
Step 1: Use root and the Linux PAM realm
- Use root and the Linux PAM realm
Enter root in User name and your installation password in Password. Set Realm to Linux PAM standard authentication.
- Select Login to sign in
After entering your credentials, select Login. User name and Password are still empty in this image.
Review the package repositories. A subscribed production system uses the Enterprise repository. A test system without a subscription can use No-Subscription; it is not the same production recommendation as Enterprise. Do not enable the Test repository for this walkthrough.
In Repositories, this unsubscribed lab:
- Kept the Debian repositories enabled.
- Disabled the subscription-only pbs-enterprise entry.
- Selected No-Subscription in Add and added the repository.
No-Subscription was selected because this lab has no subscription. This is not a recommendation for production use.
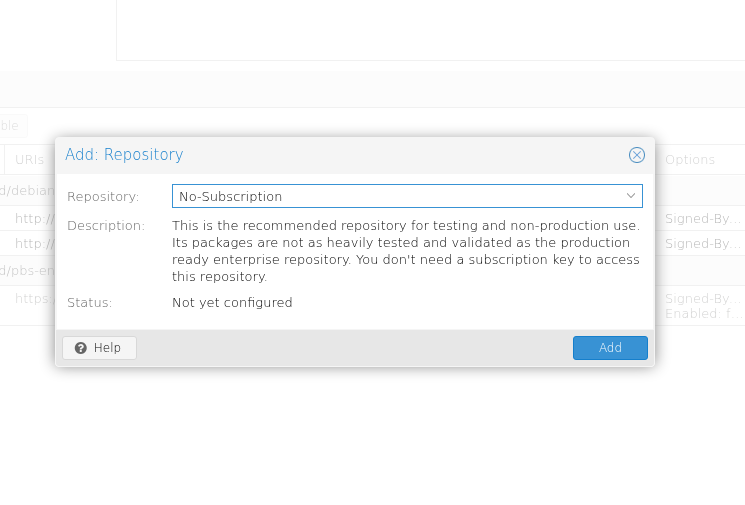
Step 1: Check the No-Subscription selection
- Check the No-Subscription selection
Repository is set to No-Subscription. The description says it is for testing and non-production use and is less heavily tested than the enterprise repository.
- Add the repository
Check the selection, then select Add. Not yet configured shows that this image was captured before the repository was added.
The resulting list has pbs-no-subscription enabled and enterprise disabled. The production-use warning remains because of the selected test repository; it does not mean adding the repository failed.
The Debian repositories are retained, enterprise is disabled, and no-subscription is enabled. The production warning remains visible.
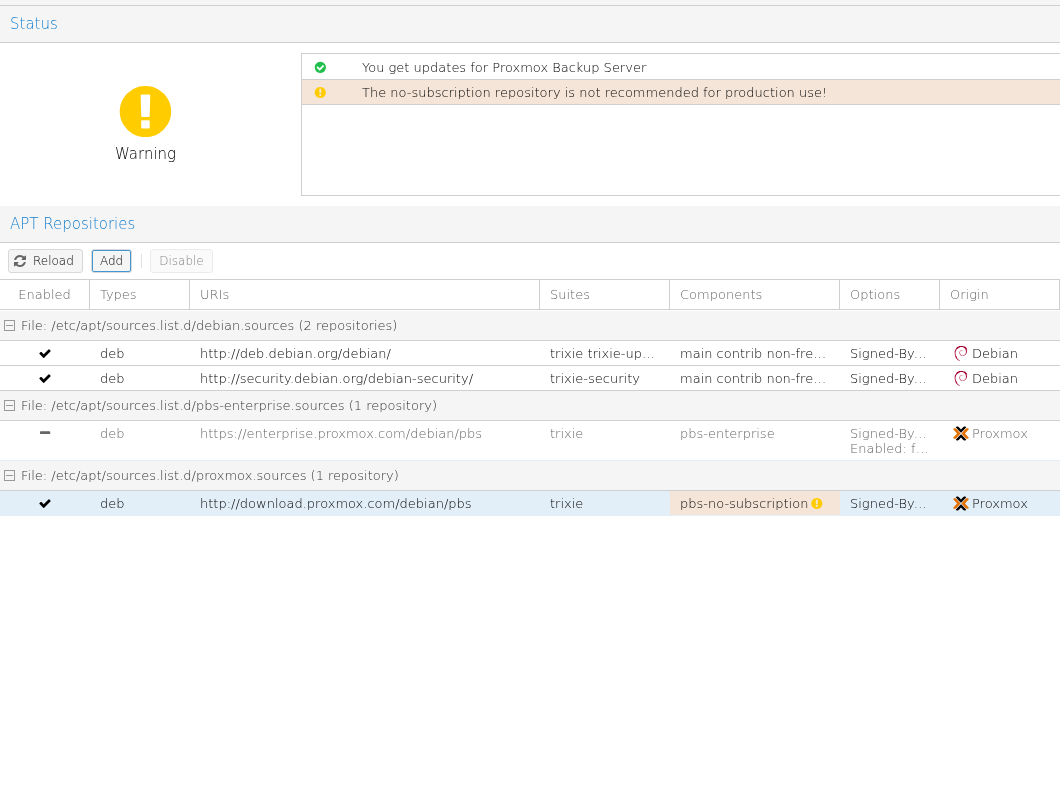
Step 1: Read the production warning
- Read the production warning
The warning “The no-subscription repository is not recommended for production use!” is expected here. This guide uses the repository for the lab. For production servers, prefer the enterprise repository with an appropriate subscription.
- Check the Enabled column
Keep both Debian rows enabled. In this unsubscribed lab, the enterprise row is disabled and the final row for the added PBS repository is enabled.
- Confirm the pbs-no-subscription component
The final row lists pbs-no-subscription in Components. This screen shows the repository configuration; it does not show a completed package upgrade.
Update the server in this order:
- Select Administration → Updates → Refresh to refresh the package list. Wait for TASK OK.
- Select Upgrade. In the terminal that opens, review the packages, download size and any proposed removals.
- At the confirmation prompt, enter
yand press Enter after reviewing the list. Wait until the operation finishes and the command prompt returns. - If a new kernel was installed, select Administration → Server Status → Reboot and confirm the restart.
- When the server returns, check the version and kernel on Dashboard.
Resolve repository errors before upgrading, and avoid mixing repositories from different Debian releases. See the official repository documentation.
After updates and a restart, the following values were verified in this lab:
| Check | Verified value |
|---|---|
| PBS package | 4.2.8-1 |
| Running PBS version | 4.2.8 |
| Kernel | 7.0.14-26-pve |
| Timezone | Europe/Istanbul |
| Time synchronization | NTP synchronized |
The 4.2-1 in the ISO filename is the installer revision. Seeing the newer 4.2.8 package version after updating is expected. The PBS services and a boot into the new kernel were also checked.
After the upgrade and reboot, the Updates list is empty.
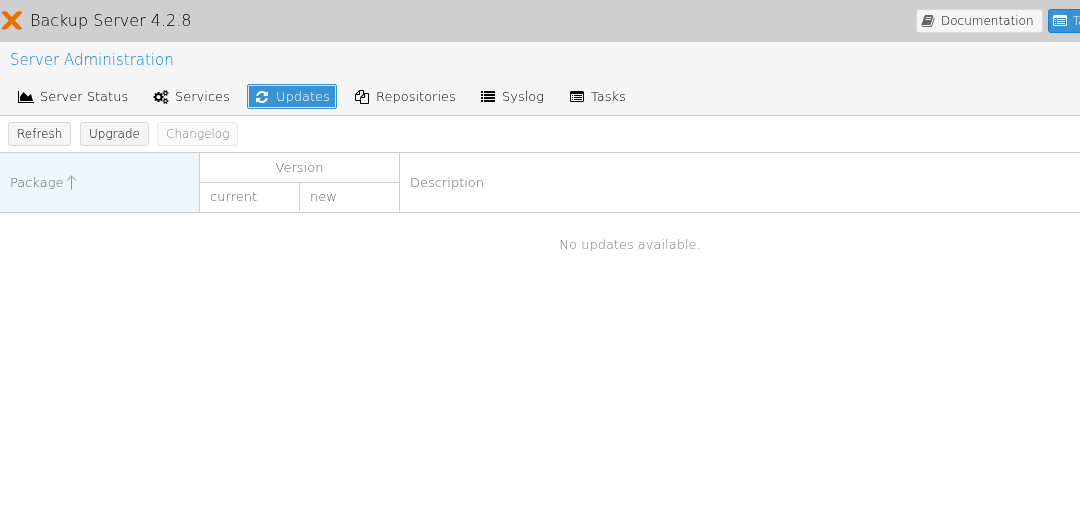
Step 1: Confirm No updates available
- Confirm No updates available
The No updates available message in Updates shows that no package updates were offered at this check.
The rebooted PBS shows its running kernel and repository warning.
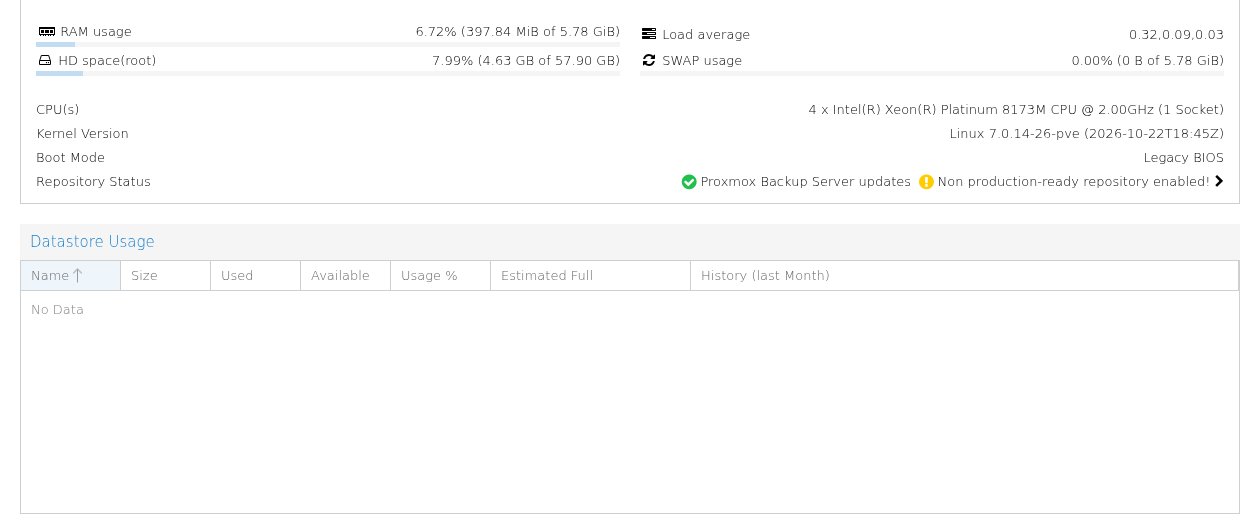
Step 1: Read the running kernel
- Read the running kernel
Kernel Version lists Linux 7.0.14-26-pve. This is the kernel running after the reboot.
- Review the repository warning
Non production-ready repository enabled remains visible for this unsubscribed lab. For production, use the enterprise repository with an appropriate subscription.
4. Create the backup datastore
A datastore is the directory where PBS stores backup data. You will use its name when adding PBS to Proxmox VE. The datastore name and its filesystem path are different settings.
In this single-disk lab, the datastore dchost-demo was created at /srv/pbs-store on the existing ext4 root filesystem. The PBS operating system and backups share one virtual disk.
Open Add Datastore in the PBS sidebar and fill in General:
| Field | Lab value | Meaning |
|---|---|---|
| Name | dchost-demo | The backup store's identifier within PBS. |
| Backing Path | /srv/pbs-store | The directory that holds backup data. |
| Prune Schedule | 03:30 | When to apply retention rules. |
| GC Schedule | 04:30 | When to clean up unused data chunks. |
General is set to dchost-demo, /srv/pbs-store, GC at 04:30, and prune at 03:30.
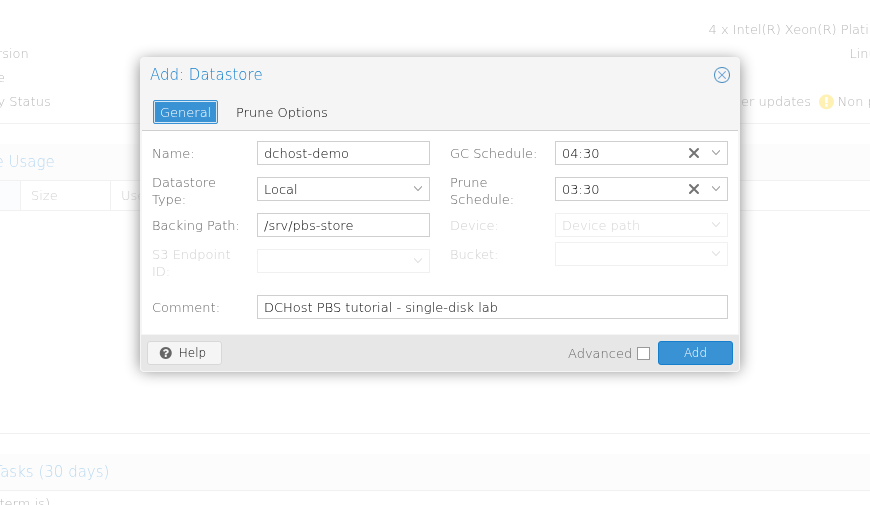
Step 1: Check the name and actual directory
- Check the name and actual directory
Name is dchost-demo, Datastore Type is Local, and Backing Path is /srv/pbs-store. This lab directory shares capacity with the PBS system disk.
- Set separate prune and GC times
Prune Schedule is 03:30 and GC Schedule is 04:30. Prune removes snapshots according to retention rules; GC later reclaims unused data chunks.
This screen shows the settings before Add is selected.
In Prune Options, the lab selected Keep Daily → 7, Keep Weekly → 4 and Keep Monthly → 3. No additional counts were entered in the other retention fields. The screens below show creating the datastore and saving those settings.
Prune Options is filled with 7 daily, 4 weekly, and 3 monthly retention slots.
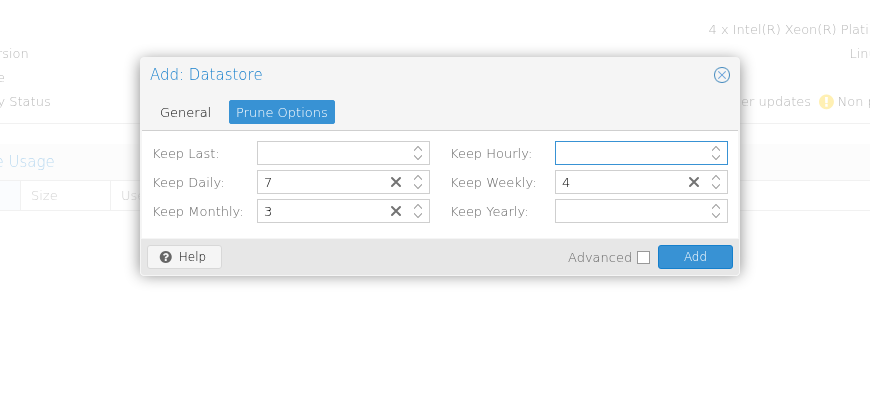
Step 1: Enter Keep Daily 7 and Keep Monthly 3
- Enter Keep Daily 7 and Keep Monthly 3
The left column uses Keep Daily 7 and Keep Monthly 3. Keep Last is left empty.
- Enter Keep Weekly 4
The right column uses Keep Weekly 4. Keep Hourly and Keep Yearly are empty. Review the settings, then select Add to create the datastore.
Video: create the datastore
Real PBS recording: daily 7, weekly 4, monthly 3 retention, General review, and Add. dchost-demo appears in the sidebar; the usage table has not refreshed. This clip does not show a backup.
Creating the PBS datastore — transcript
00:00 — Retention: daily 7, weekly 4, monthly 3.
00:03 — Add creates the datastore.
00:10 — dchost-demo appears in the sidebar. The usage table has not refreshed.
The General tab is reviewed with the name dchost-demo, Local type, and /srv/pbs-store path. The recording shows GC at 04:30 and prune at 03:30. The creation task reaches Done. At the end, the datastore appears in the sidebar while the usage table has not refreshed. The clip does not show a backup.
The completed datastore summary shows its backing path and that no backups have been created yet.
dchost-demo now appears at /srv/pbs-store; no backup groups or snapshots exist yet.
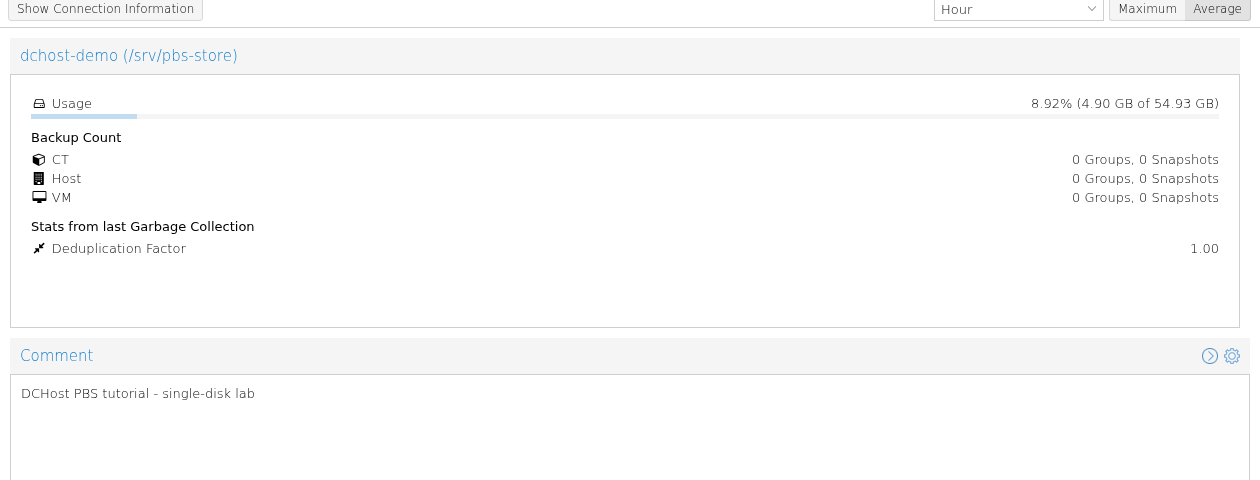
Step 1: Confirm the datastore name and path
- Confirm the datastore name and path
The summary heading reads dchost-demo (/srv/pbs-store). Usage reflects the shared filesystem capacity of this single-disk lab.
- Observe the empty state before the first backup
CT, Host, and VM each show 0 Groups, 0 Snapshots. This screen confirms that the datastore was created.
After adding the datastore, check Summary and Content. An empty Content list is expected before the first backup. Confirm that the backing path is on the intended filesystem and check its available space before backing up.
Because this directory can also fill the OS filesystem, the exercise is limited to a small VM. Use suitable dedicated backup storage for production and monitor its capacity. If you mount a separate disk, verify the actual mount rather than relying on the directory's existence.
The difference between retention and space reclamation is explained in Prune and GC. PBS job times use the PBS server's Europe/Istanbul timezone. Adjust the gaps between jobs to their actual duration; the example's one-hour gap may not suit every workload.
5. Create the backup user and API token
Proxmox VE does not need the PBS root password for every backup. Use a separate account and API token with access limited to the required datastore.
- In PBS, open Configuration → Access Control → User Management → Add.
- Enter pve-backup in User name and select Realm → Proxmox Backup. The resulting full user ID is pve-backup@pbs. Save it as an enabled account.
- In API Token → Add, select that user and give the token a name describing its purpose.
- Save its identifier and secret securely. The secret is displayed only once.
For this account, the token identifier has the format pve-backup@pbs!TOKEN_NAME. Replace TOKEN_NAME with the actual token name you created; it is not a secret value to copy literally. In Proxmox VE, the full identifier goes in Username and the token secret goes in Password. The user's login password is not the token secret.
Add: User is filled with pve-backup and the Proxmox Backup authentication realm.
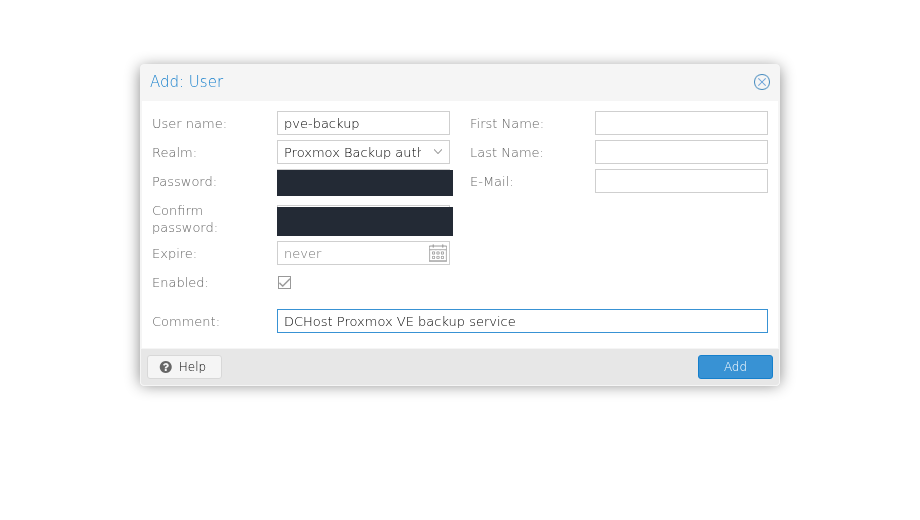
Step 1: Create pve-backup in the PBS realm
- Create pve-backup in the PBS realm
User name is pve-backup and Realm is Proxmox Backup, giving the full user ID pve-backup@pbs. Set and confirm a strong password for the account.
- Select Add to create the enabled account
Enabled is checked. After reviewing the fields, select Add to create the user.
The token creation form selects pve-backup@pbs. The token name is masked for privacy.
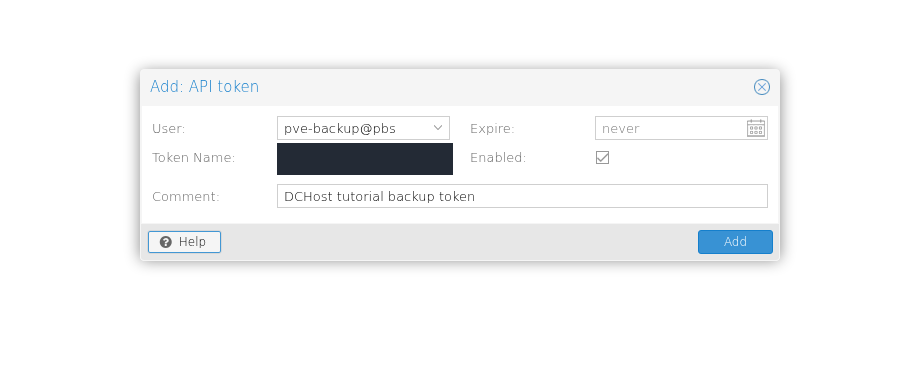
Step 1: Select the user and enter a token name
- Select the user and enter a token name
Select pve-backup@pbs in User, enter your own Token Name, and keep Enabled checked. Store the token secret shown after Add in a secure place.
This image was captured before the token secret was generated.
Use Permissions → Add → User Permission for the user, then Permissions → Add → API Token Permission for the token. Give both the DatastoreBackup role on the intended datastore only. The ACL path in this example is /datastore/dchost-demo; do not enter the /srv/pbs-store filesystem path here.
The token needs its own ACL entry. Giving its parent user a role does not automatically provide the token with that access. Its effective privileges are restricted by both its own permissions and those of the parent user.
DatastoreBackup allows creating backups and restoring owned backup groups. We will manage pruning on PBS, so the Proxmox VE token does not need a broader role for deleting old snapshots. See the official API-token permissions.
The lab verified /datastore/dchost-demo → DatastoreBackup for both the user and token. Neither was granted server-wide administrative access.
DatastoreBackup is assigned to pve-backup@pbs at /datastore/dchost-demo.
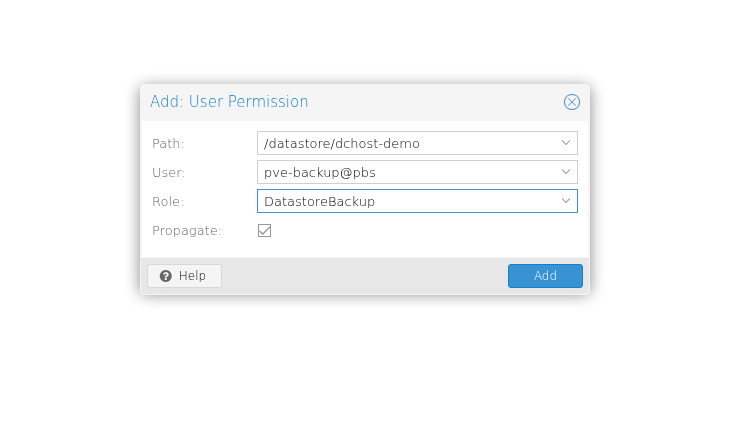
Step 1: Check Path, User, and Role together
- Check Path, User, and Role together
Set Path to /datastore/dchost-demo, User to pve-backup@pbs, and Role to DatastoreBackup. Propagate is checked. Confirm the scope, then select Add.
The API token also receives DatastoreBackup at /datastore/dchost-demo.
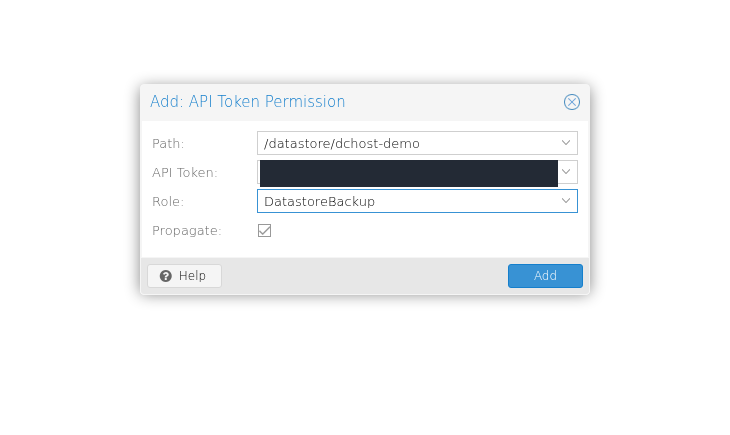
Step 1: Use the same scope for the token
- Use the same scope for the token
Path is /datastore/dchost-demo and Role is DatastoreBackup. Select the API token you created, keep Propagate checked, and select Add.
Permissions lists two rows for the user and token at the same datastore path.
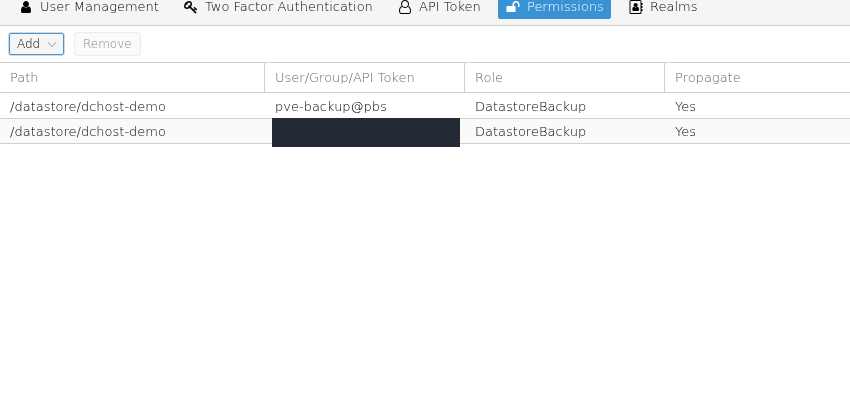
Step 1: Confirm that both rows use the datastore path
- Confirm that both rows use the datastore path
Both Path values must be /datastore/dchost-demo. The first row is for pve-backup@pbs and the second is for the API token.
- Check the role and Propagate value
Both rows show Role DatastoreBackup and Propagate Yes. These permissions provide backup access to the selected datastore.
6. Connect PBS to Proxmox VE
Switch to the Proxmox VE interface. Open Datacenter → Storage → Add → Proxmox Backup Server.
Configure the connection in General:
| Field | Value for this example |
|---|---|
| ID | pbs-dchost: the connection name within PVE. |
| Server | The reachable IP address or DNS name of your PBS server. |
| Username | pve-backup@pbs!TOKEN_NAME: your token's full identifier. |
| Password | The API token secret, not the user's login password. |
| Datastore | dchost-demo: the datastore created in PBS. |
| Fingerprint | The PBS TLS certificate's SHA-256 fingerprint, checked through a trusted source. |
Compare the fingerprint with the value obtained through the verified PBS interface or trusted console. Its bytes are separated by : in this field. If the certificate changes later, establish that the change is expected before saving a replacement fingerprint.
General is filled with storage ID pbs-dchost and datastore dchost-demo.
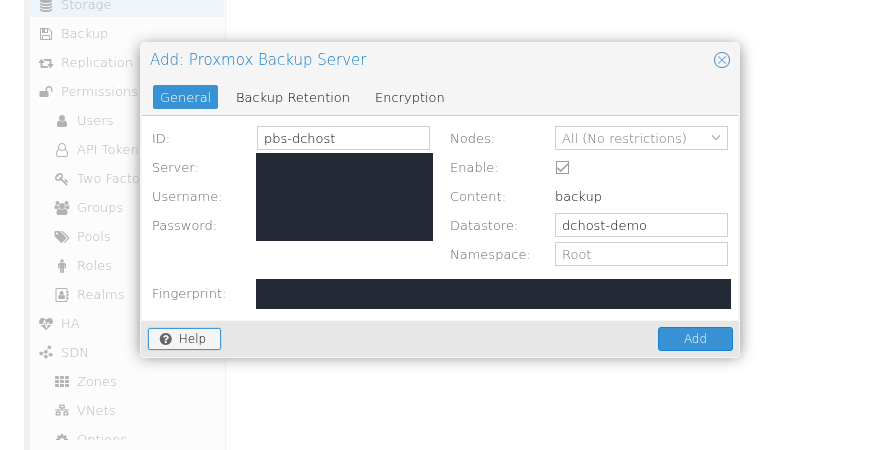
Step 1: Enter the server and API token credentials
- Enter the server and API token credentials
ID is pbs-dchost. Enter your PBS address in Server, the full API token ID in Username, and its secret in Password. For Fingerprint, use the TLS fingerprint you checked against the PBS identity.
- Check Datastore and Enable
Datastore is dchost-demo, Content is backup, and Namespace is Root. Enable is checked. Configure Backup Retention and Encryption before selecting Add.
This is the form before Add; it does not show a backup result.
The Backup Retention tab was set to Keep all backups. PVE therefore does not apply its own shorter retention policy through this connection; PBS manages the 7 daily, 4 weekly and 3 monthly retention rules. Keep all in PVE does not disable the PBS prune job.
PVE retention is set to Keep all backups; the PBS prune job applies the retention rules.
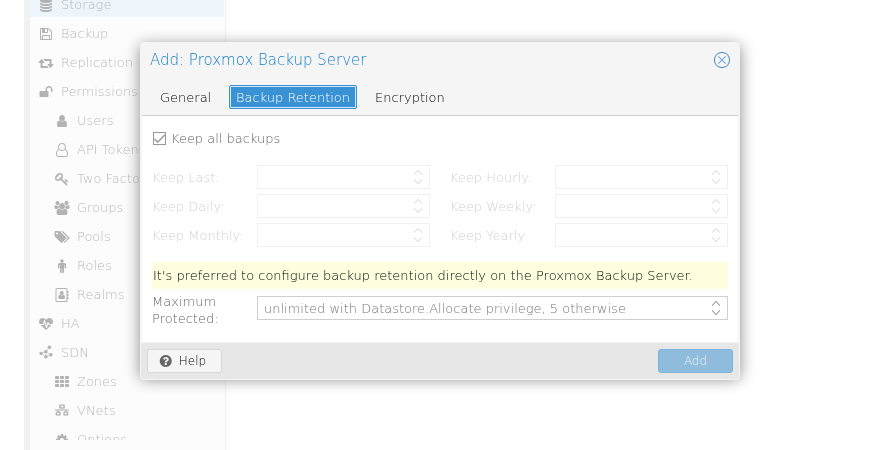
Step 1: Leave Keep all backups checked
- Leave Keep all backups checked
This selection sets no separate retention limit in the PVE storage configuration. PBS prune rules still apply; GC reclaims unused data chunks on its own schedule.
Enable encryption and keep the recovery key elsewhere
TLS protects the connection during transfer. Client-side encryption encrypts the backup data before it reaches PBS. These are separate protections; backup encryption is not enabled by default.
The lab selected Encryption → Auto-generate a client encryption key to create a new client encryption key. After checking General, Backup Retention and Encryption, Add saved the storage connection.
Encryption selects Auto-generate a client encryption key.
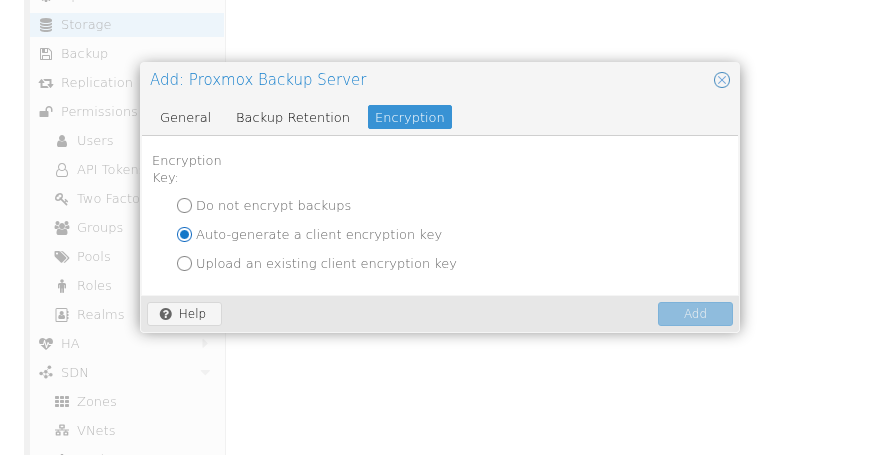
Step 1: Check the Auto-generate selection
- Check the Auto-generate selection
Select Auto-generate a client encryption key for a new key. Check the other tabs, select Add to add the storage, and safely save the key from the dialog that opens.
This image shows the selection before Add; the key appears in the next dialog.
After saving, Important: Save your Encryption Key appears. Select Download, then keep the key file securely outside both servers. In this walkthrough, Download saved the generated key as a JSON file.
Important: Save your Encryption Key asks you to save the key. The entire key field is hidden.
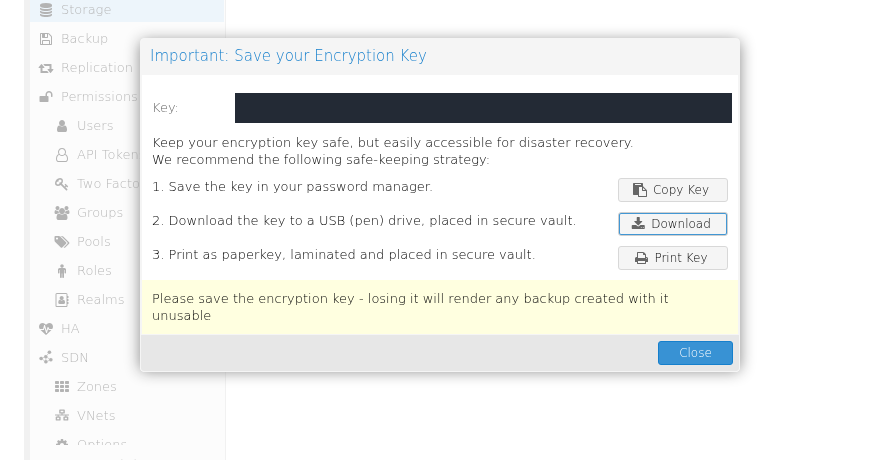
Step 1: Follow Save your Encryption Key
- Follow Save your Encryption Key
Keep the key in your password manager and in a secure recovery location. The dialog states that losing the key makes backups created with it unusable.
- Export the key with Download
Use Download and keep the file in a secure location you can access during recovery. After saving it, select Close to continue.
Keep a recovery copy of the key separate from the PVE and PBS servers.
This active key file is not protected by a passphrase, allowing PVE to run unattended jobs. Protect the downloaded copy in a password manager's secure file storage or an encrypted offline copy. Do not put it in a public web directory or share the key text, JSON contents or QR code.
The API token, administrator password and backup encryption key are different credentials. Replacing a token or resetting root's password does not recover a lost encryption key. If its only copy remains on a failed PVE host, the encrypted backups on PBS may be inaccessible.
After adding the connection, pbs-dchost was confirmed active and able to read the empty PBS backup list. An empty list is expected before the first VM backup.
The PVE Storage list shows pbs-dchost, Backup content, and Enabled Yes.
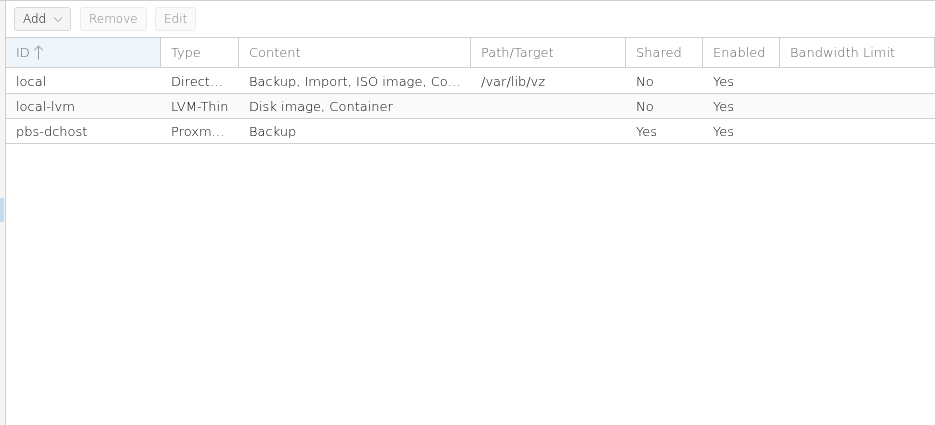
Step 1: Find pbs-dchost and Backup
- Find pbs-dchost and Backup
ID shows pbs-dchost and Content shows Backup. This row shows that the PBS storage definition was added to PVE.
- Check Enabled Yes
The new row shows Yes for Shared and Enabled. Also check that the storage is accessible before running the first backup.
The storage definition is complete; this list does not yet show a successful backup or restore.
Enabling encryption later does not encrypt earlier snapshots retroactively. Backups encrypted with different keys cannot share deduplicated chunks across those keys. Label recovery copies so you know which storage connection and backups they belong to. See the official encryption and key-storage guidance.
7. Create the first VM backup
The source in this exercise is VM 101, a Debian guest with a 16 GiB virtual disk. Check the intended VM name and ID, included disks, and target PBS storage before starting. Excluded disks, external storage and application-specific database backups need separate planning.
Prepare a file to check after recovery
Open the guest console and create a small pbs-restore-check.txt file in your home directory.
printf 'DCHost PBS restore verification\n' > ~/pbs-restore-check.txt
sha256sum ~/pbs-restore-check.txt
The file contains the line DCHost PBS restore verification followed by a newline. Its recorded SHA-256 is:
33ab253ce02653b93adc34ea8ec8ff4cf5aab70865a2ad50243d35ffe02c818e
Keep that value. We will look for the same file and hash in the restored machine. Changing the contents changes the expected hash.
The source VM has created pbs-restore-check.txt, read its contents, and calculated its SHA-256.
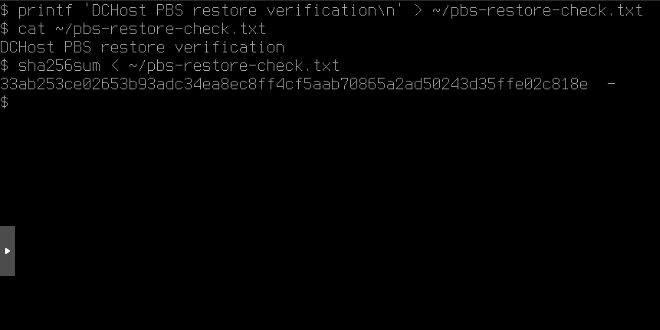
Step 1: Create and read the contents
- Create and read the contents
The actual file path is /home/demo/pbs-restore-check.txt. The cat output shows DCHost PBS restore verification.
- Read the start of the SHA-256
sha256sum reads the file from standard input. This closeup shows the beginning of the result; the complete value is below.
- Check the end of the SHA-256
The second checksum closeup shows the end of the same actual output line. This value will later be compared with the restored file.
Source SHA-256: 33ab253ce02653b93adc34ea8ec8ff4cf5aab70865a2ad50243d35ffe02c818e. This screen establishes the source file; no restore has happened yet.
Start the snapshot backup
Open the VM's Backup → Backup now dialog:
- Select Storage → pbs-dchost.
- Check Snapshot, the mode used in this exercise.
- Confirm the intended VM and start the backup.
- Open the task log and wait for TASK OK.
The Backup form selects pbs-dchost as the destination and Snapshot as the mode.
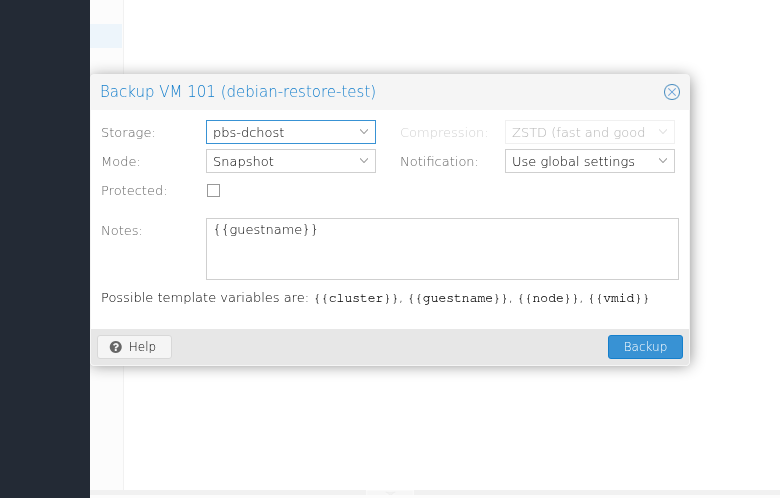
Step 1: Check Storage and Mode
- Check Storage and Mode
Storage is pbs-dchost and Mode is Snapshot. This screen shows the actual settings before the backup starts.
- Select Backup to start
After checking the settings, select Backup. Confirm completion in the following task log.
Video: create the first encrypted backup
Real PVE recording: the first backup of VM 101 is started manually with Backup, using pbs-dchost and Snapshot mode. The task log shows encryption, progress, and TASK OK after 26 seconds. This clip does not demonstrate a scheduled trigger or a restore.
Starting the first encrypted backup manually — transcript
00:00 — Started manually with Backup.
00:04 — Log: enabling encryption.
00:10 — The backup is progressing.
00:27 — TASK OK · completed in 26 seconds.
At the start, pbs-dchost storage and Snapshot mode are selected for VM 101 (debian-restore-test). Backup starts the task manually. The log shows enabling encryption, guest-agent fs-freeze and fs-thaw commands, progress percentages, and Finished Backup of VM 101 (00:00:26). The result is TASK OK. The roughly 32-second genuine recording does not prove a scheduled trigger or a restored guest. Use fullscreen or the companion annotated screenshots to read fine interface text.
The task log shows the guest filesystem freeze/thaw steps, the 26-second duration, and TASK OK.
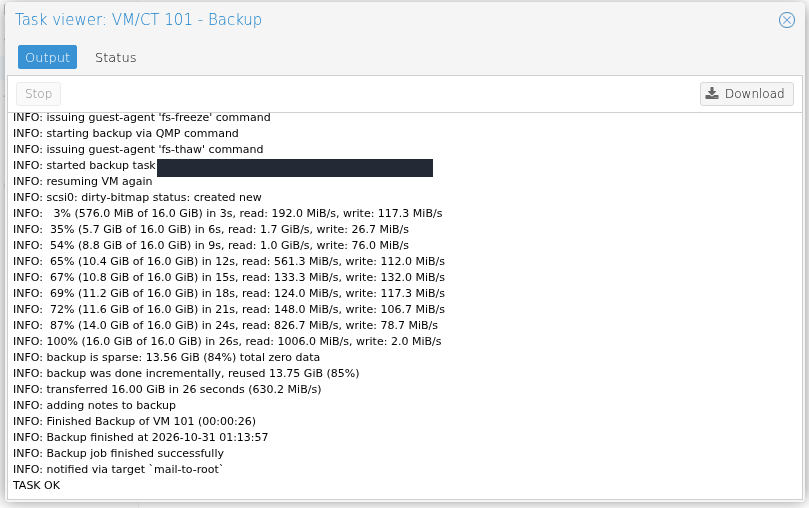
Step 1: Check the fs-freeze and fs-thaw lines
- Check the fs-freeze and fs-thaw lines
The guest agent freezes the filesystem, the backup starts through QMP, and the filesystem is thawed. These are actual task-log lines.
- Read the 26-second duration and TASK OK
Finished Backup of VM 101 (00:00:26), Backup job finished successfully, and TASK OK are visible. They confirm successful completion of the backup task.
This view is scrolled to the completion lines. The first-backup recording and PBS Content screen establish encryption; restoration has not yet been tested.
The first real backup log recorded client encryption and QEMU Guest Agent filesystem freeze/thaw operations. It completed with TASK OK. In the PBS datastore's Content tab, the first snapshot appeared under vm/101 with an Encrypted status.
Content lists vm/101, one snapshot, and an encryption lock. Verify State is None at this point.
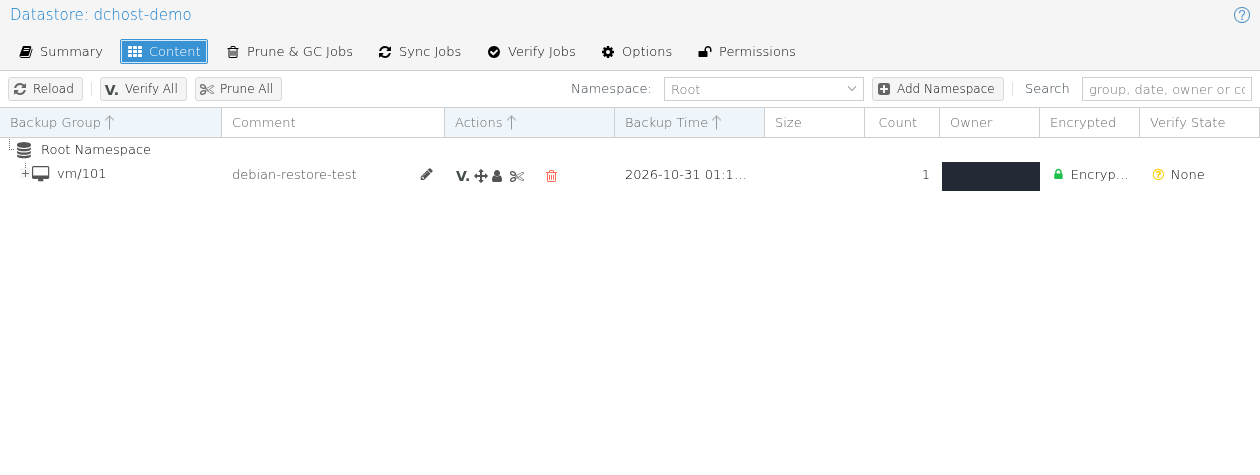
Step 1: Check the VM group and comment
- Check the VM group and comment
Backup Group is vm/101 and Comment is debian-restore-test. This is the source VM backup group in PBS.
- Read the snapshot count and state
Count 1 and the green lock identify the first encrypted snapshot. Verify State None means that no verification result existed when this screen was captured.
This record is not a restore test. Verify checks data integrity; a booted guest and file comparison must be tested separately.
Guest Agent helps bring a running guest's filesystem to a consistent point for backup. This does not establish every database or application's consistency without its own checks; follow application-specific backup requirements as well.
Subsequent backups can reuse unchanged chunks instead of sending the entire VM disk again. Each snapshot still references the full state required for recovery. Do not assume a fixed compression or deduplication ratio: the saving depends on the data and how much changes between backups.
8. Configure automated backups
The VM backup schedule is configured in Proxmox VE. A PBS Verify or Prune schedule does not create a new VM backup.
- Open Datacenter → Backup → Add in PVE.
- Select Storage → pbs-dchost.
- In Guests to Include, check the box at the start of the VM 101 row. Confirm Selected (1) and the selected VM ID.
- Set the Schedule and backup mode. This exercise uses Snapshot.
- Select Keep all backups on the Retention tab; PBS will manage retention.
- Keep Enable checked, select Create, and check the next run time.
Keep all backups remains selected for this connection; the PBS retention job manages old recovery points. Adding a shorter PVE policy could remove snapshots earlier than the PBS policy intends.
The final corrected form shows pbs-dchost, Snapshot, Schedule 02:00, Enable, and selected VM 101.
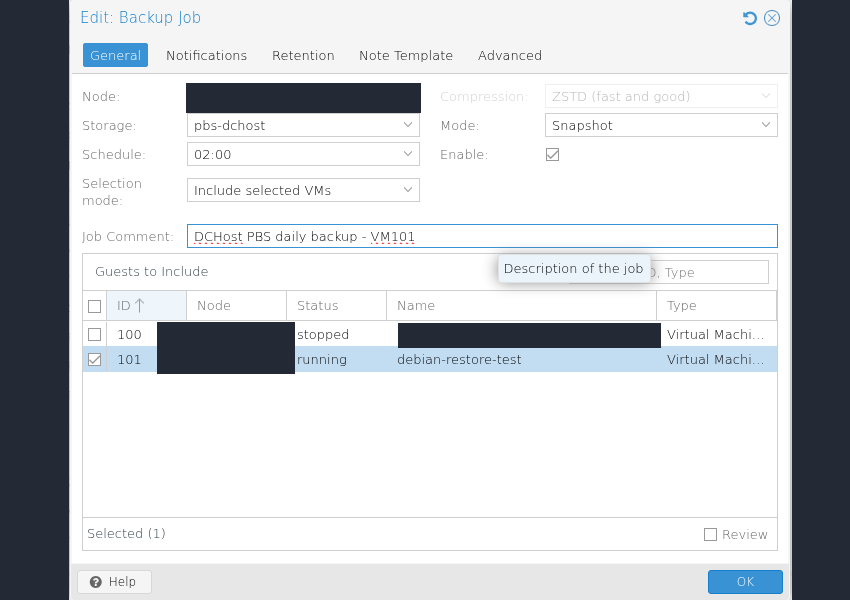
Step 1: Enter 02:00 in Schedule
- Enter 02:00 in Schedule
The destination remains pbs-dchost and the mode is Snapshot. Schedule 02:00 defines a daily run; Enable is checked.
- Select VM 101
Include selected VMs has 101 (debian-restore-test) checked. Selected (1) confirms that one guest is selected.
- Save the final settings with OK
Select OK to save, then confirm 02:00 in the table. This form was prepared after the actual 01:19 scheduler test.
This step shows the settings form; the next screen shows the final saved row.
Confirm an automatic run
The lab first tested the scheduler with a near-future time of 01:19. On 31 October 2026 at 01:19, Europe/Istanbul, the scheduled task started automatically and completed successfully. A new encrypted recovery point appeared on PBS; this result was not established solely by pressing Run now.
The actual automatic test log shows encryption, 32 MiB of changed data, and the successful-completion line.
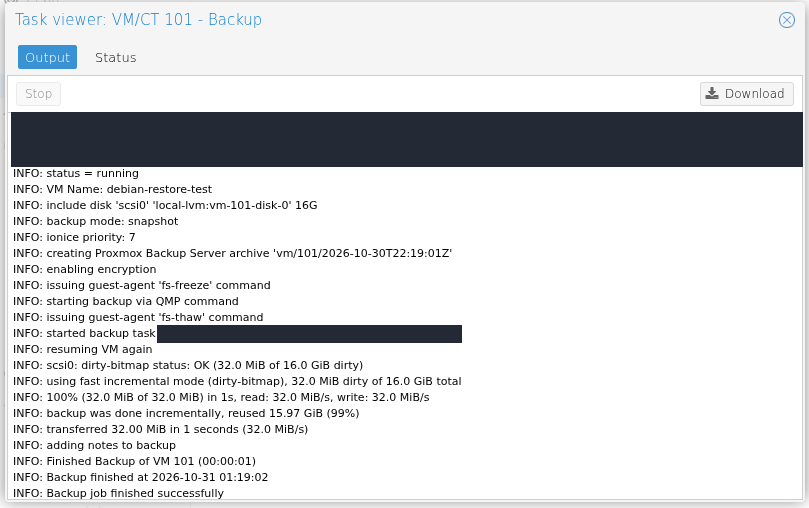
Step 1: Check encryption and guest-agent lines
- Check encryption and guest-agent lines
enabling encryption, fs-freeze, and fs-thaw are visible. The 22:19:01Z snapshot timestamp corresponds to 01:19:01 in Europe/Istanbul.
- Confirm that the incremental transfer finished
The log shows the completed 32.0 MiB transfer and Backup job finished successfully. The PVE scheduler triggered this test job.
The scheduler journal and snapshot record independently confirmed the automatic trigger; Run now was not used. TASK OK is outside this captured viewport. The final daily time is 02:00.
After that test, the same job was saved with its final 02:00 schedule and checked again. This expression means every day at 02:00 in the PVE server's timezone.
The Backup table has saved the enabled job, 02:00 time, pbs-dchost, and VM 101 selection.
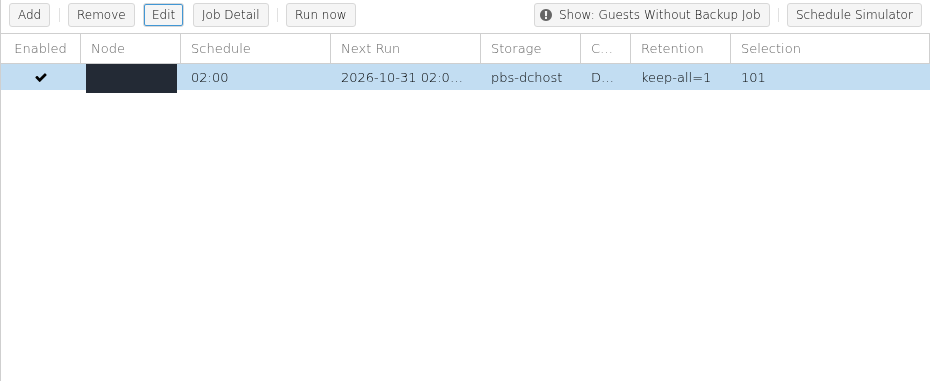
Step 1: Check 02:00 and the enabled checkmark
- Check 02:00 and the enabled checkmark
Schedule shows 02:00 and Enabled has a checkmark. This is the saved final daily time.
- Read the destination, selection, and PVE retention
Storage is pbs-dchost, Selection is 101, and Retention is keep-all=1. The separate PBS prune policy keeps 7 daily, 4 weekly, and 3 monthly snapshots.
Both PVE and PBS use Europe/Istanbul in this lab. A trailing Z in a backup identifier denotes UTC; local 01:19 corresponds to 22:19 UTC on the previous date. Account for that difference when comparing an identifier with the panel's local time.
You can first test a job manually with Run now. To confirm automatic triggering, also wait for the scheduled time and check the resulting task and snapshot. Allow the backup to finish before later prune or GC tasks; choose gaps based on your workload's actual duration.
9. Manage retention and free space
Keeping every backup indefinitely eventually fills the datastore. Decide which recovery dates your service needs, then choose a retention policy and capacity to support them.
Prune: decide which recovery points remain
In the PBS datastore's Prune & GC Jobs tab, review the retention job saved when creating the datastore. Avoid accidentally adding a second policy with a shorter retention period for the same backups. Keep Last retains recent snapshots by count; Keep Daily and Keep Weekly retain representative snapshots from the relevant days and weeks.
The lab configured Keep Daily → 7, Keep Weekly → 4 and Keep Monthly → 3, with no additional Keep Last count. This does not always mean exactly 14 backups remain. The rules are processed in order and retain representative snapshots for the relevant time periods. Configuring a policy cannot recreate a backup from a day when no backup was taken.
You can optionally use the official Prune Simulator to explore schedules and retention values before changing the policy. It is a planning tool. Reducing retention removes recovery points that cannot simply be recreated later. See the official pruning explanation.
Garbage Collection: reclaim unused chunks
Prune removes snapshot metadata and references. It does not immediately delete all the underlying data because other snapshots may still reference the same chunks.
Garbage Collection (GC) finds and removes chunks that no backup needs. PBS applies a safety interval to protect active writers. A successful GC task can therefore show Pending removals: some unused chunks may need a later eligible GC run before they can be removed.
Set a regular GC schedule. Plan backup, verification and cleanup jobs around the server's disk and network capacity. Never manually delete the datastore's chunk files. See the official GC explanation.
This example saved Prune at 03:30 and GC at 04:30. In Prune & GC Jobs, check the intended datastore, retention values and next run times.
Prune is saved for 03:30 and GC for 04:30. Prune keeps 7 daily, 4 weekly, and 3 monthly snapshots; these jobs have not yet run.
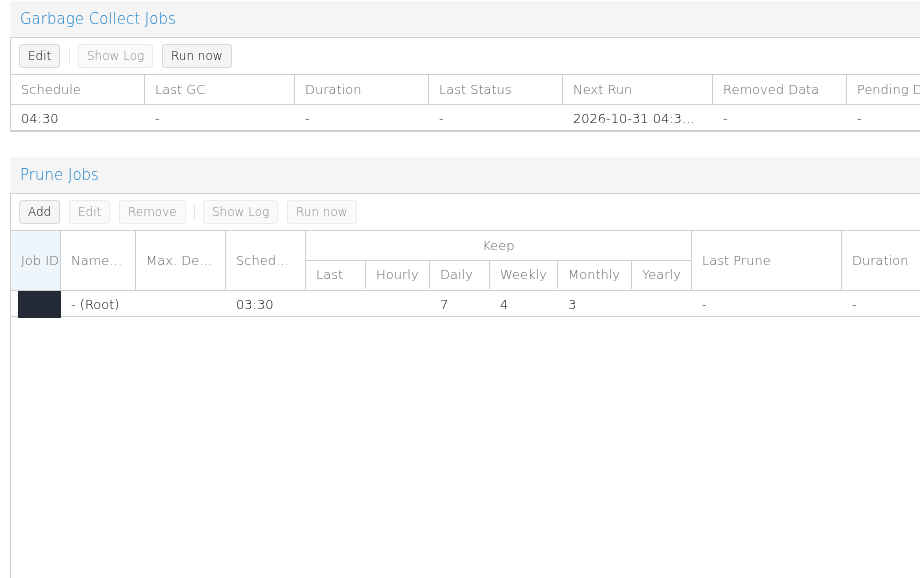
Step 1: Confirm GC at 04:30
- Confirm GC at 04:30
Schedule in Garbage Collect Jobs is 04:30. GC reclaims space from data chunks that are no longer referenced.
- Read the prune time and retention values
Prune applies the 7 daily, 4 weekly, and 3 monthly policy at 03:30. Prune removes snapshot records; the later GC reclaims physical space.
10. Verify backup integrity
In PBS, open dchost-demo → Verify Jobs and add the verification job. The lab saved these settings:
| Field | Value | Purpose |
|---|---|---|
| Schedule | sun 05:30 | Runs on Sundays at 05:30 in the PBS timezone. |
| Skip Verified | Enabled | Skips already verified snapshots that have not reached the recheck threshold. |
| Re-Verify After | 30 days | Makes older verification results eligible for a fresh check. |
dchost-demo is set to Sunday 05:30, Skip Verified, and Re-Verify After 30 days.
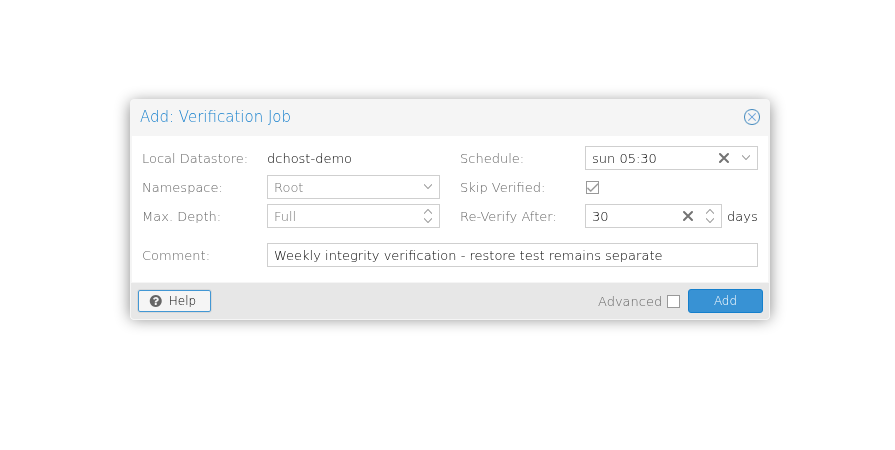
Step 1: Check the datastore and scope
- Check the datastore and scope
Local Datastore is dchost-demo, Namespace is Root, and Max. Depth is Full. These settings define the verification job scope.
- Set Sunday 05:30 and re-verification after 30 days
Schedule is sun 05:30, Skip Verified is checked, and Re-Verify After is 30 days. Check the fields and select Add. Verification does not replace a separate restore test.
This is the form before Add; verification has not run yet.
Verify Jobs lists the saved job. It has no execution result yet.
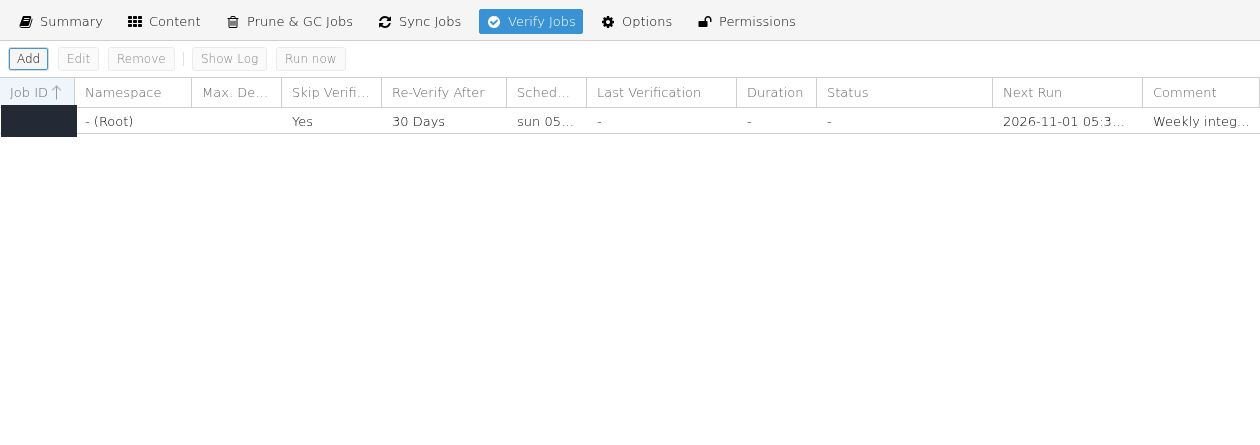
Step 1: Read the saved re-verification settings
- Read the saved re-verification settings
The row shows Skip Verified Yes and Re-Verify After 30 Days. The weekly job selected in the form is saved; the narrow Schedule column truncates its text.
- Recognize that no verification result exists yet
Last Verification, Duration, and Status contain dashes. This screen shows only that the job was saved; a successful verification result must be checked after a run.
At this stage the verification job has not run yet.
Select the saved Verify job and choose Run now. In this exercise, verification of the first encrypted snapshot was started manually. The task window used the title Scheduled Verification; the completed task reported TASK OK and 0 errors.
The check started with Run now on the Verify Job completed one snapshot with 0 errors and TASK OK.
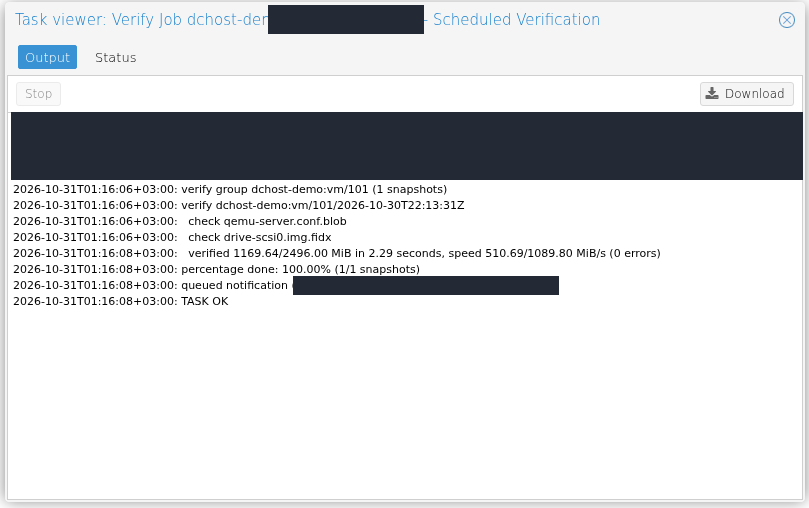
Step 1: Check the 0 errors result
- Check the 0 errors result
The log shows 2.29 seconds and (0 errors). One snapshot was verified in this actual run.
- Read the 100% and TASK OK lines
percentage done: 100.00% (1/1 snapshots) and TASK OK confirm completion. Verify checks the integrity of backup data.
Scheduled Verification in the title is the task type; this run was started manually with Run now. A successful Verify does not by itself prove guest boot or application recovery.
After the second backup, a final Run now verification checked the new snapshot and skipped the recently verified first one. Refreshing PBS Content showed both encrypted snapshots with All OK verification status. The demonstrated verification runs were started manually; the weekly schedule remained configured.
A previously successful backup can be damaged later by storage faults or data degradation. The first result is therefore not enough indefinitely. Here, 30 days is the recheck threshold; because the job runs weekly, an eligible backup is checked on the next Sunday. This is not a guarantee of a check every 30 days exactly.
The vendor recommends reverifying all backups at least monthly. To meet a strict maximum interval, adjust both the job frequency and recheck threshold accordingly, allowing for data volume and disk capacity.
Verification passed and the restored machine works are different results. Verification checks the stored backup's integrity. Operating-system boot, application behaviour and access to the recovery key must be checked through an actual recovery exercise.
11. Restore into a separate virtual machine
Connect using the downloaded encryption key
To test using the saved key for recovery, a second PVE PBS storage connection named pbs-recovery was created. It points to dchost-demo on the same PBS server; it does not create a separate physical backup copy.
- Open Datacenter → Storage → Add → Proxmox Backup Server again.
- Use pbs-recovery as the new ID. The PBS address, datastore, token and verified fingerprint must refer to the same intended destination.
- Select Encryption → Upload an existing client encryption key. Use the file picker beside Key to upload the JSON key previously saved with Download. The existing encrypted backup needs its matching key.
- Select Add to save the connection, close the key-saving dialog and use this connection’s backup list for recovery.
The downloaded JSON was actually imported through the GUI, and its key data was checked against the original. The active key for pbs-dchost was preserved; the working key was not deleted for this test.
Encryption is set to upload an existing key for the recovery storage.
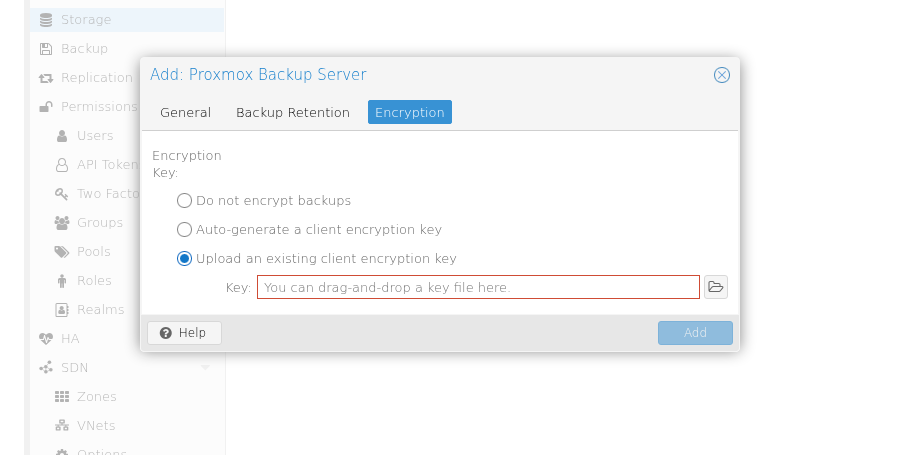
Step 1: Select Upload an existing client encryption key
- Select Upload an existing client encryption key
Use the file picker next to Key to upload the key file you previously saved with Download. The encrypted backup requires the existing key that was used to create it.
The downloaded JSON file has been loaded. The entire Key field is masked for privacy.
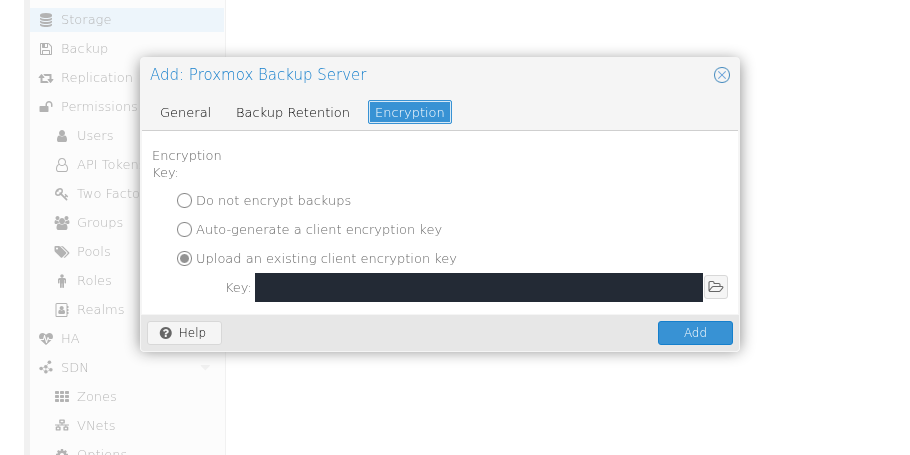
Step 1: Use the existing key you loaded
- Use the existing key you loaded
Keep Upload an existing client encryption key selected. This lab reloads the JSON file downloaded earlier; its key field is completely hidden in the image. Select Add to save pbs-recovery.
PVE lists pbs-dchost and pbs-recovery. Both connect to the same PBS datastore.
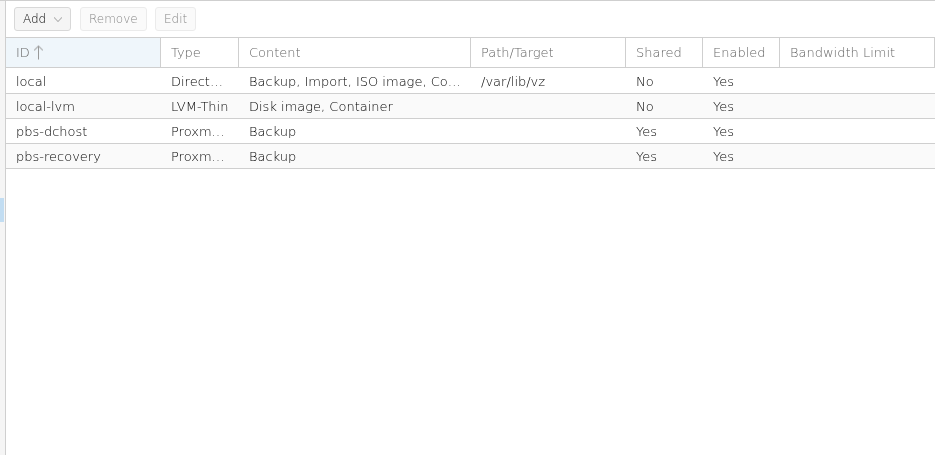
Step 1: Find the pbs-recovery row
- Find the pbs-recovery row
pbs-recovery is the second PVE connection to the same dchost-demo datastore, using the saved key.
- Check Enabled Yes
Both PBS connections show Enabled Yes. The recovery test uses pbs-recovery.
These two PVE definitions are not two independent backup copies.
Restore to a new VM ID
In the PVE sidebar, open pbs-recovery → Backups. This exercise selected the automatically created 31 October 01:19 recovery point, identified as vm/101/2026-10-30T22:19:01Z. Select Restore to open the form.
| Setting | Selected lab value |
|---|---|
| Target storage | local-lvm |
| New VM ID | 102 |
| Restored VM name | debian-pbs-restore |
| Unique | Enabled; generates new network adapter identities. |
| Start after restore | Disabled; the restored VM is started under control. |
Choose an unused VM ID and sufficient destination capacity on your system. Recheck that Restore will not overwrite the existing VM.
The target VM ID is 102 and storage is local-lvm. Unique is checked and Start after restore is unchecked.
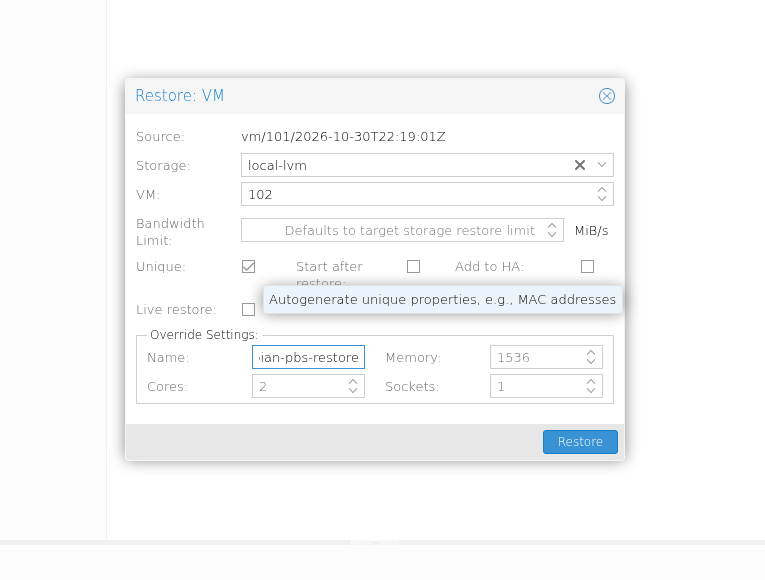
Step 1: Check the new VM ID and target storage
- Check the new VM ID and target storage
Source is vm/101/2026-10-30T22:19:01Z, the scheduled backup taken at 01:19 local time. Storage is local-lvm and VM is 102.
- Keep Unique checked and automatic start unchecked
Unique generates new hardware identities. Leave Start after restore unchecked, then start the restored VM after stopping the source VM. Review the settings and select Restore.
Video: restore with the saved key
Real PVE recording: the backup is restored to new VM 102 on local-lvm using the saved key previously imported into pbs-recovery. Restore, disk progress, and TASK OK are visible. This clip does not show guest boot or a file check.
Restoring to a new VM with the saved key — transcript
00:00 — Restore starts recovery to new VM 102.
00:02 — The 16 GiB disk is being restored.
00:15 — Restore completed: TASK OK.
The initial form shows source snapshot vm/101/2026-10-30T22:19:01Z, local-lvm, and new VM ID 102. Unique is selected; Start after restore is unchecked. Restore starts the task. The log shows use of an encryption key from a file descriptor and disk restoration. The genuine LVM-thin capacity and autoextend warnings remain visible. The disk line reports 17179869184 bytes restored in 11.16 seconds; TASK OK follows. The saved key had been imported into pbs-recovery before this recording. Guest boot and file verification are separate stages. Use fullscreen or the companion annotated screenshots to read fine interface text.
The restore task completed with TASK OK. The encrypted snapshot was restored into the new VM 102 through pbs-recovery, using the downloaded key.
The task log shows completed disk restoration and TASK OK.
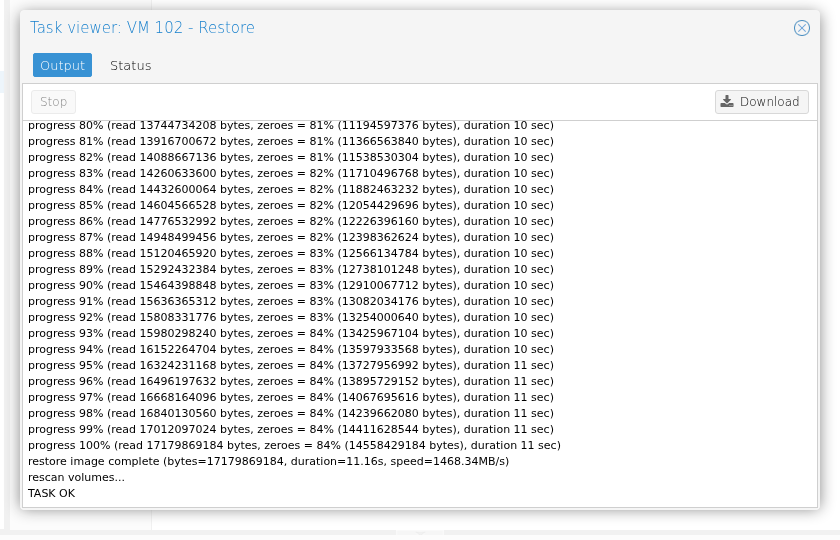
Step 1: Confirm TASK OK
- Confirm TASK OK
restore image complete reports that the 17179869184-byte disk was written. rescan volumes and TASK OK follow. Next, boot the new VM and check the file.
Understanding the LVM-thin capacity warning
This restore log warned that automatic protection against a full thin pool was not enabled and that the total virtual disk capacity exceeded the available physical capacity. Three 16 GiB virtual disks represented 48 GiB of virtual capacity; the thin pool's actual data usage after restore was 28.48%.
Thin provisioning allocates space as data is written rather than reserving the entire virtual disk immediately. Virtual capacity can therefore exceed the physical pool, but the pool can fill as guests grow. TASK OK confirms that this restore finished; it does not replace capacity planning. Monitor data and metadata usage and plan real free capacity for growth. Automatic extension cannot create capacity when no physical space is available.
Boot the copy safely and check the file
Unique generates new MAC addresses; it does not change a static IP inside the guest. Do not run the source and copy together on the same network with the same address.
In this lab, Shutdown was used on source VM 101, its stopped state was checked, and then VM 102 was started.
The source VM debian-restore-test shows stopped.
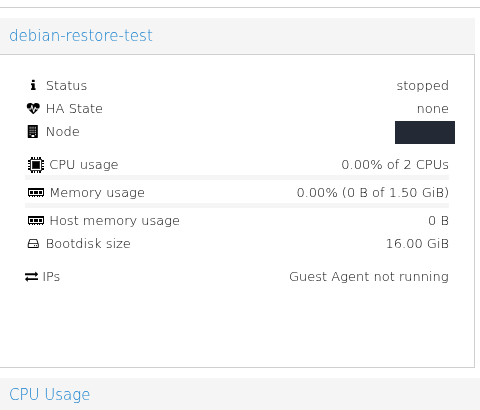
Step 1: Confirm that the source VM is stopped
- Confirm that the source VM is stopped
In this lab, source VM 101 was stopped before restored VM 102 was started. Both guests carry the same static IP configuration, so this order prevents a network conflict.
Open the restored VM's console and sign in with the guest account. Debian 13 booted from disk with kernel 6.12.113+deb13-amd64. Check the test file:
cat ~/pbs-restore-check.txt
sha256sum < ~/pbs-restore-check.txt
Here, < supplies the file through standard input; the - beside the hash identifies that input method.
It contained DCHost PBS restore verification, and its SHA-256 matched the pre-backup value:
33ab253ce02653b93adc34ea8ec8ff4cf5aab70865a2ad50243d35ffe02c818e
The VM 102 console shows the running kernel, actual file contents, and a SHA-256 digest matching the original file.
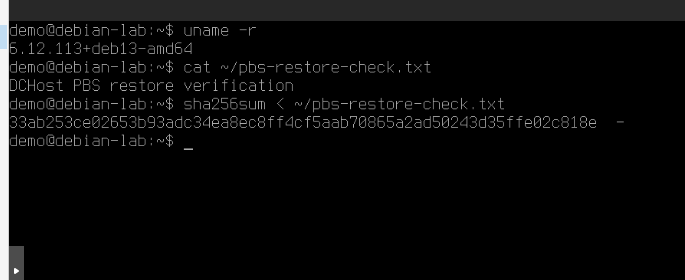
Step 1: Read the kernel and file contents
- Read the kernel and file contents
uname -r shows the running kernel, and cat prints DCHost PBS restore verification. The sha256sum output in the main image matches the original file exactly.
This confirms the test guest boot and file integrity. Run additional functional recovery tests for production applications and databases.
Video: check the restored file
Real VM 102 console: after login, uname -r, the file contents, and its SHA-256 digest are shown. The digest was independently matched to the recorded source-file value. This test verifies the lab operating system and file; it does not establish production application health.
Verifying the file in the restored VM — transcript
00:00 — uname -r: kernel version.
00:02 — cat: contents of the restored file.
00:05 — sha256sum: the file’s SHA-256 digest.
VM 102 is already logged in; no password is entered in this recording. The real commands are uname -r, cat ~/pbs-restore-check.txt, and sha256sum < ~/pbs-restore-check.txt, in that order. The output shows kernel 6.12.113+deb13-amd64 and file contents DCHost PBS restore verification. The SHA-256 output is 33ab253ce02653b93adc34ea8ec8ff4cf5aab70865a2ad50243d35ffe02c818e. Because the command reads the file through standard input, the digest is followed by - instead of a filename. The previously recorded source-file digest is identical; this match and guest boot were also independently confirmed. This recording does not show a side-by-side source comparison. The test covers only the lab operating system and this file; it does not establish production application or database health. Use fullscreen or the companion annotated screenshot to read fine console text.
The test confirmed access to the encrypted backup with the saved key, restoration to a new VM, OS boot and recovery of the test file. If your service runs a database, website or another application, test those application functions too.
Finish the test and restart the source
After verification, restored VM 102 was shut down and source VM 101 was restarted. The two copies with the same static address were not left running together. The source VM's daily 02:00 backup job was retained.
debian-pbs-restore shows stopped after the file check.
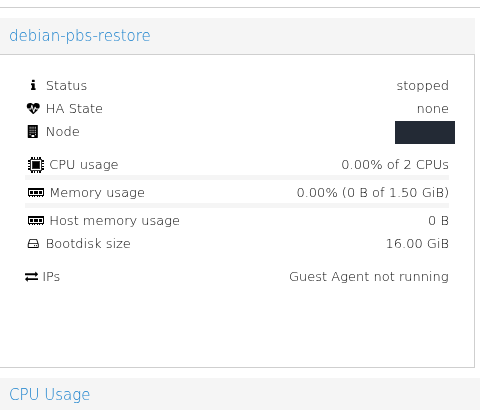
Step 1: Finish the recovery test in a controlled state
- Finish the recovery test in a controlled state
VM 102 was stopped after file verification. Original VM 101 was then started again for the daily backup job; both VMs were retained.
After PBS Content is reloaded, it shows two snapshots and group verification state All OK.
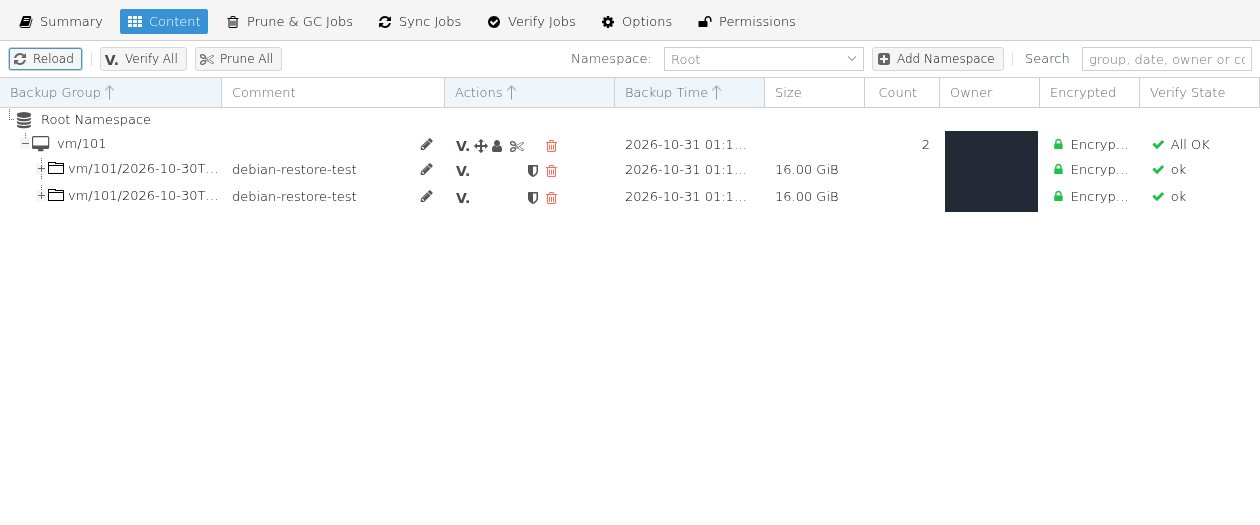
Step 1: Confirm that two snapshots are present
- Confirm that two snapshots are present
vm/101 shows Count 2 with two snapshot rows beneath it. They are the initial manual backup and the backup created by the scheduler.
- Check encryption and verification status
Both snapshots show encryption and Verify State ok; the group shows All OK. The final verification in this lab was started manually with Run Now.
Troubleshooting
The previous OS starts although the ISO is selected
Check the intended service, ready ISO and boot order first. Wait for any pending portal start or restart task to finish. Rebooting from inside the guest OS is different from fully stopping and starting the VM. In this lab, the ISO menu appeared after the console's Commands → Shutdown, confirmation that the VM was stopped, and Commands → Start. Use that full stop/start only on the intended server and during an acceptable interruption window.
Connection, backup and recovery
| Symptom | What to check |
|---|---|
| PBS interface does not open | Address, 8007 port, server power state, routing and firewall rules. |
| Authentication fails when adding PBS | Full pve-backup@pbs!TOKEN_NAME identifier and token secret. A user password is not a token secret. |
| Permission denied | Both user and token ACLs on the correct /datastore/NAME path. |
| Backup group ownership error | The group owner and the identity used by the client, especially after changing tokens. |
| Certificate fingerprint mismatch | Whether the PBS certificate was intentionally renewed and whether the destination is the intended server. |
| Deleting a snapshot does not free space | Prune versus GC, shared chunks, GC schedule and safety interval. |
| No new snapshot at the scheduled time | PVE Backup job enabled state, selected VMs, PVE timezone and task log. |
| Verify passes but recovery fails | Encryption-key availability, destination capacity, VM configuration and application requirements. |
| The restored VM causes network problems | Duplicate static IP/hostname and simultaneous operation; isolate the copy. |
After setup
For Ubuntu or Linux servers running outside Proxmox VE, follow the Proxmox Backup Client guide to back up directories, system files and a test block image directly to PBS, restore encrypted backups to separate destinations and schedule runs with systemd.
When the installation media is no longer needed, open Templates & ISO → ISO Management in the DCHost customer portal, choose Delete for the intended PBS image and confirm Delete ISO? → Yes, Delete. In this walkthrough, only the uploaded PBS ISO was removed after the installed system had booted from disk. See ISO management for the full workflow.
VM backups do not mean that the Proxmox VE host's entire management configuration is backed up. Include the node's network and storage settings, PBS configuration and recovery access information in a separate recovery plan. Those records can contain secrets and do not belong in public documentation or screenshots.
Monitor task results and disk usage. Configure failure notifications separately and perform a real delivery test. Confirm that the recovery key can be retrieved by authorised administrators and that the retention period matches the service's needs.
A single PBS server does not remove every risk. Keep another suitable copy of important data, such as synchronization to PBS in a separate location. Include backup-deletion permissions and administrator access in that recovery plan.
Related guides: Proxmox VE installation, server backup planning and ISO management.